How to hem a roof with your own hands. What is the best way to hem the roof overhangs of a house? What should be the size of the ventilation holes
Reliable filing of the roof overhang protects the walls of the house from the vicissitudes of the weather. In addition, high-quality ventilation of the under-roof space can be arranged in the filing to ensure high-quality and durable functioning of the roofing pie. Beautifully designed overhangs are the decoration of the house.
How to hem roof overhangs with your own hands
A roof overhang is called a continuation truss system a certain distance outside the walls of the building. In some cases, fillies are used to lengthen this element - boards that are a continuation of the rafter legs.
The overhang has a purely practical purpose - to protect the walls from exposure external factors- rain, hail and snow.
But, in addition to the functional purpose, the overhang can also perform purely aesthetic tasks, being a decoration of the building.
The overhang is sheathed from below with various materials, forming a structure that encircles the house from all sides. Various materials are used for this:
- Sheet metal galvanized.
- Metal sheet painted or with a plastic protective coating.
- Board - lining grooved.
- Vinyl siding.
- Soffits are special products for forming an overhang and ensuring the operation of the natural ventilation system.
There are two types of overhangs:
Photo gallery: filing roof overhangs
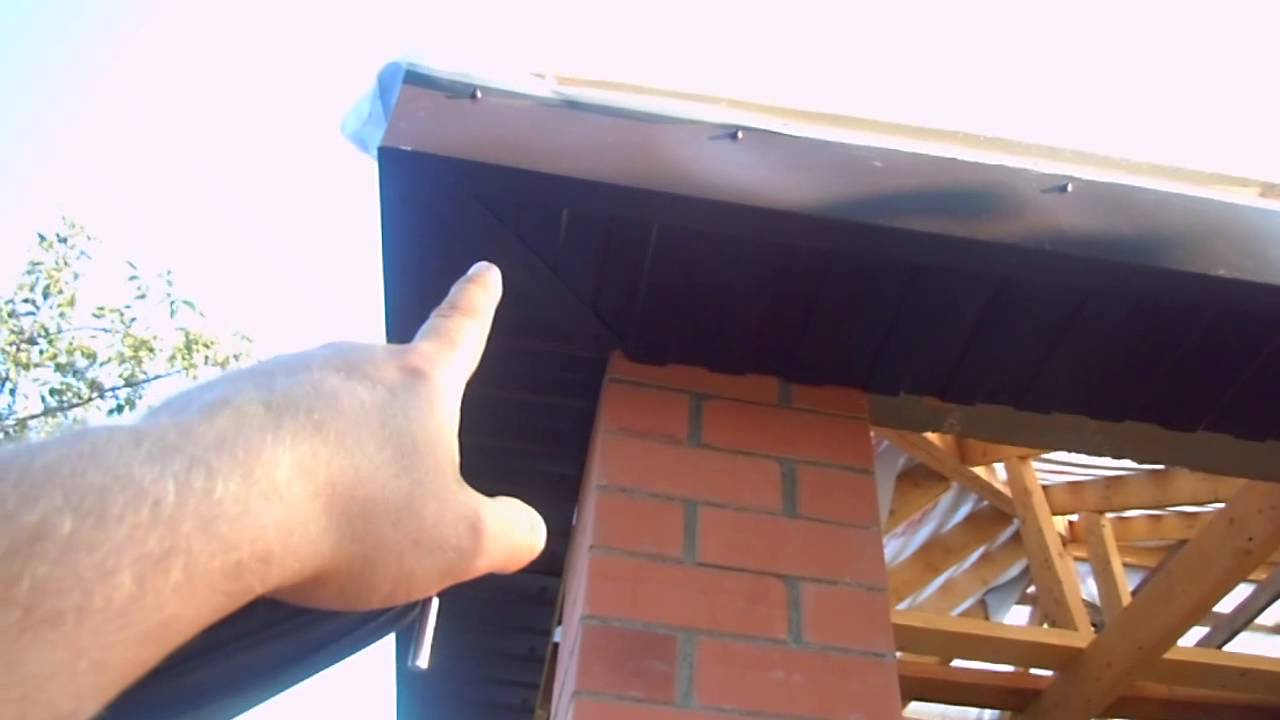
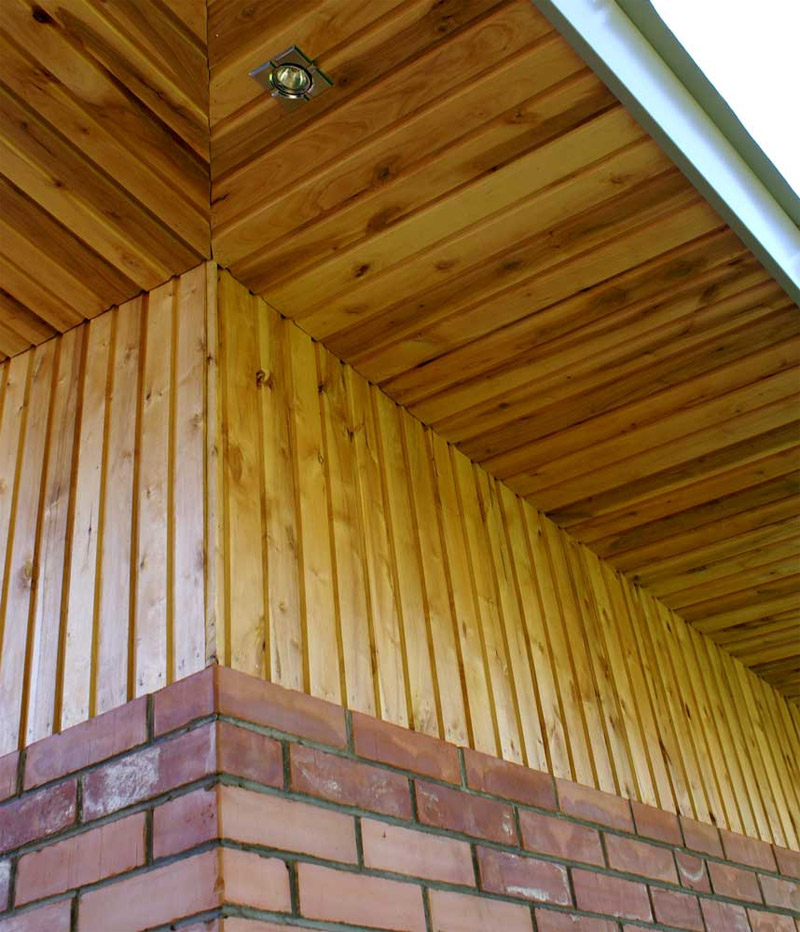
Roof overhangs upholstered with clapboard complement well appearance houses made of timber or rounded logs Hemming with edged boards is used as a simple and inexpensive way to finish overhangs Siding lasts longer than wood, so roof overhangs will be reliably protected for decades Metal spotlights not only give the house a finished look, but also serve to ventilate the roof space
Overhang edge trim
The fundamental document for the design of safe buildings and structures is the federal law from 30.11.2009 " Technical regulation on the safety of buildings and structures. On its basis, various documents have been developed for the creation of overhangs, including SNiP II-26-76 "Roofs". The requirements of the document stipulate the rules for the construction of overhangs various designs and the materials used for it.
This set of rules and requirements is constantly being finalized and changed in connection with the appearance on the market of various roofing materials.
Optimal overhang size
As already mentioned, the purpose of the overhangs is to protect the walls. Therefore, the wider it is, the better it performs its function. But there are also limiting parameters - a wide overhang is subjected to increased wind loads, which can loosen it over time, leading to the formation of leaks in the roof.
Therefore, the width of this element is rarely arranged more than one meter. For buildings with one or two floors, the standards provide for an overhang of 60 centimeters, and for a normal drainage system, it must be at least 40 centimeters.
Roof overhangs can be made in the same style with other architectural elements of the building, for example, with a canopy over the entrance
The main methods of filing overhangs
These details of the building structure are arranged in various ways:
- Rafter stitching. In this case, the material is nailed directly to the rafters from the underside to the distance of the covered part, and a frontal board is nailed to the end of the rafter leg. They are often decorated with openwork slotted carvings and painted in a color that contrasts with the walls. In this case, it is necessary to observe the color scheme with the finishing coating of the roof.
The material for filing along the rafters must be in harmony with the roofing
- When filing horizontally, a bar is first installed, which is attached directly to the rafter leg. Then the material is hemmed and the frontal board is installed.
Horizontal filing often looks like a decorative box.
- Soffit installation. These products are designed specifically for filing overhangs. They are metal, plastic or wood. An indispensable attribute of the soffit is a ventilation grill designed to let air into the under-roof space for ventilation. It rises along the left gap and carries moisture from condensate to the ridge area, where a “cold triangle” is arranged. In addition, the lattice on the soffit does not allow birds and large insects, in particular, wasps, for which the attic is a favorite nesting place, to penetrate under the roof.
The soffits always have gratings for ventilation of the under-roof space
A house with unlined suspensions does not look aesthetically pleasing, it looks like an unfinished one.
How to hem the overhang from below
Various materials are used to form overhangs:
- Board made of coniferous wood - spruce, pine, larch. Such materials are less subject to warping. The board is used planed on four sides with a thickness of 20–23 mm. Such a material is characterized by drying out, while the width of the product can decrease by 2–8%, which leads to the formation of gaps between them. It is not recommended to use material wider than 12 centimeters, it is often warped. To avoid the formation of cracks, the planed board can be overlapped with an overlap of about 10 millimeters.
- Clapboard. Using a grooved board for filing will be a more practical solution. In this case, there is no need to use flashings. The board is stuffed both in length and in width, using an additional crate. In the second case, you can use the trim remaining after finishing other surfaces.
When using lining, it is not necessary to fill the flashings
- PVC siding. This material is usually used for canopies on gables, but it is also used for filing overhangs. The material is valuable because it does not need constant care. Siding plates are installed at right angles to the walls. Fastening is made to the wooden planks of the crate with self-tapping screws through the holes provided for this. Each next plank is fixed to the previous part with a lock. The PVC siding kit includes additional elements with which you can hide the end cuts.
Overhangs sheathed with siding last a long time and do not need regular maintenance.
- Professional sheet. A profiled sheet is often used for filing overhangs. For this purpose, small-combed varieties with a wave height of about 8–10 millimeters are used. They can be placed along the length along the wall or in fine cuts perpendicularly. Such a profile is produced by bending on profile bending mills. A more successful solution in terms of design is the use of an aluminum profiled sheet obtained by rolling. Such a profile can have an anodized coating of various colors, in the range of which you can choose the desired shade. Such rental is durable and does not require constant care.
For sewing overhangs, you can choose a profiled sheet of any desired shade
- Smooth steel sheet. It is used with a protective coating of zinc or aluminosilicon. The advantage of using is the ability to give the sheet the desired shape flexible. Sheets with a protective coating in the form of paint or plastic are also used.
- Using OSB or plywood. This is a sheet material that is well suited for finishing overhangs. OSB is a product made from specially oriented wood chips. Produced by pressing with the use of polymer binders. The process takes place at high temperature and high pressure. The result is an absolutely non-hygroscopic material of high strength. At the same time, the surface of the slabs has an original pattern that allows it to be used for design purposes. Plywood made from polymer binders is also used to finish the overhangs. However, the outer layers of the veneer are exposed to the atmosphere and need additional protection after installation on overhangs.
OSB has an original texture that can be used to implement interesting design solutions
- Soffit - a specialized profiled steel sheet for filing overhangs. To order, you can make soffits with a length of 0.5–8.0 meters. Their standard length is 2.4 or 3.0 meters. Please note that the multiplicity in this case is 0.5 or 0.6 meters. In appearance, the soffit imitates laying from a bar. Available in double and triple pieces. One or two protrusions of the soffit are endowed with a perforated grid that provides ventilation in the under-roof space. Thanks to the locking connections, the spotlights are quickly and easily mounted. Fastening to the crate is done with self-tapping screws. Color solutions are used within the RAL or RR scales, which allows you to choose any tones that are in harmony with the color of the roof and walls.
Soffits are usually matched to the main color of the roofing system.
Soffits for filing overhangs are made from various materials. Mentioned metal perforated products are used only for cornices. For pediments they are not used.
Metal soffits can be produced, in addition to steel, from copper and rolled aluminum.
Plastic soffits are also popular. They are much cheaper and very easy to install. The material for their manufacture is polyvinyl chloride or silicone. The main dimensions are a length of 3 meters divided into three parts in width, which is 305 millimeters.
Do-it-yourself cornice filing
This element of the building structure can be made in several ways:
This method is most often used on roofs with a slight slope. The work is carried out in the following order:

The specified sequence is used when installing boards parallel to the wall. If the hemming is done perpendicularly, in short cuts, you must first fix the support strips. They are installed on the rafters at the junction with the walls and at the ends of the legs. The fastening of the slats of the filing is done with self-tapping screws.
Once alignment is complete, you can continue roofing, and complete the filing after installing the finish coat.
Before you make a filing along the rafters, their ends must be aligned
Video: how to trim the rafters
Overhang filing on the box
This method of closing the under-roof space is used for steep roof slopes. For this, the following operations are performed:

Video: metal filing of overhangs along the box
Soffit installation
With this method of filing overhangs and cornices, additional elements are used, supplied with the spotlights. A fastening is formed from them, into which the details of the filing are inserted one by one. At different manufacturers soffit mounting system may be different. Before starting work, you must carefully read the instructions.
An obligatory element of filing cornice overhangs are ventilation holes in them. They are needed to ventilate the under-roof space. If it is not there, the condensate from the finish coating will damage the roofing cake until it is completely destroyed.
Scheme of the device of supporting elements for filing with spotlights
For overhangs of any design, there is a single ratio of the ventilation surface. It should not be less than 1:50000, that is total area ventilation holes in the sheeting must correspond to the given ratio to the roof area.
It should be noted that there can be no talk of any insulation of overhangs, since a ventilation space is formed along them, and insulation requires tightness.
Video: installation of spotlights
Sheathing of roof overhangs is one of the final operations in the construction of a house. This procedure cannot be taken lightly, because not only the appearance of the structure, but also its proper functioning largely depends on it. Unreasonable savings on this element can subsequently turn into much higher unexpected costs. I wish you success!
Arrangement of the roof is a complex event, which includes not only the installation of roofing and drainage system. Most of the houses are designed taking into account the necessary protrusion of the roof on all sides relative to the facade of the task. This technology serves additional protection walls and foundations from rain and other atmospheric phenomena. And since there is such an overhang, it means that it must be arranged decoratively in order to protect the rafters and crate from moisture and give the house a complete appearance. How the filing of roof overhangs is performed, what materials and components can be used - we will explain below.
Cornice and gable overhangs and their purpose
Depending on the shape of the roof near the house, roof outlets can be implemented both in the eaves area (hip and hip design) and from the side of the gable (gabled roofs).
Eaves overhang formed by a truss system protruding relative to the walls of the house at a certain distance. Its value is determined by the project or can be set at the request of the developer. With additional vertical supports, the cornice outlet can serve as a canopy over the porch or a small veranda.
Gable overhang performed from the end (side) side of the building. Its optimal width is 60-70 cm, the minimum is 30, the maximum is not more than 100 cm. The carrier for the release is the roofing, so it is not recommended to make it too wide.
 Roof removal options: left - eaves, right - gable
 In both cases, the overhangs serve not only as a decorative finishing element for finishing the house, but also protect the walls, the plinth and the foundation of the building from excessive wetting. This moment is especially important when using plaster as a facade material, which is more whimsical to moisture. Therefore, it is necessary to hem the gables and cornices under the roof. Otherwise, the protruding part of the roofing "pie" becomes vulnerable to rain and wind. Exposed wooden structure and thermal insulation can become unusable. Strong gusts of wind in an unprotected area can loosen the roof fasteners or completely rip off the material. The right finish the protruding part of the roof does not require further maintenance over a long period of operation.
Types of cornice filing
In accordance with the architectural preferences of the developer, the device for roofing filing along the eaves can be performed in two ways.
- Along the truss system (without box)
- Perpendicular to the wall of the house.
In the first case, the rafter legs extending beyond the walls are lined from the inside with a crate for further decoration of the overhang with a board or spotlights. Thus, it looks more aesthetically pleasing due to the natural continuation of the roof.
 Rafter hemming option
 But this method is not always convenient, because. most specialized finishing materials and components are made for a horizontal finish, where the roof overhang and the wall are perpendicular (at an angle of 90 degrees) to each other. For this, a special box is mounted, on which the finishing material is subsequently stuffed.
 Roof outlet with box
 In the photo on the left, the cornice box ends flush with the wall, and on the right it continues to the pediment ledge.
Materials for finishing overhangs
In the construction market, elements for decorating overhangs are presented in a wide range. As the main raw materials for manufacturing, metal, PVC (plastic / vinyl) and wood can be distinguished. Ready-made spotlights with the necessary set of accessories for convenient and quick installation are very popular all over the world. In addition to ease of installation, among the advantages of such a material, a variety of colors and durability can be distinguished.
Steel elements are made to order in the form of panels with a length of 0.5 to 8 meters. You can also buy ready-made products standard sizes: 2.4 and 3 meters (values are multiples of the overhang width of 600 and 500 mm, respectively).
In appearance, the material most often imitates a natural timber or board. The width of the panel depends on the profile and varies between 240-305 mm. The best known are double and triple soffits.
 Types of metal spotlights: on the left - double, on the right - triple profile
 The image shows that all elements have perforations - small holes located partially or over the entire area of the material. Their purpose is to flow air through the cornice into the under-roof space. Read more about the natural circulation of air under the roof in the material "Control lattice: dependence on the slope and length of the roof slope" . The article describes in detail all the main points, indicates the dependence of the required area of the openings of the cornice overhang on the value of the roof area.
Perforated soffits are needed only when installing the eaves. Finishing outlets from the side of the pediment can be made with products without ventilation holes.
There are several types of metal spotlights:
- Copper;
- Made of galvanized steel polymer coated(for types of polymers, see);
- Aluminum. Also available with a colored layer.
The recommended thickness is from 0.45 to 0.5 mm. Galvanized and aluminum materials with a paint and varnish covering are made in a wide range of colors of the RAL and RR catalog, and also with drawing and texture under a tree, a brick or a stone.
Plastic spotlights
Soffits made of plastic are the most popular due to their low price and ease of installation. According to the composition, they are divided into two types: vinyl (PVC - polyvinyl chloride) and acrylic (improved with the use of special polymers). They are mainly produced with a length of 3 m and a width of 0.305 m with three sections.
For ventilation properties plastic panels differ in:
- Perforated (all 3 sections have holes);
- With partial perforation (holes only in the central section);
- Solid (without perforation).
 Types of plastic spotlights
 Making a roof overhang with corrugated board
A more economical option compared to the above. As additional elements you can use accessories from a metal spotlight. The most attractive profile is C-8 (or 10) or an ordinary colored flat sheet. A high profiled sheet (20, 21, etc.) will not work in this case. The disadvantage of this option is the lack of ventilation sections, so you will have to install additional supply grilles.
 Ventilation grilles in the lining
 Also, unlike prefabricated panels, mounting on metal sheet will be noticeable. Between themselves, it is better to connect them with self-tapping screws with a press washer in the color of the corrugated board, or with short roofing self-tapping screws (4.8x19 mm).
wood filing
Here, moisture-resistant wood species are used as the material: the most popular and affordable are larch and aspen. The installation shouldn't be too difficult. The only thing you need to understand is that natural resources tend to change geometric dimensions over time, which can affect the appearance of the facility being built. The rule applies to OSB and moisture resistant plywood.
exposed rafters
Many prefer not to use any additional materials. In places where the roof is taken out, it is nailed continuous crate, she will hide the roof from prying eyes. The rafters are evenly cut and, if necessary, treated with decorative moisture-resistant varnish or paint.
 Overhang decoration without additional materials
 To implement this method, you need to make the correct crate at the stage of roof construction.
Soffit installation instructions. Two ways + video
Before starting work, you need to familiarize yourself with the accessories for spotlights. Some additional elements are used when installing siding. For example, an external corner or a final (finish) profile. Usually the size of the corner is 50x50 mm, the length of the elements is 3 m.
 External corner and finish profile
 There are also specialized accessories for arranging spotlights: a J-bevel ("jay" or "ji") is used for the end finish, and a J-profile is used to mount the panel in the corner of the wall.
 J-bevel and J-profile
 Depending on preferences and conditions, the end face technology can be performed in three combinations.
In the first option, we use a combined J-bevel and a finishing profile.
 1st way: finishing the end with a j-bevel
 It must be taken into account that the j-bevel is usually produced in a width of 200 mm. This value should be sufficient. Otherwise, you need to use the methods below. If the width of the end is smaller, cut off the excess part from the bar and insert it into the initially installed final bar.
If the end is too wide, you can use an alternative option using an external corner. And also install a soffit on the vertical area.
 2nd option using outside corner
 And, finally, another combination in which we replace the outer corner with a J-profile. The method is the most cost-effective, because. j-bar is 4 times lower than the cost of the corner.
 3rd option: installation with J-profile
 For corner connections between spotlights, you can use an H-profile, or two jay-profiles.
 Corner soffit connections
 1. Installation of a horizontal roof outlet using a box
Step by step, we will consider the installation of spotlights with a removal located perpendicular to the wall. To do this, you need to prepare a special box, which will be a support for the entire structure of the filing. We fix the bar to the wall so that its edge is flush with the bottom point of the rafter.
 Box mounting scheme
 Next, we nail a frontal board or several, depending on the width, to the end of the rafters. We measure the distance from the wall to the frontal board: it is these sizes that the spotlights need to be cut. We produce hemming according to the instructions above.

2. Overhang filing without box
To decorate the roof with plastic elements, you will need the following tools: level, pencil, tape measure, corner, screwdriver, knife, hammer, hacksaw and cord.
A step-by-step example of filing with siding or soffit. Work is carried out with inside rafters, without a box device. Applied materials: siding and soffit with central perforation and white, outer corner, J-profile, self-tapping screw with press washer 4.2 * 16 galvanized sharp (for wood), nails, edged board 25 * 120 mm.
Before installation, make sure that the rafters are cut at the same distance and parallel to the plane of the wall of the house.
To begin with, we stretch the cord along the bottom from the first to the last rafter leg. This will show us at what level it is better to install the frontal board. In this case, the width was two boards with a small gap. We fix them with nails to the ends of the rafters. Now you need to set the outer corner for further installation of the siding. We fix the bar with self-tapping screws with a press washer. Correct installation is easier to control with a taut cord. Combined chamfer in this option not suitable, because designed for mounting the soffit at 90 degrees relative to the end.
 Installation of the outer corner for siding and soffit
 When the corner is installed, you can start installing the siding panels on the end. Cut it to the desired length. As a rule, the length is equal to the width of the cut of the rafter. It is better to prepare two or three pieces, as sizes may vary slightly. For vertical installation, we observe the fixation on the lock. We also fasten each panel with self-tapping screws. The lower part will "enter" the corner, and the upper one can be brought under the cornice strip or a final profile can be installed.
 We fasten siding panels from the end part of the truss system
 For the design of the lower overhang, it is better to use spotlights (in this case, triple with central perforation). It is installed in the same way as siding. One end is inserted into the outer corner, and the other into the J-profile. The panels are snapped together with lock connection. They are attached to the crate with PSh self-tapping screws. It is convenient to trim the panels with ordinary metal scissors or a hacksaw for wood.
 Soffit from the side of the cornice overhang
 Roof end device
Hemming from the side of the pediment, in contrast to the cornice, is carried out at a right angle to the wall of the house. Therefore, the installation of the ends can be done using a J-chamfer or an external corner. Which option to choose - the developer decides. Sometimes such an element may be a roof wind bar, provided that the width of the lower shelf is sufficient.
 Wind bar and chamfer from the end of the house
 Video instruction
For clarity and taking into account all the subtleties of the device of plastic spotlights, we suggest watching a video. The material succinctly outlines the points for installing the filing of roof overhangs and installing panels from VOX.
If we consider the device of any roof in detail, we can see that it is quite multi-layered and complex structure. It is on how accurately it is designed and thought out that its reliability will depend. The installation of a modern roof is significantly different from the process that was carried out earlier - even 50 years ago, roofs were built differently. Now commonly used modern materials, as well as elements that were not previously heard of, now they are an unchanged part of the design. Installing spotlights on the roof eaves is a simple job, but these elements will increase the protection of the house from wind and precipitation, and give a finished look to the entire structure.

Soffits are elements that are hemmed to the bottom of the roof. They are located between its edge and the wall of the house, where, as a rule, after the completion of work there is a gap into which birds can easily penetrate, debris can get in, and the wind also blows. They can be made from various materials, have perforation or be made without it.

Roof soffits - what is it
Soffit - a small panel that just closes the gap between the wall of the building and the roof. Factory options are usually quite easy to install. They are durable, lightweight, can be installed at any time of the year and perform the required protection function 100%.

Types of spotlights
All spotlights for sale, as well as those that are made by hand, can be classified according to a certain type. For example, by the type of material used for the manufacture or by structure.


Factory soffits often resemble siding elements in appearance. But they may be slightly different from each other. So, the following options for elements for filing roof structures are distinguished.


Advice! When choosing spotlights, an important factor is the width of the slats. It can vary from 30 to 80 cm. This allows you to choose the most suitable option in each case.
Soffits can also be made from various materials. Depending on this, they will have certain properties.
Table. What materials are soffits made from?
| Material | Description |
|---|---|
| Frequently used option. For the manufacture of such soffits, polyvinyl chloride is used. Advantages of the option - resistance to moisture, the ability to choose any color, ease of installation, low cost. Also, mold and fungus do not appear on such spotlights, they do not rust. Products perfectly cope with temperature extremes in the range of -50 - +60 degrees. |
| This version of spotlights is durable and practical, it is relatively inexpensive. Elements are made of steel with galvanization, due to which the material is not subject to corrosion. But if protective covering damage, then the steel spotlights will quickly rust and become unusable. But they are more durable than plastic ones. |
| Soffits with the longest possible service life. Copper is able to withstand the impact of external factors for 150 years. She is not afraid of water, wind, environmentally friendly, easy to care for. However, the cost of such spotlights is very high - not everyone can afford them. |
| One of the lightest soffit options. Now aluminum products are the most demanded on the market. They are easy to install, are not afraid of exposure to temperature and moisture, do not burn or fade under the influence of ultraviolet radiation, and therefore are very popular. |


On a note! There are also spotlights made of wood. But usually they are made by hand.
Prices for various types of spotlights
Calculation of the required quantity and selection criteria
Before you go to the store for spotlights, you should calculate how many elements of this type will be needed, taking into account the ventilation and size of the building. So, ventilation should occupy approximately 1/150 of the entire ventilated space. This means that the entire area that will need ventilation is divided by 150. Then, ventilation elements (for example, dormer windows, etc.) are subtracted from the obtained value. Next, the result is compared with perforated soffits. Based on the value of the area that one soffit panel will occupy, the total number of elements required for the work is also calculated.
Important! It is impossible to close the cornice overhangs with a continuous coating. Ventilation in any case should be. The best option- buy perforated spotlights and calculate how many you need to cover the entire space between the wall and the eaves along each wall of the house.

As for the selection criteria, it is only important to take into account that it is recommended to install spotlights with perforations on the street, and indoors you can use spotlights without holes. Regarding the color - here you can choose to your taste, but in any case, it is important to first assess how the chosen color will look in the overall harmony of the house.
Mounting options
Soffit panels can be installed in two ways - diagonal and horizontal. In the first case, the elements are placed parallel to the overhang of the structure. The mounting profile is mounted on the rafters. The method is optimal for decorating a roof with a slope angle of not more than 25 degrees. At the same time, the length of the overhang cannot exceed 5-6 m. Diagonal - not the most convenient way, since you will have to install fasteners for spotlights in places that are difficult to access. And the consumption of materials increases significantly.

The horizontal method is much easier to implement and saves time and material. In this case, the soffit strips will be mounted parallel to the base. Here, a kind of box is mounted from the bars, on which the soffit elements are attached. Roofing in this way is done quite quickly.

Installation of soffit elements
To work with PVC elements, you will need a screwdriver, a writing instrument, a tape measure, a stepladder, self-tapping screws, and a sharp knife. You will also have to purchase the spotlights themselves and profiles (H, F, J), due to which the fastening will be carried out.
Step 1. Installation of spotlights is impossible without processed wooden slats measuring 3x5 cm. Before starting work, they are processed various formulations, preventing rotting and damage to wooden material.


Rail dimensions - 3x5 cm
Step 2 By using building level on the wall of the house markings are applied to fasten the rails. First, the places located closer to the corners of the building are marked, then all the marks are connected by a single line, along which the rails will be mounted. When marking, the building level is applied to the roof eaves - relative to it, markings are applied to the walls.


Step 3 The slats are attached to the wall using so-called quick-mount pegs. Their length will depend on the thickness of the wall, as well as insulation. The pegs are screwed with a screwdriver.


Step 4 Also, rails are mounted along the entire length of the gutter belt. Here they are fastened with wood screws, taking into account the parameters of the J-profile.


Step 5 If necessary, additional wooden slats are installed, which are fixed on the gutter belt and rafter legs, as well as on slats fixed on the wall of the house. They will serve as an additional support for the spotlights.


Step 6 A long wooden rail is mounted in the center of the installed crossbars, which will also act as an additional fulcrum.

Step 7 Fixing strips S-25 (J-profile) are being installed. But before that individual elements connected to each other to achieve the required length. To do this, a small piece of the mounting element is cut off from one of the strips and this edge is inserted into another strip. Thanks to this, if necessary, the slats will be able to expand linearly.


Step 8 The slats are fastened under the slats mounted on the wall of the building using flat head screws.

Step 9 In the corner of the building, the planks should be joined at an angle corresponding to the corner of the building. The corner is formed end-to-end.

Step 10 The entire building is finished with these strips in those places where the soffit panels will be installed.

Step 11 In order for the soffit strips to be subjected to thermal expansion, they need to be trimmed. Work can be performed using any tools - a jigsaw, metal shears, etc.


Step 12 The prepared soffit panel is inserted with one edge into the previously installed profile, and then with the other edge into the profile from the opposite side.

Step 13 Two adjacent planks should lock together in the lock, and a distinct click is heard. It means that the slats have risen correctly.

Step 14 Each soffit strip is secured with flat head screws at the mounting holes.

Fixing the soffit panel with screws
Step 15 Next, an angular H-profile is mounted. The corners of the building are different, so it is important to start by cutting the planks correctly. To do this, one H-profile is taken, it is divided in half from the edge - a mark is made with a pencil. Further, this edge is installed in the corner where the previously installed profiles are joined. The second edge of the bar is placed exactly in the middle of the corner of the girdle.


Step 16 The bar is temporarily fixed on the supports. With the help of the building level, the contour of the facade of the building is transferred to the bar. Marking is done with a pencil.


Step 17 The resulting element in the shape of a triangle is cut out.

Step 18 After that, the bar is tried on to the corner. Next, the required marking is applied on the other side of the plank - the shape of the angle of connection of the roof joints is also noted. Excess planks are cut off.


Step 19 The trimmed H-profile strip is mounted in the corner.

Step 20 Next, the installation of soffit strips continues. Only now they need pruning. The edge of the plank with the lock is inserted into the lock of the previously installed plank. Next, markings are applied to the soffit along the angle of the H-profile. The resulting excess is cut off.


Step 21 The trimmed panel is mounted in its place. Similar actions are repeated until the very corner, until the gap is completely hidden.

Step 22 The installation of the herringbone panels starts from setting a right angle between the edge of the panel and the edge of the corner of the profile fixed under the eaves.


Step 23 Direct mounting of the planks ends like this - its locking part is cut off from the extreme panel. It is mounted at the previously installed bar S-25 (the one that was mounted at the beginning of work). Further installed right size piece of soffit panel. Mounted lock will not allow the bar to walk in the wind.


Video - Filing spotlights
As soffits, you can use pieces of profiled sheet and hem the roof with them. To do this, sheets of material are cut into pieces equal in width to the gap between the wall of the house and the roof eaves. In the same way as when installing plastic spotlights, support bars are installed along the walls and cornices, and additional supports are also mounted. Further, the sections of the profiled sheet are fixed on them with the help of self-tapping screws.
Important! The cut sheet must be treated at the cut point with protective compounds, otherwise it will quickly become unusable due to developing corrosion.

The entire roof is hemmed in the same way. To design the joint between the spotlights and the walls, you can use metal profiles or plastic rails.
Prices for corrugated board


Installation of spotlights is not as difficult as it seems at first glance. But it will allow you to make the roof and the structure as a whole beautiful, neat, complete. It is worth spending a day of free time and still doing these finishing work.
During the construction of housing, as a rule, special attention is given to the roof. And an integral part of the roof is the gable overhang. If you do not approach this issue seriously, then the money spent on arranging the entire roof can be thrown to the wind. We need to sheathe a piece that is limited by the slopes of the roof itself. And from below we carry out warming. And that's what we're talking about today. We will analyze the types of frontal overhangs, methods of insulation and cladding, and of course the installation technology.
- The way in which gable overhang missing. This is when the pediment is located at the same height as the roof. Inherent in buildings in the style of minimalism.

To strengthen the overhang, intermediate bars are taken out, and supporting skates, which are referred to as the load-bearing elements of the roof. This scheme allows you to make a large overhang.
Used on roofs with heavy roofing (concrete tiles, ceramic tiles).
How to hem a gable overhang
Ways of filing overhangs
Exists two ways of filing overhangs:
- wooden box
- along the rafters.
Materials that are used in the decoration of overhangs

After that, we proceed to installation. Each board is cut to length individually, and when fastening, a distance of 2-3 mm is left between the boards.

- PVC plastic hollow panels. They are often used for the device of the gable overhang. On the this moment the cheapest method of filing. Very easily damaged and not reliable.

When cutting galvanized steel, the edges are treated with paint so that rust does not appear. And aluminum and copper are coated with a special polymer coating for better protection.
Aluminum and copper sheets are fastened with special fixing latches.
Do not exceed the sheet length of 5-6 meters, sagging is possible.
 There are PVC and metal spotlights. The most requested material. Are carried out in various executions flat, perforated, in the form of lattices. They have a rich palette.
In the kit for spotlights, you should purchase strips in the form of Latin letters L and F.
F is attached from the side of the eaves. And the L bar on a special rail, which is attached to the wall.
It is advisable to mark everything before installation.
 Then we measure from the rail to the F rail, subtract 5-6 mm. for thermal expansion. And cut the spotlights to the desired length.
The prepared elements are slightly bent and fixed in place with metal screws.
As you understand, a well-mounted overhang will protect not only the facade of the building, but also increase the life of the roof.
Installation of the gable roof overhang can be done by hand, now there are a lot of photos and videos on the Internet, study and go ahead. Don't rush and be careful. But it is better to entrust the matter to specialists.
After the installation of the roof covering has been completed, they begin to sheathe the overhang or eaves of the roof. For what? Roof eaves filing is done to ensure ventilation of the roof, as well as to protect the facade. In addition, such events allow you to give the roof a finished look and play a decorative role.
In this article, we will take a closer look at how you can hem a roof eaves with your own hands, what options exist and what materials you can use. And visual videos will help to better understand this topic.
How roof overhangs are arranged, what are their features and purpose
What is an overhang? This is the lower part of the roof, which protrudes beyond the level of the walls of the structure. Thanks to the overhang, the foundation and the walls under it do not suffer from precipitation. Overhangs may have different width, starting from 20 cm, ending with 1 m. Everything is selected individually. If you follow the building rules, then filing the cornices can be omitted. But, this is fraught with some troubles. For example, if a strong wind blows, then the roof without hemmed and unprotected overhangs can be torn off. And it would also be just nice to hide the roof and its underside along with the roofing cake.

Roof filing works are carried out only after it is completely ready. It is desirable that all external walls are already insulated and finished. It can be said that the filing work is the final stage in the construction of the structure and the finishing of the premises from the outside.
Overhangs are of two types:

What is the difference between them? The first option is formed pitched roof in its lower part, and the pediment overhang is an inclined overhang that is formed on the side near the pediment. This is how they are set up. Each of the types of overhangs needs filing. And before you get started, you need to find out two points. Firstly, the options for filing, and secondly, the materials used for the work.
Roof eaves filing, options
There are two options for doing the filing of the roof eaves with your own hands. They are basic and have their own characteristics, pros and cons. Everyone decides which option to choose, however, not only desire determines the choice. Consider them:

Let's start with filing along the rafters. This method is used when the roof has a small angle of inclination (no more than 30 degrees, with a removal of up to 50 cm). As the name says, the material is fixed to the rafters. The method is quite easy, only the complexity of this type of filing is that its implementation requires a perfectly flat plane formed by the rafters. The photo shows how this filing to the rafters is implemented.
In this case, the material is stuffed to the crate at a certain angle, but not exactly relative to the wall. The planks themselves can be stuffed to the crate parallel to the wall or perpendicular to the plane of the rafters. And their fixation occurs to the frame by means of metal corners or screws.
You can see how exactly the roof eaves are hemmed to the rafters with your own hands from this video. It will help you do everything right and quickly.
It is much more difficult to make a horizontal filing using a wooden box. It is used in cases where the roof has a large slope. First you need to create this wooden box. In this case, you will need an edged board, the thickness of which is 4 cm. They must be fastened between the edge of the rafters and the wall of the building. In this case, one edge of the board will be fixed to the rafter legs, and the other to the board that adjoins the wall. This is clearly seen in this photo.

The box plays the role of a frame to which the slats are fixed. In this case, they are perpendicular to the wall, forming a horizontal filing. Watch this video to understand this type of weight binding.
Materials used for filing the overhang
Now that you know the options for finishing the roof overhang, it is worth considering the list of materials used in this work. In fact, there are many of them, so everyone can choose the option that he likes the most. There are no specific rules here. However, each material has its own advantages and disadvantages.
Here is a list of materials that are suitable for this purpose:
- corrugated board;
- wooden plank;
- lining;
- PFH siding;
- sheet metal;
- spotlights.

Consider each of them to find out its features. We compare them by price category and features.
Using corrugated board for filing an overhang
Metal profile filing is quite simple. This material is durable, reliable, does not rot and is easy to work with. Cutting is done with scissors for metal. Since the dimensions of the corrugated board can be quite large, it can be laid in large planes.
Profile height reaches from 8 to 20 mm. As fasteners, special self-tapping screws for corrugated board are used. They have a rubber gasket and do not allow damage to the material. And given the fact that the assortment of corrugated board is quite large, if we talk about color scheme, then the caps of the self-tapping screws themselves also have a similar color. And to ensure ventilation, you will need to use special grilles.

The price of corrugated board - from $ 9 m 2.
Using wood for filing an overhang
Wood is natural construction material, which is suitable for sewing a roof overhang. This type of material looks especially harmonious with wooden houses. In this case, it is recommended to choose softwood, the width of which is from 50 to 250 mm, with a thickness of 17 to 22 mm. Only here the tree has one significant drawback - under the influence of moisture, it begins to deform and rot. And when used outside, this cannot be avoided. What to do? He needs to be protected. For this purpose, special impregnations and protective agents are used, thanks to which the tree will not rot and burn.

Note! Immediately before filing the overhang with wood, it is recommended to keep the boards outdoors under cover so that they can adapt to this environment. So the material will acquire the desired condition and not warp after installation.
Making ventilation with this method of filing is quite simple. It is only necessary to fix the boards not close to each other, but forming small gaps. They won't let the rodents through, but the wind will do its job. The advantage of wood is that it is easy to work with. It does not require high-tech tools and special skills. The photo shows exactly how the overhang sheathed with wood looks like.

The price of wood is at least $ 2.2 per m 2.
Using a wooden lining for filing an overhang
The advantage of lining is that it does not need to be further processed and protected. It is ready for use immediately after purchase. That's why she's so in demand. Yes, and the appearance of the lining is quite attractive. Only here there is one point: it is important to purchase moisture-resistant products so that they can withstand the influence of the external environment.
As in the case of boards, it is recommended to keep the lining for a month on the street. Installation is quite simple. Only here the gaps cannot be made, because the fastening is carried out according to the principle of a spike in a groove. Therefore, with a step of 1.5 m, a grate is installed between the lining. Fasteners can be clamps, screws or nails.
The price for lining is at least $6 per m2.
Using PVC siding for overhang filing
Siding is an excellent material used specifically for exterior decoration. It withstands any impact, mechanical stress, does not rot, is not afraid of moisture and is sold in a large assortment. He looks very nice. Installation is easy, as there are special profiles, corners and other fastening elements for PVC siding. And for attic ventilation, there are special grilles.

Planks are mounted perpendicular to the wall. You need to fasten in 2-4 places. The number of attachment points will depend on the width of the roof overhang. It is not recommended to hem the overhang with PVC siding along the overhang, since, unlike wood, siding can sag.
The price of siding is at least $ 4 m 2.
Using Sheet Metal for Overhang Hemming
Often you can see this version of the filing. Sheet metal refers to galvanized steel, copper or aluminium. In this case, the thickness of the sheet can be 0.6-0.8 mm, with a length of 6 m. All the same grilles or perforated sheets are inserted as ventilation.

It is clear that the sheets will have to be cut. The cut points will be a weak point, as if moisture enters, they will begin to rust and deteriorate. This applies to galvanized steel products, because everyone knows that copper and aluminum do not rust. For protection, you will need to cover the metal with an anti-corrosion compound or paint.
Sheet metal price - from $5 per m2.
Using a soffit for filing an overhang
This material is specially designed for filing cornices. It looks like planks, which are made from the most different materials. Here is the list:
- vinyl spotlights;
- aluminum spotlights;
- spotlights made of copper;
- soffits made of steel;
- PVC soffits.
The advantage of materials is that the work is carried out simply, quickly and reliably. The material itself is durable and practical. And thanks to the diversity color solutions, everyone will be able to choose products for their home design.

The complete set for filing is as follows: the panels themselves, chamfers (frontal strips), J-shaped profiles with grooves and finishing strips. In the photo you can see what they did.

The panels themselves can be single, double, triple, solid (for filing the pediment) and perforated (for filing the cornices). And yet, you do not need to additionally install a grill, because the products already have holes for ventilation. This is clearly visible in the photo.

Installation is quite simple, even without certain skills. The price of the product - from $ 10 m 2.
Summing up
Roof eaves filing is an integral part of creating roof structure. it great way protect the house and give it a complete look. It remains only to choose the method of attachment and purchase suitable material. The good news is that there are a lot of them, so everyone can find the perfect option for themselves. And we considered the features and prices of all materials that will help in choosing. It remains only to bring everything to life. And thanks to the videos posted above, even a beginner who does not have the skills to work will cope with the work.


