Technology of wall cladding with ceramic tiles. Rules for wall cladding with ceramic tiles


The article contains information about facing tiles for the facade of a house: the advantages and disadvantages of each type of this material, and also considers the technology of facing the facade with tiles.

Requirements for facade tiles
Let's start with the requirements, because the facade is subjected to all known natural loads, the totality of which can not withstand any finish.
High moisture resistance. Humidity fluctuations in outdoor air are known, so the lining must calmly withstand the highest humidity: the main thing is not to absorb it.
High stability to chemical attack. Polluted air quickly destroys many Construction Materials. Facade tiles must withstand chemical attack.
High mechanical strength.
Easy cleaning, optimally - resistance to pollution.
Ease of installation.
Types of facade cladding
Tiles for the facade of the house are made from a variety of raw materials, using several manufacturing methods. We list the most popular types:
ceramic tile;
porcelain stoneware;
clinker;
terracotta;
tile from agglomerate;
concrete.
Let's consider each type separately.

Ceramic facade
Ceramic tile, aka tile, a material known for its diversity decorative design and high moisture resistance. More often it is used for interior decoration, but there is also a facade variety among them. It differs from the usual high rate of frost resistance. Because an ordinary tile laid on the street cracks in the cold already in the first year of operation.
According to other characteristics, this finishing material practically does not differ from ordinary tiles. It just needs to be noted that manufacturers do not offer the widest range in terms of decorative design. More often it is an imitation of brick, stone, plain tiles of soft colors.

Porcelain stoneware
In fact, this is still the same ceramic tile, but with higher strength and other characteristics. Because the technology of its production is not only firing at a temperature above +1000C, but also the preliminary molding of products by pressing under high pressure(400-500 kg/cm²). It is the last operation that gives porcelain stoneware special strength.
Initially, this material was intended for finishing floors that are exposed to high loads. Over time, the approach to it has changed. Designers and architects began to offer cladding from this material. Moreover, it perfectly copes with any natural loads. True, it should be noted that porcelain stoneware must be laid on special adhesives designed specifically for this material.

Clinker
Clinker tiles for exterior finish facade of the house is one of the most amazing and beautiful materials. It is made, like ceramics with porcelain stoneware, from clay. Only here it is not white clay mixed with kaolin that is used, but shale. At the same time, the production technology is based on the extrusion method, when the finished clay mass is passed under pressure through a gap that forms a tape. It is subsequently cut into tiles and fired at a temperature of +1300C.
In addition, it should be noted that clinker tiles are a structure of small pores, hence the high moisture-proof characteristics of the finishing material and cracking resistance, especially in winter frosts. In terms of frost resistance, clinker is much superior to durable porcelain stoneware.

It should be noted that today manufacturers offer clinker tiles assembled in panels. Models with a heater are offered. They are called thermal panels. Convenient option assembled on a frame or on special dowels. Paneling is done quickly and easily, and there is no need to think about how to insulate the house from the outside. Everything is already included in the package for the facade cladding.
Agglomerate tiles
Agglomerate is nothing but fake diamond. These are granules of stone rocks, which are interconnected by cement or polyester resins. Manufacturers, in order to give the stone an unusual texture, add various components to the raw mixture: metal shavings, shell rock, glass of different colors, synthetic-based pigments. Hence the huge variety of designs.
To finish the facades, tiles are used, in which a reinforcing mesh is laid during production - this increases the strength of the product several times. At the same time, it should be noted that the agglomerate, in terms of its filling with stones, is close to the natural stone itself, because this concentration is in the range of 80-95%. For example, in Corian or any other composite, this value does not exceed 70%.
More often, agglomerate is used for the production of household and interior products: window sills, countertops, pilasters, railings, columns, etc. Recently, manufacturers have begun to offer agglomerate tiles for facing the house outside. Excellent material, not inferior in its technical specifications no similar type of cladding.

Terracotta tiles
A distinctive feature of this facing material is that dyes and pigments are not added to it. It is kaolin clay shaped into tiles and fired at different temperatures. The higher the temperature, the darker the color.
It should be noted that terracotta tiles are hygroscopic material, that is, it absorbs moisture. Therefore, it is recommended to use it for finishing facades located under a wide cornice or under a canopy. The main thing is that atmospheric precipitation does not fall on it.

On our website you can find the most . In the filters, you can set the desired direction, the presence of gas, water, electricity and other communications.
Concrete facade tiles
This type of cladding is not as popular as the previous ones. It's all about the material itself. Concrete products are heavy. Under them, you have to fill in a good large foundation, which leads to material costs. If dry installation technology is used for installation, then a powerful frame is assembled under the tile. Again, this is a financial cost.
Although it should be noted that the variety of sizes, textures and colors is quite large. And here this material is not inferior to others.

Polymer sand
This is an artificial material, which includes sand, polymer and dyes. All components are mixed with each other in certain proportions. Then the finished mass is fed into the mold, where the mixture is compressed under high pressure. In this case, the press piston is heated to a high temperature.
Under the influence of temperature, the polymer is melted and sintered with sand. That is, he acts as a liaison. The pressure of the press creates the strength of the resulting material. Of all the tiles offered, polymer sand is the cheapest.

House facade cladding technology
Finishing the house with tiles is carried out in two different technologies: wet and dry. Let's consider each separately. But we immediately denote that, regardless of the method of laying the cladding, the surface facade wall be sure to prepare:
are repairing,
align,
strengthen primer solutions.
Wet veneer
It is called so only because the tile is “planted” on an aqueous adhesive composition: cement, polymer or resin-based. But in any case, it is a solution mixed with water. Please note that special adhesives are used to work with facades. They are frost resistant.
The very technology of tiling a house is no different from laying tiles in a bathroom or kitchen. That is, on the prepared surface, starting from the bottom, tiles are laid with gaps that are formed by plastic crosses.
Video description
We invite you to watch the video wet way wall cladding with clinker tiles:
Dry cladding
This is a more complex technology called wireframe. That is, on the facade, a frame is first assembled from galvanized metal profiles, on which the tile itself is mounted. Such facades are called ventilated, because between finishing material and the wall of the building remains a gap that is not closed. That is, the air in it moves without problems. This is how the facade is ventilated.
This gap is often filled heat-insulating material creating insulation on the outside. What are polystyrene boards used for? mineral wool. The insulation in this case is attached to the wall with special mushroom-shaped plastic dowels. You can see them well in the photo below.

The most important operation is the assembly of the frame. There are ready-made frame structures for a certain cladding material, which include brackets in the form of a corner and guides. How is the installation of the frame.
Produce first markup on the wall.
Along drawn lines define bracket mounting locations.
them by these points mount with anchors.
Spend warming walls, for which, at the points of coincidence with the brackets in the insulation, cuts are made with a knife. Please note that holes cannot be made. Thermal insulation boards are laid tightly to each other. Even the smallest cracks or gaps cannot be left.
Spend fastening heat-insulating plates with mushroom-shaped dowels - two per plate.
The frame is ready, it remains only to install the tiles for facing the facade of the house. For this, clamps are used. Install the first lower row of fasteners on the rails at the same level horizontally. One tile is inserted into them, two more clamps are applied on top, which, like the lower ones, are attached to the guides with metal screws. Such a mount is very reliable, not weaker cement mortar. In addition, this type of fastener makes it easy to dismantle the tile without breaking, if such a need arises.
Video description
The video tells how to dry-facing the facade with porcelain stoneware:
Conclusion on the topic
So, we have told you about all facade tiles. The variety is wide enough to choose from. In addition, in each model range a large number of products of different colors, sizes and shapes. So go ahead, choose. But be sure to consult with the masters how to mount the cladding. That it was inexpensive, but with a guarantee of long-term operation.
Facing internal walls ceramic tiles - one of the most common ways to finish rooms with high humidity. Ceramics is durable, resistant to all kinds of influences, it does not absorb moisture and odors, and with a wide range of its shapes, colors and textures, no type of cladding can be compared. Ceramic tile is an expensive material, but it fully copes with the decorative, sanitary-hygienic and protective function. About the advantages of ceramics, the nuances of its choice and the technology of wall decoration with its help - today's material.
Benefits of ceramic tiling
When choosing a material, it is necessary to make sure that it meets the requirements of the operating conditions in the room where the repair is to be carried out.
The advantages of tiles include the following:
- versatility of the material - ceramics can be used in a room for any purpose;
- ceramics environmentally friendly, safe material;
- the cladding is not afraid of temperature changes, therefore it can be used in unheated rooms;
- ceramics is not afraid of high humidity and a direct fall of water, so it is used in pools, baths, showers;
- ceramic tiles form a strong, durable coating on the wall due to high adhesion to the base;
- subject to the technology, the lining can be done independently;
- On sale you can find ceramic tiles of various shapes and sizes. Some collections are represented by original products in the form of rhombuses or polygons. In addition, ceramics are distinguished by a large assortment of colors, patterns and patterns, as well as imitations of the surface of other materials;
- ceramics are durable and fireproof, so it is used for wall cladding in the kitchen. The material does not absorb dirt and odors, it is easy to clean;
- it is a hygienic material, so it is used for wall cladding in medical facilities and laboratories.

Varieties of material
There are several varieties of ceramic tiles for internal works. This allows you to choose the material, quality and operational properties and which correspond to the conditions of a particular room.
Table 1. Types of material
| Illustration | Peculiarities |
|---|---|
 | Produced by dry pressing. The surface of the tile is covered with an opaque glaze. Due to the use of double firing technology, the material is quite durable and wear-resistant. It can be used as a cladding in rooms for any purpose. |
 | Distinctive feature- White color. It is made from expensive high-quality clay using double firing technology. It is used as an interior finishing material. |
 | Material with a porous structure without a glazed coating. It has high strength and wear resistance. Differs in rich assortment of shades. |
 | It is produced using the technology of sintering clay raw materials. The finished product has a high mechanical resistance. It can be used as an external cladding material. The color and gamut is limited to brown and yellow shades. |
 | The raw material used is not kaolin clay. The finished product does not have a glazed finish. Produced by pressing. The structure is homogeneous, so the policy has high mechanical strength. Can be used in high traffic areas. |
The size of the tile is small 5 x 5 cm, medium 10 x 10 cm, 10 x 15 cm and large when one of the sides reaches 40 cm.

A separate category of material is mosaic. Small items are glued to the backing. This allows installation to be carried out quickly. Mosaic can be used as the main finish or for decorating an accent wall, niche, column - a flexible substrate allows you to veneer structures of any shape.

The more joints between the tiles, the less the surface lined with it is resistant to moisture. The joint is a potential risk. The tile joints must be carefully monitored, cleaned and, if necessary, updated.

Modern grouting materials are highly resistant to moisture and mechanical stress, so they keep a neat finish for a long time. appearance and reliably protect the base from moisture.
Suitable substrates for ceramic tiles
According to the type of base that can be used for ceramic tiles, the material is universal. Ceramics can be mounted on DSP, concrete, cement screed, drywall and old and tiled cladding. The bases themselves are divided into those that are specially prepared for laying policies and universal ones. Most surfaces require pre-treatment.

cement board
Cement slabs form a base ready for tiling. Of all sheet materials, this is the most expensive option, but its high strength makes it the most suitable base for ceramic cladding. DSP can be laid on the floor and mounted on walls in any premises, including those with high and humidity, where the base material is protected by waterproofing.

Fiberglass gypsum boards
Fiberglass gypsum boards are not the usual GVL or GKLV. This material is specially designed as a base for ceramic cladding. The load that such a base can withstand is somewhat lower than for DSP due to its lower hardness and strength - this is worth considering. The peculiarity of the structure of the plate is the presence of a core impregnated with a water-repellent composition and a moisture-resistant coating. Therefore, such a plate is used in rooms with high humidity. Fiberglass in the composition of the plate additionally strengthens it. In order for the base to be moisture resistant, do not forget about the high-quality sealing of the joints with silicone sealant.

GKLV
Moisture resistant drywall is made in green or blue color. It is a versatile base for painting, paneling and wallpapering. Despite the name, GKLV is somewhat vulnerable to moisture, therefore, it requires waterproofing protection when used in the bathroom.

GVL
Ordinary drywall is used as a base for ceramic tiles in rooms with a dry and moderately humid microclimate. With high humidity, it is necessary to perform high-quality waterproofing.

Note! Ceramic policy is a rather heavy material that affects the base. So, a drywall sheet with a thickness of 12 to 15 mm will not be enough. The walls are sewn up with a double layer of drywall with a thickness of 12 mm each.
Concrete
Concrete base - one of the universal types, designed and breeds ceramic tiles. The laying process does not cause difficulties with the evenness of the base.
Important! The composition of concrete should not include film-forming substances that will reduce the level of adhesion between tile adhesive and foundation.

Cement strainer
This type of base is a reliable and durable option for tiles. In this case, the screed itself is made on any basis. The screed is made if it is necessary to level the floor and walls, as well as to install a slope in the shower room. A screed may be required when forming an irregularly shaped base, such as a round column. The disadvantage of this version of the base device is the long drying of the screed.

Existing ceramic cladding
Laying a new ceramic coating directly on top of an existing old one is possible on a cement mortar. This will save on costs and work time. The main condition is that the old cladding must be firmly fixed along the entire wall, while the vertical surface must be perfectly flat. It is worth remembering that as a result of such laying, the thickness of the coating will increase. To new policy firmly fixed on such a base, the old one is treated with sandpaper, thereby providing better adhesion with the cement mortar.

Features of the choice of ceramic tiles
Ceramics is the best finishing option for combined bathrooms, toilets and bathrooms. When choosing it, they take into account not only the decorative effect and the ability to create an optical effect of increasing space, but also the operational properties of the material.

Note! First, choose a tile, and then to it - plumbing and accessories.
Ceramic tiles are divided into wall and floor. The second one is thicker and larger. Often ceramics in the store are offered in the form of a finished collection with elements for floors and walls. In this case, the combination of textures and shades is thought out by designers, the collection is made in the same style, and therefore looks organic and natural.

When choosing the material yourself, it is recommended to give preference to classic shades that have a pleasant shade and are versatile in combination with other materials. These include pink, light blue, beige, as well as tiles with a pattern that imitates marble or stone.
How many tiles do you need
Tile - the material is not cheap, so you should immediately decide on its quantity. When calculating, several nuances are taken into account. It is recommended to purchase tiles with a small margin, given the likelihood of marriage during trimming. In this case, the material must be from the same batch. Otherwise, it is possible to distinguish between shades.

When measuring continued under the cladding, it is necessary to pay attention to the geometric parameters of the room, namely the evenness of the walls and corners.

Walls are drilled on a sheet of paper on a scale. On each of them, the layout of the tiles of the selected size is marked, decorative inserts, borders, and the thickness of the tile joint are drilled. The laying method is taken into account - “in a row” or “seam to seam”. The layout is performed so that the elements cut in the corners are not too narrow. When the calculations are made, another 10% is added to the resulting value - for marriage, trimming and inaccuracies in the calculations.
Ceramic tiles have gained wide popularity due to their aesthetic and hygienic qualities. The surface of the walls after such a finish is reliably protected from the effects of fire, chemistry and moisture. In the kitchen, ceramic wall tiling technology allows you to get any decorative effect even after covering only part of the wall in places where the table, stove and sink are located. The same can be done in the toilet and bathroom. It will be enough to veneer the surface 1.5 m-1.6 m in height, and paint the rest of the plane to match the tiles or stick wallpaper.
What is needed for high-quality cladding
Finishing work with tiles is carried out with special tools. Stock up on them in advance. The above list includes those devices that professional tilers use. Although, it is possible that any of the tools will be replaced by another suitable tool.
Would need:

- vessel for water (about 6 l);
- bucket for solution;
- Master OK;
- rubber spatula;
- hard brush;
- measuring instruments (cord, spirit level, plumb line, square, tape measure);
- wooden hammer;
- dowels or steel pin (needed when working with a cord);
- stitching;
- wire cutters;
- tile cutter;
- special hammer.
In addition to tiles for cladding, you will need glue, cement mortar or mastic and joint filler.
Finishing technology includes three stages:
- Alignment of the main surface.
- Application of mortar or other adhesive.
- Facing.

Ceramic tiles are often laid on a cement composition, which is also used to level the base and joints. The composition of the building mixture includes Portland cement, fine sand and water. The ratio of the constituent elements depends on the stage of cladding.
To prepare a mixture for plastering and leveling walls, you will need M400 cement, fine building sand, water, with a mass ratio of 1: 3: 0.5. Bulk materials are first mixed, and then diluted with water.
For cladding, the same components are taken, changing the component:
- cement of the above brand - 1 part;
- fine sand - 2.4 parts;
- water - 0.4 parts.
Back to index
How to check the quality of the solution
A certain amount of the prepared cement-sand mixture must be applied to the wrong side of the tile after it has been pre-wetted. Then it is unfolded and gently shaken. A high-quality mortar will linger on the tile with a layer of about 3 mm. If the entire prepared mixture falls to the floor, then this means that sand and cement must be added to the solution.

The building mix for cladding should be prepared in small doses, as its normal consistency will last one or two hours. Then solidification occurs, and if water is added after that, then the quality of the solution will no longer be the same. That's why cement mixture for facing, you need to prepare in a volume of approximately 5 liters. It is best for an inexperienced master to prepare an even smaller amount, because the solution must be used up within an hour and a half.
You may be interested in: Kitchen Design Rules
To prepare a softer composition, take one part of colored cement and one part of ordinary sifted sand. All this is thoroughly mixed and water is added until the density of softened plasticine is obtained.
The reverse side of the tile before facing is moistened with cement milk. It is prepared from water and Portland cement in a ratio of 4: 1.
The cement composition can be replaced with mastic. It consists of synthetic or organic binders and pulverized or mineral fillers.
The most convenient is to use the mastic prepared in the factory workshop. However, sometimes it is prepared immediately before the facing process.
Depending on the presence of certain binders, mastic can be:
- plaster;
- bituminous;
- polymer;
- casein;
- bitumen-polymer.

The advantages of mastic for wall cladding include the fact that it easily acquires the desired density when diluted with water and quickly sets. Therefore, after its application, you can lay the tiles. Among the shortcomings, one can note the rapid hardening, which is why the entire laying process must be completed as quickly and without errors as possible.
For bathroom cladding and areas that are exposed to increased moisture, it is best to use waterproof glue and grout.
Back to index
Preparatory work
Cladding technology requires scrupulous surface preparation before repair.
In order for the tile to hold firmly, the walls must be clean, even and dry.
Deviation from the vertical is allowed within 10 mm. To determine the evenness of the walls, a 2-meter duralumin rail and spirit level are used. The rail is leaned against the surface and leveled with a building level. The gap from the wall to the rail should not be more than 10 mm. Areas that do not correspond to this parameter should be marked and leveled with a cement-sand mortar. At the same time, it is not necessary to achieve perfect smoothness, roughness contributes to high-quality adhesion of the solution and the surface of the walls.
Elevations greater than 10 mm are removed with a chisel. If necessary, they are primed with polyvinyl acetate dispersion and leveled with mortar.

If the walls are flat surface, but are covered with greasy stains, then the solution will not hold in these places. Therefore, degreasing is required. To do this, use a 5% solution of soda ash or a 3% solution of hydrochloric acid. After 2-3 minutes, the surface is washed and left to dry.
On a smoothly plastered surface, notches must be made that contribute to the strong adhesion of the solution. For this purpose, you can use a simple hammer. Then the walls must be cleaned of dust. It is convenient to do this with a brush dipped in water.
You may be interested in: What kind of wallpaper can be glued to the kitchen?
If the lining will occur using mastic, then brick walls covered with gypsum-lime mortar. The ratio of components in it should be as follows:
- lime - 1 part;
- sand - 3 parts;
- gypsum - 0.5 parts.
In this case, it is not necessary to apply a covering layer, which will weaken the adhesion of the mastic and the surface of the walls.
Back to index
Hanging walls and installing beacons

The cladding technology provides for laying square and rectangular tiles in straight rows (in a row or seam to seam), and square tiles also diagonally.
Finishing work starts from the bottom. When the floor has not yet been put in order, it is necessary to find out the level of the finished floor and install slats around the perimeter. Standard tiles for skirting boards are laid out during flooring, and then the height of the skirting boards is taken into account to install the rule rails.
After that, the surface is hung and beacons are placed at the level of the upper row on each side of the wall. First, a pair of upper beacons from the tile is installed, and then a pair of lower ones at the level of the initial row. Beacons for the bottom row are placed exactly in one line under the top beacons horizontally or vertically. In this case, it is necessary to take into account the thickness of the tile, plaster and mortar layer. The solution for fastening beacons is used the same as for the entire tile.
Pins are driven in near the lighthouses and the mooring cord is fixed. Stretch it horizontally between a pair of lower beacons one millimeter from the top edge of the initial row of ceramic tiles. To clarify the vertical arrangement of the seams, you need to stretch the mooring cord vertically. Check the position of the cord with a spirit level.
Back to index
How to properly clad

Before attaching the material to the wall, you need to determine its quantity. For this, the tile is laid out dry. If the lining will be with expanded seams, then for the calculation you need to know the width of the seams. First of all, the tiles are sorted by size and cut pieces of tiles are prepared if the plates do not fit in a row.
For wall cladding, the surface is treated with water, and the reverse side of the tile is immersed in cement milk for a second. This procedure enhances the adhesion of the tile to the mortar and the plane.
The first row begins to be laid from the corner or from the middle of the wall. The latter option is appropriate when symmetrical tiling is required.
The solution is applied to the reverse side of the ceramic tile using a notched trowel. Then it is applied to the wall at an angle and, guided by the mooring, it is brought down to the required level by tapping with the trowel's handle. After laying the initial row, the pins are hammered under next row. The cord is pulled and the next rows are lined using the same technology. Shaped parts are installed in the course of work.
You may be interested in: Kitchen design and assembly
During the cladding process, care must be taken to ensure that during the precipitation, the space between the wall and the tile is completely filled with mortar. All mortar that has come out from under the tile must be removed with a trowel or trowel.
Each row must be checked for quality using a 2-meter rail. It is applied to the treated plane and viewed for gaps. The tiles laid incorrectly are removed, the adhesive is added and set back, sitting down to the required level.
Already long years wall cladding with ceramic tiles is a traditional option for interior decoration. In particular, this solution is the most popular for the kitchen, bathroom or bathroom. The tile gained its recognition due to its resistance to moisture, and besides, it is not picky in care. Tiles are fairly easy to clean high level strength and does not conduct electricity. In addition, ceramics is an environmentally friendly material.
The choice of tiles for wall cladding
To date, the variety of tiles is quite large. A large assortment of types, shapes, colors and shades is simply misleading. But let's look at the main criteria for choosing a tile. It is enough to follow a few simple rules:
- If the room is not large, then good option will be the choice of light tiles. Since this will give the effect of increasing the room, and also make it brighter.
- Note that the tiles intended for walls are somewhat thinner than the material for flooring.
- High-quality tiles should be of regular geometric shapes. And the quality in this regard is easy to check. Take several tiles from the same package and place them next to each other. If their size does not match, then you do not have quality material.
- Each seller must have a quality certificate for the products that he sells. Ask him to present.
- If you buy several boxes of tiles, be sure to check the color in each package, it must be completely identical.
- Ask the seller what glue to buy for this type of facing material. Since each tile has a different adhesive, depending on the type of material, size and weight.
Wall cladding with ceramic tiles: surface preparation
The quality of work will depend directly on how smooth the walls are. That is why first you need to check the surface of the walls for irregularities. To perform this task, a plumb line or building level. We apply it to the wall, and all the flaws immediately become visible.
We also note that cladding on curved walls will lead to significant costs of tile adhesive. It will be much cheaper to pre-putty or plaster to level the surface.
In addition, it should be borne in mind that it is quite difficult to equip tiles on a large layer of glue, and this will undoubtedly have a detrimental effect on the result of the work. Ultimately, it’s not enough that you have to hold each tile for 10-20 minutes, but in the end, the tile may simply fall off soon.
As already mentioned, tile laying is carried out on a previously leveled surface. Alignment can be done in several ways:
- Surface plastering.
Considering the option of plastering, it should be noted that the work will require some skill. In addition, the process itself takes a long time, and at least three weeks will pass from the moment preparations begin until the laying begins.
Surface plastering technology
The work is carried out in several stages:
- First of all, you need to install beacons.
- After that, the solution for plastering is prepared.
- The third step is the application of the solution.
- And the last stage is alignment using a level or a rule.

GKL installation technology
Considering the second alignment option, it should be noted that it is somewhat simpler, but much faster. You can install drywall sheets in one day. In addition, the very next day you can begin work on wall cladding with ceramic tiles. As you can see, the time savings are enormous. At the same time, we note that special skills for the work will not be required.
The process itself is carried out as follows:
- Initially, the walls are primed. It should be noted that a deep penetration composition is used.
- Next, tile adhesive is applied to the drywall sheet (around the perimeter and in the center).
- The sheet is pressed against the wall and aligned with the rule. Then it is checked by the building level.
- Next, a full fixing with dowels is carried out. If necessary, adjust the position of the sheet.
- After that, the GKL is primed for the best adhesion of the glue and the drywall itself.
Wall cladding technology with ceramic tiles
Preparatory work
Wall cladding with ceramic tiles should be carried out on a flat base, respectively, we figured out the alignment options.
Before starting work, if you do not yet have sufficient experience in their implementation, read the literature on doing wall tiling with your own hands.
As part of preparatory work, it is necessary to check the integrity of the base. If there is damage, they must be repaired. Then calculate the consumption of tiles and purchase the required amount.
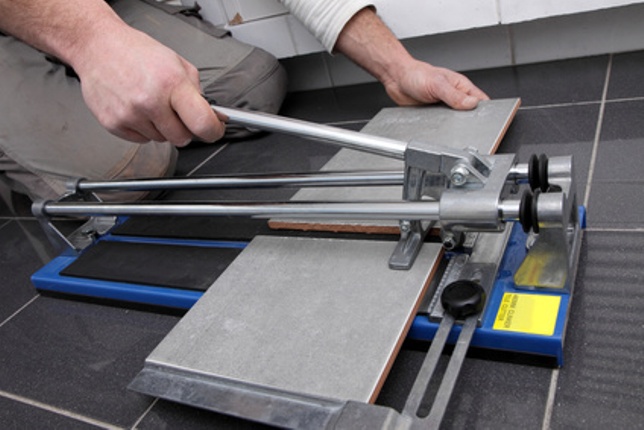
How to divide a tile into parts?
When carrying out work, sometimes you may not need a whole tile, but a certain piece of it. Therefore, it is necessary to know how to divide the tile into parts. And this is done as follows:
- It is necessary to measure and mark the line along which you will separate the tiles
- Then attach a ruler in the line and draw a glass cutter along the line, while pressing hard on it
- Then turn the tile on the back side and tap it a little
somewhat more convenient and quick option will use a special cutter. If you have one, then you are lucky, and the work will be somewhat faster and easier. If not, then buying it for the sake of one room is not worth it. Its price is quite decent, and in the absence of the need to constantly cut tiles in large quantities, it will be irrational to purchase such a device.
Also, if you need to do round holes in the rosette tile, you can use the ballerina cutter attachment. In addition, cutouts can be made in the same way as in the case of separation, using a glass cutter.
Laying tiles on cement mortar
The first way of laying tiles, and the oldest, is the arrangement on cement mortar. The technological process is as follows:
- To begin with, you need to hang a plumb line on the wall, mark it and install beacons by which we will mark the coverage levels.
- Next, on the edges of the walls, it is necessary to fix plumb slats up to 2 meters long, further to these slats there will be a guide thread that will determine the level of the tile. Those. a kind of beacon, on which we will carry out all the work.
- Before starting work, the tile must be moistened, which will lead to a stronger adhesion of the material with the adhesive.
- Then we apply a solution to the tile, and press it against the wall. It should be noted that it is necessary that the tile touches the beacon (i.e. the equipped thread / lace). After that, it is necessary to knock on the tile for its uniform laying. To do this, use a rubber mallet.
- For arranging even seams, special crosses are used. Between each tile, depending on its size, at least two pieces are inserted, not far from the tops of the tile. After the solution dries, the crosses are removed.
- After completion of work, it is necessary to remove the remnants of the mortar from the tile, and also wipe it.
- Further, after drying, grouting is carried out (we will consider its technology a little later).

Thus, the walls are lined with ceramic tiles on cement mortar.
Laying tiles with glue
Also, in addition to using cement mortar, tiles can be equipped with PVA-mastic, or special tile adhesive. The technology of work is very similar to the previous version, but there are some characteristic differences. Let's take a look at them.
- First of all, it is necessary to prime the surface. A primer is applied to the previously cleaned base with a layer of up to three millimeters.
- Before laying the first row, equip the guide rail by leveling it with a level. In the future, you should focus on the first row, while checking each subsequent level for the absence of deviations.
- Using a spatula, apply glue evenly on a flat surface and level it so that the layer is about 3-4 millimeters.
- Next, lean the tiles against the wall. You should also tap it lightly with a rubber mallet or wooden block, which will help to evenly distribute the mastic over the entire area of \u200b\u200bthe tile.
- If the adhesive protrudes beyond the seams, it must be immediately removed with a spatula, because, having dried, it will not provide such an opportunity and somewhat spoil the appearance of the tiled coating. To arrange the seams, crosses are also provided between the tiles.
- After the glue dries, it is necessary to remove the crosses, and then the arrangement, putty and grouting are carried out.
- The last step is to clean the surface from debris, dirt and dust.

Note that when gluing tiles, there is no need to pre-wet it. At the same time, the seams are filled with special tabs for the duration of the work, which will help keep them in the required position and prevent them from slipping. In addition, constantly monitor the level of the tile. The slightest error at the bottom by 1 millimeter, reaching the top, will lead to surface distortion and the creation of a rather large slope, which will subsequently lead to flaking and falling off of the tile.
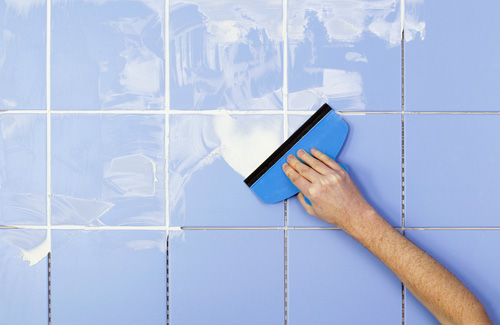
Grouting and jointing
After completing the tiling of the walls, it is necessary to allow the glue (or mortar, depending on the choice of method) to dry. Drying occurs during the day.
After drying, the crosses are removed and the seams are cleaned from excess mortar. Cleaning work is carried out with a spatula. Next, grouting is carried out, for which a gypsum mortar is used. It should be noted that this gypsum grout is commercially available in several color variations. Therefore, it can be matched directly to the color of the tile.

Note that grouting compounds floor tiles not suitable, because they are based on sand and cement, which does not allow you to choose the desired color.
The grouting solution itself is diluted with water in a shallow container, after which it is applied with a rubber spatula. Then it is pressed against the seam, since it is necessary to ensure the maximum level of penetration, which will determine the reliability of the fixation. Then the excess material is removed with a damp sponge.
Two hours after the lining, or rather its completion, the tiles are washed in order to remove grout residues. It is carried out with the help warm water and rags. We also invite you to see how the walls are tiled with ceramic tiles in the video:
Ceramic tiles have been used by man for many centuries to decorate his home. During this time, it has changed beyond recognition, continuing to be one of the most popular finishing materials. The material is not cheap, but capable of successfully performing decorative, sanitary and protective functions.
The choice of ceramics produced by Russian and foreign manufacturers is amazing. All possible sizes, colors, texture options. The material becomes familiar, which is difficult to distinguish from natural leather, fabric, wood. The use of the photo printing method allows you to apply three-dimensional images to the surface. To implement the most striking and unusual design ideas, it remains for the "small" - to properly clad the walls with this wonderful finishing material. You can’t do without this when carrying out ordinary repairs, when you just need to “refresh” the walls. The technology of wall cladding with ceramic tiles will be discussed.
Packages of ceramic tiles intended for wall cladding are marked with a pictogram with a human palm.

Material Quantity Calculation
You can calculate the area of \u200b\u200bthe walls and divide by the area of one tile of the size that you have chosen for this room. Just? Yes, but the discrepancy with the actual amount will be quite significant. It is better to work a little with the calculations, so that later you do not buy more or think about what to do with the surplus.
We measure the area under the lining with a tape measure. We pay special attention to the corners in the room. We check them by applying a construction corner. Right angles (which is rare in our new houses) - our task will be simplified, there is no right angle - we need a supply of material for trimming.
Draw a projection of each wall on a sheet of paper, marking the places where the tiles will not fit. Put on the drawing the position of curbs and other decorative elements. Select the laying option to be used (traditional seam-to-seam, diagonal or staggered).

At this stage, it is necessary to ensure that narrow strips of tiles do not have to be laid in the corners. And remember that half of the ceramic tile in the drawing in life will have to be considered as a whole.
Very important! It is impossible to do without the obligatory high-quality alignment of the wall. This is not a wallpaper that you can reluctantly stick with an overlap, but cut or cut a strip in the corners.
Have you calculated? Feel free to add at least another 10% - for trimming, marriage, correcting inaccuracies in the initial calculations.
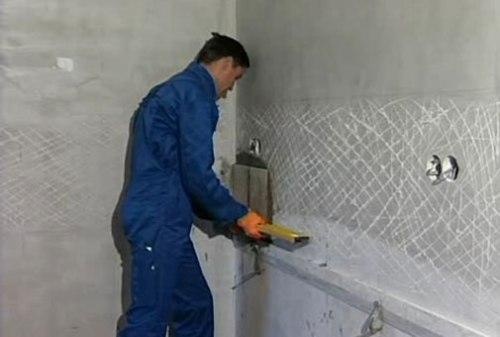
Wall surface preparation
Before the start of laying work, the surface of the walls in the room is prepared. We clean concrete and brick walls from traces old plaster and dirt. We pay special attention to potholes and irregularities, as well as corners. We close up all the irregularities with a layer of mortar and try to eliminate the curvature of the wall. On flat walls with 90° angles, tiles look great.

The rough surface improves the adhesion (adhesion) of the material to the wall. Therefore, a finishing leveling layer is not applied to the plastered wall, but on the contrary, small notches are made with a chisel.
Tool for the job
For work, we need to prepare a set of spatulas (smooth, notched, rubber, including a semicircular one for leveling the seams), a level, a plumb line, a tape measure, a metal ruler, a simple pencil, a container for glue. A stiff brush and sponge will be needed to grout the joints between the tiles. A tile cutter is required for cutting ceramics, a drill for drilling.

Of the materials, in addition to the ceramic tiles themselves, we need special glue, grout, plastic spacer crosses and corners (internal or external).


Cutting and drilling tiles
For cutting, we use a roller tile cutter, which, with small volumes, can be replaced with a good glass cutter. On the surface of the tile, we outline a line and insert it into the tile cutter, make a movement with the handle “away from you”. We draw a glass cutter along the line, then lay the tile on the surface so that the part that needs to be cut off does not have support. We take the free edge in the palm of our hand and “bend” it down with an energetic movement.
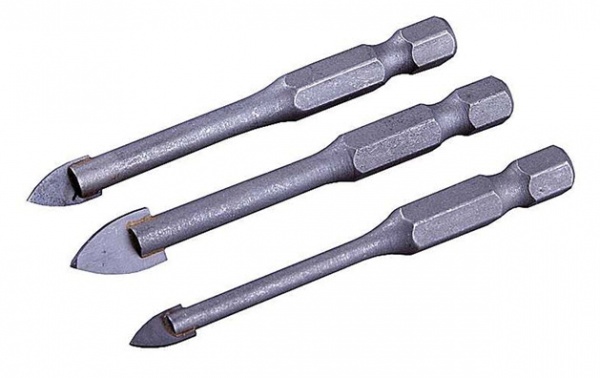
For drilling ceramics, we use special pen drills (the drill has the shape of a spear). Hole drills or hole saws are used if it is necessary to drill holes of large diameter.


Important! When drilling, we hold the drill horizontally relative to the base (floor). Do not roll in any direction! The drill must be in normal drilling mode. Start drilling at low speed. Having drilled a hole in ceramics, we change the feather drill for a concrete drill.
When drilling ceramics, moisten its surface with water.

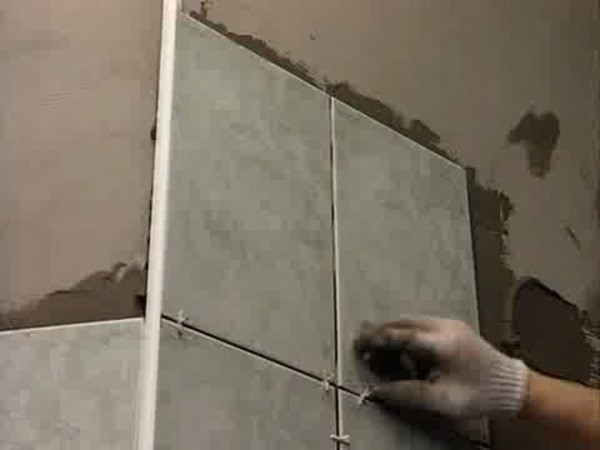
Wall covering
We start by marking the walls. Laying work begins from the bottom, as the current SNiP 3.04.01-87 regulates and suggests common sense. We apply the tiles of the first, lowest, row to the wall at the base (there is no flooring yet) and draw a flat horizontal line along the upper edge, checking the horizon with a level. We will glue the first row later, after facing the entire wall. Along this line (below it) is attached metallic profile, which will hold the glued ceramic tile and prevent it from moving down.
Very important! When checking the horizontality of each row, do not forget to check the verticality by applying a level to the glued tile after every two rows. In case of deviation, we adjust the vertical with the amount of solution.
We use tile adhesive for work. It will simplify and facilitate the process. In addition, special adhesives increase the adhesion strength of the wall surface to the tiles. Glue dilution instructions are on the package.
We start by applying a layer of adhesive to the wall and spreading this layer evenly with a notched trowel. The thickness of the adhesive layer depends on the size of the tile and the characteristics of the adhesive itself. for ceramics small size, for example, 150x150 mm, the layer may have a thickness of the order of 5-6 mm. For larger ceramics, the layer thickness increases to 8-10 mm.


Advice. Do not dilute a large amount of glue and do not apply a large amount of glue to the wall. Dried glue will have to be removed and a new one should be added.
Experts advise starting to glue ceramics from the center to the edges of the room. To do this, a vertical line is drawn in the center. With this method, the cut tile will be in places where it is not conspicuous. If you have an integer number of tiles in a horizontal row and you do not need to trim, you can start work from a doorway or from a corner.


Between the tiles we lay plastic crosses-separators right size. When the glue sets, we will remove them.
Do not forget to lay the internal plastic corners in the corners of the room. The junctions of vertical rows of ceramics on two adjacent walls in this case look much better. It is recommended to lay plastic corners on top of the last row of ceramic tiles, especially if this row is at eye level of an adult and is clearly visible.
After the glue has set, go back to the first row and glue it. We just have to do the grouting. It is advisable to buy the grout at the same time as the tiles. In this case, it is easier to choose the right combination colors. Experts recommend buying tiles and grout in one color scheme, and use the lightest or darkest grout that is present in the color of the ceramic. White grout is considered universal. For the bathroom, the grout can be matched to the color of plumbing fixtures. In rooms with high humidity, epoxy grout is used.
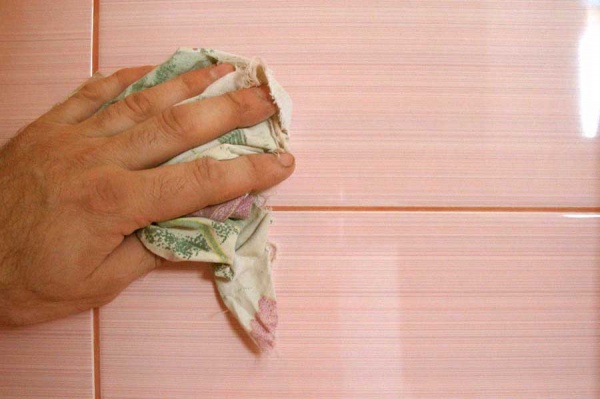
After grouting, the remaining material is removed from the ceramic surface with a brush and sponge.
These are the main points in the work on wall cladding with ceramic tiles. You can clarify for yourself some of the details of this process by watching video instructions on this topic.