Shelf template became animals from plywood drawings. Animals from plywood: a minimum set of a master, drawing up a drawing and general rules for cutting
All photos from the article
For a long time it was customary to decorate the interior of the premises with hunting trophies. After a successful hunt, a stuffed animal was made with their own hands, which was hung on the wall and for a long time testified to the skill, accuracy and luck of the shooter.
Today, the situation has changed radically, since many animals are under state protection and their shooting is prohibited. Of course, a stuffed animal of one or another part of a dead animal can be bought, but the price of such a trophy will be high.

In this article, we offer an alternative to buying expensive stuffed animals, because a deer head made of plywood will look much more original and modern than a stuffed animal stuffed with straw. In addition, you can be proud that no animals were harmed while decorating the interior of your living room.
We recall school labor lessons or what can be made from plywood

Many readers of this article had to attend labor lessons or needlework circles and something during their school years. If you have experience in such activities, then you can easily cope with those works, which we will discuss below.
If there is no experience with a jigsaw, let's explain that a manual jigsaw is a tool designed for delicate cutting of thin lumber. Structurally, it is a metal frame with a handle, and a narrow fine-toothed cloth is clamped between the ends of the frame.
The advantage of a narrow blade is the ability to cut lumber both starting from the edge of the sheet and indented from the edge. In this case, a through hole is drilled in the sheet, into which the canvas is pushed through. As a result, complex figures can be made, for example, the head of a deer with an eye, to which there is no cut from the edge of the sculpture.

If you have a jigsaw and drawings of a plywood rhinoceros head, you can easily translate a design idea into reality with your own hands.
Below we will bring to your attention a few instructions from which you can choose the craft that will fit into the interior of your living room.
Assembly instructions

Perhaps, let's start with the most common hunting trophy and consider drawings of a plywood deer head. Making a deer, as well as other animals, is the creation of a kind of 3D puzzle. That is, a certain number of parts are made from lumber, which are assembled into a single structure.
Plywood animals can be made by anyone. It is not necessary to have special professional artistic skills and abilities. Although in this case there is a chance to create a complex composition. Simple figures are quite suitable for the interior of the garden plot. Great solution children will be invited to the process of coloring finished products. Extraordinary bright colors are guaranteed.
Designs can be installed in any place that is pleasant and considered auspicious. However, it is still worthwhile to approach this wisely and choose a site suitable for a particular figure. It is not necessary to set the figure of a fox against the background of a pond, but to fix a frog on a grape bush. There is a simple logic here.
Advantages
- Durability that contributes to the service throughout years;
- Good level of flexibility;
- The material does not pass water;
- Environmentally friendly qualities;
- Ease in processing.
The color solution of the product and the structure may depend on the texture of the plywood sheets.
Attention! When using a base made of coniferous wood, it is more convenient to do staining, birch wood looks beautiful even without paint treatment.
Material selection
There is a wide range of plywood types, the quality of which is highest level. Celebrate good performance moisture resistance. For a garden plot better fit material grades FB, BS and FSF. There is a cheaper option - the FK brand, which has relative moisture resistance. Because of this, it needs to be treated with a moisture-repellent compound before painting.
Note! Drying oil is quite suitable as a processing agent. The figures are updated at least once a year.
With regard to the thickness of the material, a sheet having any number of layers may be suitable. By choosing fragments with different thicknesses, you can easily add volume to an artificial animal. Often the convexity of parts is played up with the help of coloring. The weather vane is made from thinner sheets, and the ground figure is cut out of thick material. It would be appropriate to use sheets with a thickness of 2 and 3 cm.
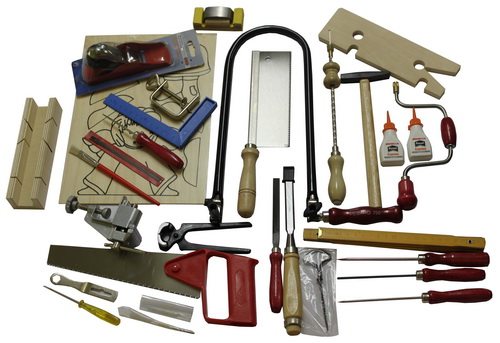
Tool preparation
The main tools for creating a figurine are a manual or electric jigsaw, a stencil bought or made by oneself, fine-grained sandpaper, a pencil, self-tapping screws, a screwdriver. For finishing work, you need to stock up on furniture varnish, paints and brushes.
When planning to make a figurine without oprah during installation, it is worth taking care of acquiring pegs. The size is chosen taking into account their deepening into the ground. Details must be at least 50 cm long.
Drawing
Figures of animals from plywood are made according to previously prepared images. On the Internet, you can easily find a picture for every taste and make a printer printout on a regular sheet of paper.
In order to create plywood animals with specific data, drawings are simply necessary. To do this, you need to create a template, according to which you can transfer all the contours of the selected image.

You should draw or print a grid of small square cells. The same type of mesh is applied to a plywood sheet, taking into account the parameters of the future animal in the desired scale. After that, there are no difficulties in transferring all the contours from the drawing to the workpiece.
Attention! It is advised to initially outline the outline of the figure by cells, then apply the outline of the remaining elements of the image.

If the performer knows how to draw, you can make a sketch of the desired drawing immediately on a sheet of plywood.
How to make a figurine and fix it on the site
At this stage, it remains to cut animals out of plywood using an electric or manual jigsaw, and then paint the products with acrylic paint, you can use different colors.
Sawing animals out of plywood occurs in the form of manufacturing structural elements in turn. Do not forget about the hind and front paws of the animal. They are glued to the already finished body on the sides to acquire stability. For some cases, the design of stands is provided:
- Separately;

- In composition;

- According to the scene.
The sculpture is mounted on a tree or pole. Once a figurine is made, it can be moved from one place to another. It is possible to rely on a flat stand, which is screwed to the product with self-tapping screws. It can be fasteners in the form of pins made of wood, plastic or steel. They are stuck into the ground.
Stationary products need a more reliable base that will help to hold on and not fall in the slightest wind. The support should last for many years. Because of what it is worth using a pipe with plugs on both sides or thick fittings that are processed bituminous mastic. A plate with prepared holes for fastening is welded to the upper part. With a large thickness of plywood, a pin can be inserted in the drilled hole along the bottom edge.
Attention! Dig in a support at least 0.5 m deep.
Animal heads
Animal heads made of plywood are an alternative option for people who like to hang stuffed animals and heads of dead animals on the wall. Moreover, such products are now at the peak of popularity. They are made from different types of material. But plywood for this role is ideal for both the level of quality and the structure of the material. The cost of products is relatively low.
Perform work in stages:
- First, choose the right type of plywood. Depending on the location of the future product, the required level of moisture resistance of plywood sheets is determined. Having decided on the desired parameters, you can think about the thickness of the material.
- Ensure the following tools are available:
- Jigsaw or self-tapping screws,
- Pens or a simple pencil,
- Screwdrivers or screwdriver
- Sandpaper with fine grains,
- furniture varnish,
- Brushes and special acrylic paints.
- To create animal heads from plywood, drawings are simply irreplaceable.
- Stencils should be made from ordinary sheets of paper, applying which all the details are cut out separately;
Attention! For greater efficiency, it is still better to paint the product, it is easier to do it in a disassembled state using a spray can. Different elements are advised to be painted in different colors (meaning the head and horns).
All photos from the article
Sawing plywood homemade products is an interesting and useful pastime. Any plywood product can be loaded functionally, and then you get what is called two in one - beautiful and useful handicraft. This instruction will tell you how to turn a boring sheet of plywood into something useful or just unusual.

plywood fauna

Sawing animal figurines is a fairly simple and rewarding task:
- First, most animals are recognizable by contours.
- Secondly, two or three colors are usually enough to turn the workpiece into a full-fledged "animal".
- Thirdly, any scheme of animals made of plywood, which involves installation on a rocking stand, or loaded with some kind of seat, in interesting toy for kids. With a touch of imagination, the animal figurine can be used as the basis for a garden tool holder, a potted plant stand, and much more.

Our help!
Plywood drawings of animals may involve flat figures, the main purpose of which is to decorate a garden or plot, decorate children's corners and recreation areas. Volumetric figures are possible.
In this case, there are two main solutions to this problem: gluing plywood - with this technique, parts are glued on top of each other, resulting in a three-dimensional figure; The second technique is modular design.
With this technique, flat fragments are inserted perpendicularly load-bearing structure, as a result we have a three-dimensional figure.
Both methods allow you to create both a decorative beast and a functional one.
Minimum master set
What makes it good to work with plywood is the minimum set of tools and the minimum amount of paintwork materials.
For work you will need:
- jigsaws - manual or electric with a sufficient amount of consumables;
Note!
Even if you decide to cut something grandiose, for example, you are interested in an elk from plywood, then one plywood and laminate file is enough for a jigsaw.
For a hand tool, several files are needed.
No one will give you clear calculations for the consumption of files.
The thing is that files for hand tools with the wrong load can simply burst.
If you do not have the skills to work with this tool, buy the package right away.
Its price is quite lifting, and the files are unlikely to be superfluous, they will be useful for other homemade products.
- abrasive materials- usually two types of sandpaper are enough: coarse-grained and fine-grained (null). If you have needle files or an abrasive nozzle for a grinder, you can use them - the first for processing ends and internal contours, the second for processing surfaces. But separately for the sake of one or more crafts, you can not buy them;
- clamps or vise, as a rule, two clamps are enough to fix even a large sheet;
Note!
When working with plywood, the sheet must be firmly fixed to the work surface.
If necessary, the sheet is fixed in a new place in order not to interfere with the passage of the cutting tool.

- meters, markers or pencils by default;
- of consumable paints and varnishes, we are interested in a primer for plywood, which has antiseptic properties, and also creates a water-repellent layer. Paints can be selected depending on where your homemade product will be used: acrylic - indoors, enamel - in the yard or on the site.
Drawing, needed or not
Let's start with the most important thing - a drawing is needed, and especially if you decide to design a three-dimensional beast. Thus, you can draw drawings of a dragon from plywood or drawings of a dinosaur from plywood.
Before you start making figures from plywood for the garden with your own hands, you first need to decide on the type of plywood. The durability and attractiveness of the garden figurine depends on the choice of one or another type of plywood sheet.
Which plywood to choose?
Today, the construction market offers a huge number of various types plywood For garden figures, BS, FB and FSF are best suited. Such brands have increased moisture resistance and frost resistance.
Cheaper FC. The moisture resistance index of such a brand is lower than that of the above types, therefore, before painting it (FK sheet) should be treated with moisture-repellent compounds.
It is better not to use the FBA brand for garden crafts, since this type does not tolerate atmospheric phenomena. The outdoor figurine will last a maximum of one season. But if you are going to update the figurine n once a year, then FBA plywood, pre-impregnated with drying oil, will do.
As for the number of layers, both single-layer and multi-layer plywood sheets are suitable for the garden.
Important point! If you are going to make an outbuilding, then a thin sheet will do. For ground figures, it is better to use plywood, about thirty millimeters thick.
Blueprints
The selected figure can be printed on a printer or a template can be created. As a rule, beginners choose the second option, since using a template it will be easier to reproduce the figure on a sheet of plywood.
A grid is drawn on the drawing and on plywood, of the same scale / size. Then all the contours are transferred from the paper to the plywood sheet.
What will be needed for work?
For work you will need:
- stencil, pencil;
- plywood sheet;
- jigsaw;
- screwdriver and screws;
- "sandpaper", acrylic paint and brushes.

Important point! If you are going to install a figurine that does not lean on anything, then in this case you will need to mount pegs on which the figurine will “sit” in the future.
Do-it-yourself plywood garden snail
The snail will be a wonderful decoration for any garden plot.
Manufacturing process:
- Draw a snail on paper. Then transfer it with carbon paper to plywood.
- Using an electric jigsaw, cut out the constituent elements of the craft.
- With the help of acrylic paints decorate the figurine. You can use burning to select all the contours.

Stork of their plywood with their own hands
The stork will not only decorate the garden plot, but also bring happiness and joy to the house. You can install it, for example, near a pond, fountain or in the center of the site.
Manufacturing process:
- To work, you need a plywood sheet with a thickness of six millimeters. A stork figurine is cut out of it, 0.85x.58 m in size.
- For the stand (stork legs), plywood about twelve millimeters thick is used.
- All cut out elements are cleaned with sandpaper.
- A hole is made at the end of the "legs". It will be necessary to insert the body of a stork into it. The depth of the hole should be about five centimeters.
- With the help of self-tapping screws, the legs are fastened to the body. In order for the product to last a long time, you must first make holes for the screws.
- Prime the product.
- Color the figurine.

If they are attached to the pediment, then thin plywood will do for the “leg”. If desired, you can create not one, but two storks and a nest. After painting, the products are attached to the facade using self-tapping screws.
DIY plywood bird feeder
Manufacturing process:
- For the base, you will need four slats (two long and two slightly shorter). They create a rectangle.
- Cut out the bottom and roof for the feeder from the sheet (should fit the size of the rails).
- Racks are made in the corners.
- The resulting product is decorated acrylic paints. You can also use burning to make an interesting pattern on the roof of the feeder.

DIY plywood hedgehog
Manufacturing process:
- Make drawings of figures on paper. Then cut out a hedgehog from paper.
- Apply the template to the plywood sheet and trace the contours of the figure with a pencil.
- Then, using a jigsaw, a hedgehog is cut out of plywood.
- All edges of the craft are sanded with fine-grained sandpaper.
- Product coloring.

DIY plywood butterfly
Their plywood can be made not only large figures, but also small ones, for example, various insects, butterflies and various bugs. Such figurines can be attached, for example, to garden house, birdhouse or gate.
Manufacturing process:
- Butterfly can be drawn immediately on plywood. If you do not have the ability to draw, then in this case you should create a template. Apply the stencil to the plywood and circle it with a pencil.
- Using a simple jigsaw, carefully cut out the product.
- In order to cut patterns inside the wing, holes should be drilled within its area.
- Then the canvas should be inserted into the holes made and fixed.
- Cut the product along the contour.

In addition to the garden figurines described above, you can also install a unique, green frog, cat, fox, bear and many other fairy-tale characters on the site.
Many of us spend a lot of time on garden plot. At the same time, we want to be surrounded by comfort, convenience and beauty. DIY plywood crafts are a wonderful way of self-realization and decoration of the garden.
It's nice to play the guitar after a piece of sausage. If the mice are not caught, it will be bad.
Working with plywood is easy and pleasant. The material is affordable. In the simplest version, for crafts, you will additionally need paint and some self-tapping screws. You will need a few tools, see the maximum list below.
 You can make decorative crafts from plywood for beds and a fence, heroes of fairy tales and cartoons for a playground, birdhouses, bird feeders, flower pots and so on. Having wondered what plywood can be made with our own hands, we conditionally divided all the figures into two groups: simple ones, which are made from one piece of plywood, and more complex ones, which are assembled from several parts.
 "Cartoons" for children and adults
Flat figurines made of plywood
Almost all of the examples above are cut from a single piece of plywood.
For making DIY crafts, it is better to use a sheet with a thickness of at least 10mm. In this case, the image will not warp and will last longer. At the same time, it is preferable to use moisture-resistant plywood in the garden and vegetable garden.
 There is no dispute about tastes - the choice of your favorite option is yours
The procedure for making plywood figurines is as follows:
- The contours of the drawing are drawn on a sheet of plywood with a pencil.
- The craft is cut with a jigsaw around the perimeter.
- The contours and the flat surface of the workpiece are processed with emery cloth.
- Color borders of various colors are applied to the part with a pencil.
- The craft is consistently painted with all colors. Adjacent coats of paint must dry completely before applying the next color.
 Guys from our yard
It is convenient to fix the finished product with self-tapping screws to a fence or wall. Look at the photo: you can “screw” hair, buttons, shoes, a wire tail and so on to the craft.
It is important that these elements hold securely, serve for a long time under the sun and rain, and do not pose a danger to people.
 Animals, as always, are useful: a deer holds a flower pot
With your own hands, you can make a variety of decorations for giving from one piece of plywood. We have selected a few for you interesting options.
 Why does a dog need a hare if it has a bone?
 These birds are clearly not friendly.
 Storks, swans, chickens: no one will fly away from you!
 Grandmother solves an important problem: what would she cook for her grandfather and granddaughter?
 Grandfather understands well that there will be no dinner without firewood.
 The granddaughter wastes no time and decides to milk the goat
Volumetric crafts for the garden
It is wrong to say that voluminous plywood crafts for the garden are noticeably more difficult. Of course, you will have to cut out a few details with your own hands. But some of them should be painted in one color, which simplifies the work.
 It is difficult for a donkey to understand how one can sleep for so long, he is a donkey!
All parts are prepared according to the scheme described above, and then fastened with self-tapping screws. Of course, the volumetric figure looks more interesting. The photo clearly shows that it is necessary to use a material with a thickness of 15-20mm. Each piece has its own shape and size. They can be placed optimally on the sheet of material and the plywood can be used sparingly.
 The dog guards, the cat helps: in general, everything is in business
It is especially pleasant when a craft made by yourself not only decorates the yard, but also performs a useful function. The photo shows just a few examples.
 The observer is looking for birds - or a hedgehog?
Patterns and schemes are not problems
Templates are best done by yourself. Firstly, it is not difficult, and secondly, you can make templates for your own and a new drawing when you get tired of repeating other people's ideas. Note that there are a huge number of children's applications for colored paper crafts, which are quite easy to cut out of plywood.
The easiest option is to apply the drawing directly to the plywood. Moreover, if you had five in drawing at school, it is not at all necessary to copy what has already been done.
Otherwise, a grid should be applied to the drawing you like with a pencil. Then the same grid is drawn on a sheet of material with a pencil. All elements of the pattern are transferred to plywood "in squares". It is convenient that the squares in the drawing and the workpiece can have different sizes, that is, the drawing can be transferred to any scale.
It is most convenient and modern to do the work using a computer, which we did. Almost everyone has a Microsoft Power Point program, where you should copy the picture you like. Previously, the program sets the size of the sheet for printing on the printer 29.7x21cm.

We have a piece of plywood measuring 57x77 cm, and we set the size of the drawing based on the availability of material. It should be understood that the program takes into account the size of the entire image.

Then you need to print fragments of the picture on the printer, sequentially shifting it relative to the print sheet. For ease of printing, a grid of sheets for printing should be applied to the drawing and grouped with the image.

Now the sheets should be glued into a single image and cut along the contour after the glue has dried. A paper template is laid on a sheet of plywood and outlined with a pencil. Subsequently, individual parts of the drawing are sequentially cut off from the template and also transferred to the workpiece with a pencil. You can cut out!
About how to save your work and longer
It will be very disappointing if a self-made craft will peel off and warp from the first rain. So it is better to take a number of measures to save your own work.
First, it is better to use moisture resistant material. Secondly, it is necessary to impregnate it from moisture, for example, with “Pinotex”. Paints can be used acrylic and oil. It is important that they are for external use. If you want to leave the natural color of the wood, the craft should be covered with a transparent yacht varnish.
Prepare for the fact that the figure will have to be repainted every two to three years. If the plywood begins to delaminate, it must be puttied before painting, for example, with Silacryl sealant. It is very effective to hide the craft from the weather for the winter.
Let the video help you in your work. It remains to wish you good luck!
- Creation of figurines
- Choice of plywood
- Image
- Carving figures
- Stork on the roof
- plywood butterflies
Perhaps everyone knows the figures of traffic police officers with patrol cars installed on the roadsides and designed to discipline road users. They, if over time they cease to frighten drivers, they still enliven the boring roadside landscape. Despite the rather realistic appearance of these crafts, they are made using a very simple technology. If you own an artistic brush, you can easily create the same silent guards for your site, since it is not difficult to cut them out of plywood. Nevertheless, in the country house or in the garden, it is better to install animal figures that will create a more relaxed atmosphere than models of law enforcement officers.
Plywood figures will help diversify the boring natural landscape of the site.
Creation of figurines
To get animal figures from plywood, it is not necessary to have the professional skills of an artist. Of course, they will help to create complex compositions “in the style of realism”, but simpler installations can also please the eye. It is very good if a child's hand is attached to their coloring.
You can install the figurines in any place you like, but still it is desirable that they do not look ridiculous there. The figure of a fox is hardly appropriate, for example, in the water of a pond, and a frog should not be fixed at all in a vineyard. And the rest is quite simple.
Back to index
Choice of plywood

Today, the industry produces many types of plywood, and some of them have such high moisture resistance characteristics that steel sheet can envy them. Plywood of the FSF, FB and BS brands is best suited for installation in the garden. Cheaper material is FC brand plywood. Although it has relative moisture resistance, it must be treated with moisture-repellent compounds before painting.
Worst of all, the impact of atmospheric factors is tolerated by the FBA brand, however, it can also withstand 1 season in an open area. If you are going to update the figures at least once a year, then FBA plywood, well impregnated with drying oil, will suit you.
When decorating your site, you can use plywood with almost any number of layers. The combination of elements of different thicknesses will give the figures volume. True, it can be played with coloring. The weather vane is made from thinner plywood, while the ground figures are sawn from thicker plywood. Sometimes it is appropriate to use a sheet of 20 or 30 mm thickness.
Back to index
Image

To embody an animal figurine in plywood, search the Internet for its image. Print the picture you like with a printer on a regular A4 sheet. If you are not sure that you can accurately reproduce all the contours of the picture, create a template by which you will transfer the figure to the plywood blank.
Draw or print out a grid of small square cells. The same grid, scaling the size of the squares, taking into account the size of the future figure, apply on a sheet of plywood. Now it’s quite easy to transfer all the contours from a paper sheet to the workpiece. First outline the outline of the selected figure in the cells, and then you can draw the contours of the rest of the details of the picture.
The most inexperienced can only give advice on using images with simplified outlines and a minimum of detail.
Back to index
Carving figures
Now it remains to cut out the figure with a manual or electric jigsaw and paint it with acrylic paints of different colors. Sculptures can be mounted on trees or poles. Figures can be moved to a new location each time. They can, like tin soldiers, rest on flat stands that are screwed to the figures with self-tapping screws. The figures can be fixed on wooden, plastic or steel pins stuck into the ground. Stationary sculptures require a more reliable foundation so that they do not fall down from the slightest wind. The support itself should serve for many years, so for it it is better to use a pipe or thick fittings treated with bitumen mastic and muffled on both sides. A plate with holes for installing fasteners can be welded to its upper end. If the plywood is thick enough, then the pin can be inserted into a hole specially drilled for it on its bottom edge. The supports are dug to a depth of at least ½ meter.
Back to index
Stork on the roof

Perhaps, the creation of a “zoo” on the site should begin with the manufacture of a stork, because it brings happiness to the house. The figurine of a stork can stand in the middle of the site, and decorate the pediment. To paint a bird, you need paint of only 3 colors, and the look of a stork is so familiar to everyone that even the most inept draftsman can reproduce it, especially since a template will come to his aid.
- The bird figurine is cut out of 6mm plywood. The size of the blank is 85 x 58 cm.
- The leg-stand is cut out from a separate piece of plywood 10-12 mm thick.
- All edges are cleaned with sandpaper.
- A slot is made at the end of the stand to insert the body. Its depth is 3-5 cm.
- The leg is attached to the figure with 2 screws. Holes are drilled into the plywood before they are screwed in.
- The primer is applied.
- The bird is painted white.
- Black paint is applied to the wings, and eyes are drawn.
- The beak and leg are painted.
The stork is ready for installation in the garden.
To attach the figurine to the pediment, you do not need to use thicker plywood on the legs. If the size of the sheet allows, then you can cut out 2 storks and a nest. After painting, the figure is attached to the facade with self-tapping screws, and the realism of the nest can be given by decorating it with bundles of straw.
You can make a weather vane from a plywood stork. The bird itself is made according to the dimensions described above. The stork will be mounted on a bicycle wheel rotating in a horizontal axis on well-lubricated bearings. For reliable fastening of the bird, it is necessary to weld brackets-corners to the spokes, and the stork will need two legs-stands with an extension at the bottom to increase the plane of contact with the brackets. The legs are attached to the wheel with bolts and nuts. The spokes and the rim for masking the attachment are braided with wicker and straw. By fixing pieces of thick wire on the rim and braiding them with branches, you can make the walls of the “nest” higher. Install the weather vane on a roof, pole or tree, but please follow the safety precautions.
Plywood crafts for the garden are the simplest decorations, but due to the imagery, brightness, and the ability to move them around the site with ease, they are especially loved.
Such crafts for the garden are cheap, since the material itself is inexpensive, and making them yourself is not a particularly difficult job. Plywood crafts are installed in place using a long pin that is easy to stick into the ground. Although you can attach such crafts to any building on the site.

How to cut plywood crafts
An ideal tool for cutting plywood is a jigsaw. The file, of course, must be taken with small teeth - so the edges of the cut out figure will be more accurate, without chipping the plywood layers. After the craft is cut out, clean its edges with sandpaper.
If there is no electric jigsaw, you will have to use the usual manual one.
Cutting, of course, will take longer than with an electric jigsaw, but if you do not cut in jerks, the edges of the garden crafts will also be clean.

How to avoid delamination of plywood
The risk of delamination of plywood under sawing is very easy to reduce. To do this, you need to prepare a fixing solution: dilute construction PVA with water (2 parts PVA + 1 part water). We apply a generous amount of the solution on a sheet of plywood, leave to dry. And so - 3 times.


How and how to paint plywood crafts
When the craft is cut out, you can proceed to the most interesting thing - coloring it. But first you need to prepare the foundation.

Gently sand both surfaces with sandpaper. First use coarse grit sandpaper, final sanding with fine grit. You need to grind with a large sandpaper across the fibers, and with a small one - both across and along. Wipe off dust thoroughly after sanding.
If you want everything to be according to the rules, treat the base of the garden craft with a protective impregnation for wood - this will extend its difficult life (under the winds, rains, sun), and also make it “tasteless” for various bugs.
Prime the garden craft blank. Primer is necessary for several reasons. Firstly, it will fill the pores in the plywood, as well as small cracks. Secondly, it will prevent cracking of the material. Thirdly, it will serve for better adhesion of the paint to the base.
Choose a primer depending on the type of paint (there are always instructions for use on the cans). By the way, there are very high-quality filler primers, they can be considered ideal for pre-treatment of plywood. But they are not required to create garden crafts, more often they are bought for wood processing during interior work.
You can paint plywood crafts with all types of paints and enamels intended for coloring wood. It is very useful to carefully read the instructions: the paint should be for outdoor work. Most often, plywood crafts are painted with oil paints or wood enamels.
To make plywood garden crafts shine, as well as to protect the pattern, we take the final step - varnish them. When painting with glossy paints, which already give shine, you can do without varnishing crafts.
To fulfill your dream - to make your personal garden unusual and unique, you can use plywood figurines for the garden with your own hands. This idea does not require large financial investments.
Plywood figurines can be in the form of funny characters, which will add a touch of fun to the design of the site.
In the past few years, plywood decorations have become quite popular due to the fact that they are very easy to make and take very little time. And if there are children in the family, they will be happy to help paint the blanks. These crafts will perfectly fit into the design of any garden or cottage. To create a unique corner of relaxation, you do not need to have a special talent, it is enough to have a wild imagination.


Plywood figurines can decorate any, even the simplest, site.
Use these handmade decorations to highlight special places in the country or in the garden. They make this corner of the site unique and attractive. Due to the fact that the figurines are made of quality material, they look great and are in harmony with the surrounding landscape.
Crafts for giving can be represented by the following types:
- unusual mailboxes;
- all kinds of figurines, for example, heroes from favorite fairy tales;
- painted bird feeders in the garden;
- decorated fences around the garden or cottage.
Each decoration made of plywood has its own uniqueness, expressiveness and beauty.

Some characteristics
The best, convenient and easy-to-handle material for creating masterpieces is plywood. Using it to create figures, you will spend very little time, and the process will be interesting and exciting.
Plywood is produced in the form of veneer sheets, fastened together with a special synthetic glue in several layers. The more layers, the stronger and thicker the material will be. There is plywood with a thickness of 3 to 30 mm.

The structure and color of crafts for a summer residence or garden will depend on the texture of plywood. For example, if the base is made of coniferous wood, then it is more convenient to paint it, and if it is made of birch, then the figures will look beautiful and aesthetically pleasing even without the use of paint.
Why is it better to use plywood:
- it is environmentally friendly;
- durable and will serve for many years;
- has good flexibility;
- does not pass water;
- very easy to process.
Due to the fact that plywood is made of wood, it has some of its properties, namely the ability to change the structure under the influence of natural conditions. Therefore, when choosing the source material for the figurine, you should adhere to the following rules:
- Plywood with the FSF or FKM marking has greater moisture resistance. Phenolic and melamine resins are used for bonding in these materials. This connecting material does not absorb water at all.
- On sale you can find plywood sanded on both sides, on one side or unpolished. This must be taken into account in the process of choosing the material for the base, especially if you do not have time for additional processing of the resulting figure.

In order for the crafts in the dachas to look bright and colorful, when painting them, it is necessary to use acrylic or oil paints. The use of this type of art supplies is convenient, as they lie well and softly on the tree, and are also resistant to sunlight, that is, the figures will not have to be repainted for several summer seasons.
What do you need to create a masterpiece

To make figures from plywood, you need a stencil.
The cottage is decorated in most cases with flat-shaped figurines, for the manufacture of which sheets of plywood are used. In addition to the main material, you will need:
- stencil of the future product;
- pen or simple pencil;
- self-tapping screws and jigsaw;
- screwdriver or screwdriver;
- sandpaper with fine grain;
- brushes, special acrylic paints;
- furniture varnish.
If you do not plan to put the figurine on a support, then you need to make special pegs. They should be dug into the ground to a depth of 50 cm.
You can buy a stencil for crafts in a store or make it yourself by drawing an outline on cardboard and cutting it out.
- Hand tool
- Electric jigsaw
- Stencil preparation
- Sawing process technology
- Defects in work
Wood carving with a jigsaw is rapidly gaining popularity: many people want to buy interesting subject decor to decorate your home, furniture and even clothes! Carved objects of various thicknesses organically fit into any interior style, often people buy photo frames for photos with ornaments, sawn words and letters, or order intricate shelves and other interesting products. Few people know that artistic cutting out of plywood with a jigsaw is a business accessible to any person, even an unprepared and inexperienced one. You just need to understand how to work with the tool.
What is a jigsaw: a general description
A jigsaw is a tool designed for cutting out various contours from plywood, including curved ones. It is equipped with a blade with fine teeth that can cut the plywood evenly without the formation of significant burrs.
Hand tool
The ancestor of this type of tool is a manual jigsaw. It is a metal arc in the shape of the letter "U", between the ends of which a saw blade is stretched, attached to the clamps. They securely hold the file during operation and allow you to adjust its tension. On one side of the frame is a handle.

The clamps on the tool can rotate, creating different planes for sawing, thereby providing the opportunity for woodcarving of varying complexity.
When cutting out of plywood manual jigsaw you have to be careful: its design is quite fragile, during intensive work the blade often breaks from effort and heat, so it has to be replaced. To do this, each master must have several dozen spare files.

When working with a jigsaw for carving internal contours, it is convenient to use such an auxiliary board as in the photo: it will help protect the table and solve the problem of conveniently positioning the workpiece.

Electric jigsaw
The tool is powered by electrical network. It is a case in which working mechanisms are located, a handle for control is also made on it. The sawing organ is located in the front lower part. The blade is often protected by a foot, which allows you to cut the contour exactly along the line without deviation. Advanced and professional jigsaw models have various attachments that facilitate the sawing process and level the edges of the plywood.

Blades can have different teeth in shape and size. It is necessary to select saw blades corresponding to the material being processed so that there is no damage and damage to the plywood sheet during the operation of the mechanism.
Classification of jigsaws by power and application:

In the instructions on how to use a jigsaw, or in technical passport the main parameters of the tool that must be taken into account when using the mechanism should be described.
Wood carving tools
Sawing with a jigsaw is a creative process, but it requires preparation and additional equipment. What is required for work:

Stencil preparation
Drawings for sawing with a jigsaw can be of different sizes, depending on the scale of the product being manufactured. To create a scheme for a shelf, a piece of furniture or a composite three-dimensional toy, you can take a large sheet of drawing paper A1 or A0, the wallpaper remaining after the repair is also suitable, for small figures they take plain A4 paper or another suitable format.

On the surface with a bright pencil or marker, draw the outline of the future product, adhering to the dimensions. It can be an element for assembling furniture, a shelf or other large product.

There are so many jigsaw templates on the web that choosing the right one can be difficult. It is much easier to come up with your own patterns for cutting and transfer them to paper.

Transferring the image to the surface of plywood or boards
Before you start cutting with a jigsaw, you need to transfer the image from the stencil to a wooden or plywood blank. To do this, cut out a figure from the sheet, apply it to the surface of the plywood and carefully circle it. It is desirable that the line is even and accurate. We use with a simple pencil, so that if necessary, you can correct the line by erasing it with an eraser.
We apply the contour from the back side so that no remnants of lines are visible on the finished product. The inner area can be shaded so as not to cut off the excess and designate inviolable areas.
It is important to transfer the drawing in such a way as to minimize sawing along the fibers with a jigsaw - it is so difficult to get a straight line.
Sawing process technology
How to use a jigsaw, for sure, many have heard. Working with the tool will not cause difficulties if you prepare for it correctly.

Carving on plywood begins with the inner contours of the pattern. To do this, you need to make slots for inserting the tool blade:
- Plywood is often taken thin, and there will be no problems when cutting a large contour, and tension may occur in a small residue. Sawing with a jigsaw inside can damage the product - chips, burrs, dissection;
- It’s easier to work this way: you always have something to hold the workpiece for. A large sheet is much easier to handle than trying to hold a small sawn piece while the inside is being formed.
How to cut with an electric jigsaw:

Working with a jigsaw is much easier than hand tool, there is no need to make physical efforts and the process goes faster.
How to saw with a jigsaw:

There is nothing complicated, as you can see, in this process.
Defects in work
If you did not follow the technology, held the tool incorrectly, the saw may simply move off the line. Why does the jigsaw saw crookedly:
- tilted the tool during operation;
- saw blade tension loosened;
- with an electric saw, it is possible to loosen the fastening of the saw.
To avoid such problems, be sure to check the tension of the saw and the fastening of all working elements before starting sawing. If the blade is beveled and stuck, it's best to start over and make the line parallel to the faulty one.

A little about safety
Safety precautions when working with a jigsaw for sawing plywood and wood are simple:
- Use protective equipment - goggles, gloves, gown. These things will protect you from dust and small chips.
- Sawing with a manual jigsaw should be done carefully so as not to damage the fingers with a saw. Keep the distance between the body and the instrument.
- If you are a beginner, carefully read the instructions on how to use a jigsaw, the main characteristics of the tool. This information will help to avoid accidental injury and damage to the unit.
Wood carving with an electric jigsaw requires accuracy and attention. Both your health and the integrity of the finished product depend on these qualities.
What can be made from plywood: interesting ideas and drawings
Sawing wood with an electric jigsaw or hand tool is a creative process. You can create many decorative products in different directions:

Drawings of plywood crafts do not have to be made in exact dimensions. Even taking an example from the Internet and changing its silent proportions, you will get a unique product that no one else has in this form.
DIY plywood crafts can be painted or left in a natural color, you can glue buttons, beads, ribbons and other decor on them to revive the product. To do this, it is worth involving children in the work, their imagination is a bottomless storehouse of interesting ideas.

We offer you diagrams with photos for cutting plywood with a jigsaw.
You can figure out for yourself what you can cut out using a hand or electric tool, make your own sketch and transfer it to paper, then to a canvas of wood or plywood.
Carving plywood with a jigsaw requires certain knowledge and skills. If you don't have them, consider the following rules: