Do-it-yourself chain wrench for pipes drawing. How to make a wrench from an old bicycle chain
Hello dear friends! Today we will make a very simple and effective device that will surely come in handy for people who are engaged in auto repair, plumbing, carpentry, etc. Such a little thing may well come in handy in ordinary household life.
This simple contraption is a universal key that can unscrew anything. The wrench works well with any diameter of nuts and bolts, and it also has an excellent hitch with any smooth surfaces such as a water pipe.
Compared to a universal gas wrench, this design has certain advantages. The gas wrench has only two engagement planes, which in turn can deform the unscrewed part when strong pressure. Our tool has a “soft” girth due to contact over the entire plane of the unscrewed part.
Test for wooden log. On the left is our universal key, and on the right is the gas key.
Also, this key, due to the specificity of its design, is endowed with the ability to work as a universal key with a “ratchet” mechanism: preventing the part from scrolling in the right direction and easily transferring it to the beginning in the opposite position.
To make such a universal key, you need only two parts:
- - Square metal profile 25x25 300 mm long.
- - Motorcycle chain 500 mm long.

Master key assembly
Assembly is incredibly simple and will take you no more than 5 minutes with preparation.All you have to do is weld one end of the chain to metal profile. Welding is best done on both sides of the chain.
This completes the assembly. The universal key is ready to use.

Using the master key
Let's skip the second end of the chain to the center of the profile and you will get a ring that just needs to be put on the part you want to unscrew.
In this tool, the chain is taken for a break and the greater the leverage force, the stronger the chain grip force.
The key perfectly hooks both round objects and faceted ones. For him, there is not much difference, whether it is a nut or a pipe.
Tests
Key test on a round pipe:

Wrench test on hex nut:


The results are excellent in all cases. High grip. Doesn't rotate anything.
Also, this miracle perfectly turns off plastic and polypropylene pipes, without significant deformations, which is so important when working with soft plastic.

This useful key won't take up much space in your car, garage or home. But it can definitely come in handy at the right time.
So friends, feel free to make your own universal key. Be sure to watch the video of making and testing the universal key.
Most motorists believe that the puller oil filter- a useless tool, which, if anyone should have it, is only for car service workers. Drivers who have already encountered a problem when changing engine oil on their own when the filter cannot be unscrewed manually have already acquired a suitable puller. Picking up this tool is not so easy: there are many modifications on the market, but not all of them will be suitable for servicing a particular car model.
Types of pullers manufactured industrially
Depending on the design features and the size of the filter, to unscrew it, pullers of one kind or another are used. Their body or base is usually made of steel and protected with a matt or silver chrome finish. A number of products, if provided for by the design, have plastic lining on the handles, which greatly simplifies the work with such a tool.
Almost all pullers allow you to unscrew both oil cleaners (hereinafter referred to as cleaners) and oil cups - filter housings with a replaceable insert. All pullers can first of all be divided into universal and designed for unscrewing filters of only one diameter or type.
Among the first, the following main types are distinguished:
- crab;
- belt;
- chain;
- tape;
- sickle-shaped and in the form of pincers;
- with 2 adjustable grips.

Their versatility is relative - not every filter can be unscrewed with them. Firstly, because they are designed for a certain range of cleaner diameters, and for some pullers it is wide enough, while for others it is not very wide, and secondly, because of their own design features and dimensions. After all, the location, as well as the availability of the filter on different cars, are different, and therefore it will be easy and simple to work with any tool in one engine compartment, and perhaps even impossible in another.
Only one type of tool is classified as a narrow profile - the “cup” oil filter pullers. They got this name for their appearance reminiscent of the eponymous kitchen appliance.
The design and method of using the "cup" puller
This type of puller is produced for filters of all sizes, but each individual cleaner is only of one diameter. Therefore, when buying a cup, you need to be especially careful. This key should ideally fit the filters installed on the car engine. Even a difference of a few millimeters will turn the cup into a useless accessory.
Owners of auto repair shops immediately purchase whole sets of these pullers, including up to 30 wrenches for filters of various diameters. Such sets are supplied with a suitcase in which the cups are conveniently arranged according to the size numbers.

The "cup" pullers in their "bottom" have a square hole for the tip of the socket wrench. Some manufacturers additionally make a hexagonal "bottom" - for a cap tool. Many pullers, primarily their sets, come with a “cup” hole tip that the key is put on, and some come with everything. essential tool, including cap and end.
The “cup” puller is put on the ribbed top of the filter with a wide open part, on the inner circumference of which there are edges. They must match those on the cleaner in quantity and size. Otherwise, the puller will not fit snugly and unscrewing the filter will be difficult or impossible. " Cup" is considered the most handy tool. It is compact in itself and with it, as a rule, it is easier to "crawl" to the filter. Moreover, a properly selected "cup" never slips relative to the circumference of the filter housing, which sometimes happens with some other types of pullers.
Details about the universal "crab"
The “crab” puller consists of two plates, which are the body, and 3 grippers installed between them. On the working surface of the paws there are notches that prevent them from slipping over the filter surface. The grippers are controlled by means of a clamping mechanism located in the middle of the crab body and between the swivel mounts of the paws.
The mechanism itself, as well as the puller as a whole, is actuated by a special attached key - this is one of the design varieties - either by an end or cap tool, under which a corresponding tip is provided that comes out of the body. The scheme of working with the "crab" is identical to the process of unscrewing the filter with a "cup" puller. You must first fasten it to the end of the cleaner. It is in this part of the work that the “crab” is fundamentally different from the cup, which makes it universal. In the initial position, its paws are moved apart and are able to cover the filter of the maximum diameter allowed for its design.

After throwing the grips onto the smaller cleaner, the clamping mechanism is activated. In this case, the “crab” will be able to capture the filter, the diameter of which corresponds to the minimum allowable for the puller design. After the paws grab the cleaner, you must continue to work with the key, put on the clamping mechanism drive. This will unscrew the filter. Moreover, the stronger the applied force, the more reliable the grip of the paws of the “crab” will be - slippage is excluded.
Depending on the “crab” model, it can be used to remove and install filters having a diameter in the range of 60–125 mm. This puller, like the "cup", is very good when working in a narrow and limited space.
What do you need to know about the rest of the pullers?
The oil filter chain puller, depending on the design, allows you to unscrew and tighten filters with diameters ranging from 60–140 mm. It is a handle and a chain attached to it at one end, which acts as an adjustable grip. Most pullers are equipped with a single row chain, but there are models with a double row. The second end of the grip, depending on the design, can be free or passed through a special groove located in the handle and having a lock.
At the first version of the puller, before unscrewing the filter, the chain is tightly wound around its body, almost to the end. The remaining segment of the grip is hooked to the hook on the handle. After that, the puller rests on the filter and acts like a lever. The second version of the tool has a ready-made loop from the chain, which has adjustable dimensions and immediately pounces on the filter. After that, pulling the end of the grip passed through the groove, tighten the loop and press on the handle of the tool in the right direction. At the same time, the groove lock securely holds the chain, preventing it from loosening its grip.

Belt pullers have a working diameter range of 25–160 mm. A special belt is installed in them to capture the filter, forming a loop. It can be fixed at both ends in a square steel bar. A belt is wound around it after a loop is thrown onto the filter. Then a suitable key is thrown onto the rod and the cleaner is unscrewed. Another type of puller is similar in design and use to the second type of chain tool.
The working range of tape filters is one of the narrowest - the difference between the minimum and maximum allowable filter diameters can reach only 30 mm. They use a band of steel or plastic fixed at both ends to the handle and forming a loop, which in some designs can be slightly adjusted in size. After throwing the grip on the handle, force is applied and it acts like a lever. The density of filter coverage is achieved in some designs with a screw on the handle, and in others - due to natural tightness when unscrewing. Most pullers of this type most often do not cope with filters that are too tight.

The sickle-shaped and pincer-shaped tools have 2 working curved jaws with notches and 1 or 2 handles. Their working range of capture is also small, in some designs it is adjustable. They work with these pullers, as with ordinary pliers - they grab the filter, squeeze it and turn it off.
The puller with 2 adjustable jaws consists of a thick narrow base plate, a screw and paws with notches on the working part. The threaded ends of the grips are moved in the longitudinal slots of the base and fixed in the desired position with a nut. When tightening the screw passing through the thread of the hole in the center of the plate, after it is firmly pressed against the filter, the latter is unscrewed.
Do-it-yourself belt puller - there is nothing easier
To make this key with your own hands, you will need a steel hexagon. Its standard size can be 19 or 17 - under the appropriate key, to whom it is more convenient. We cut off a workpiece about 150 mm long or another size from the hexagon rod. This must be determined by trying on in the engine compartment of your own car, so that it is as convenient as possible to unscrew the filter with a manufactured puller.
Then, along the hexagon in the middle, we make a cut with a grinder 55–60 mm long and 5–6 mm wide, which should pass through opposite corners of the section and parallel to the side faces of the bar. After that, we process the workpiece on emery - we remove sharp edges and burrs. Taking an old but undamaged car seat belt, cut off a piece of the desired length from it, depending on the diameter of the installed filter. The longer the length of the belt, the more versatile the puller will be, but it will also become less convenient to work with it when unscrewing small cleaners. In the general case, a piece of 500-550 mm is enough.

We insert the belt into the slot of the workpiece, align and center in it. Then, on the hexagon opposite the belt, we make markings for drilling 3 holes at equal distances from each other. We remove the belt from the cut. We drill through holes with a diameter of 5.5 mm. After that, on one side we expand the holes to 6.5 mm. Reaming is performed only up to the slot. In holes with a diameter of 5.5 mm, using a tap, we cut an M6 thread.
We melt both ends of the belt with a lighter so that they do not bloom, and then we put them together and thread them into the cut of the hexagonal blank opposite the holes. Got a loop. The ends of the belt opposite it should protrude from the slot by about 10 mm. We take a nail, and preferably a steel bar 6 mm in diameter, heat it well and, pushing alternately through 3 openings of the hexagon, burn holes in the tape with it. It should be burned through, and not perforated, so that the belt in these places does not delaminate and does not fluff.

Carefully, so as not to displace the loop, we put the future puller on the anvil and use a hammer to clamp the belt into the slot. Then we screw 3 bolts into the holes of the hexagon. They must be M6 threaded. The self-assembled oil filter belt puller is ready to use. The procedure for working with such a key is as follows. We put the loop on the filter, and then we begin to wind the belt around the hexagon. To unscrew it, do it counterclockwise. When the belt is fully wound, you need to take the key (17 or 19), put it on the hexagon and unscrew the filter.
If the belt option did not justify itself, we make a chain
To make your own chain puller, you will need a piece of half-inch or inch used pipe with uncorroded, undamaged walls and threads at one end. The length of the piece must be no less than the height of the filter. We select a suitable plug for the pipe so that it is wound onto its thread. You will also need a bicycle chain.

We drill a hole with a diameter of 9 mm in the center of the plug. With the help of a triangular file, we give it a square shape with our own hands. Processing is carried out until the dimensions of the hole begin to fit under the ratchet, or rather, under its limit switch. The latter should fit into the resulting opening of the plug rather tightly, with almost no backlash. We wind the plug onto the end of the pipe and tighten it very tightly. So that it does not unscrew when using the puller, it is recommended to grab it to the pipe by welding.
As a last resort, you can try to crush the metal at the end of the thread using a blunt chisel and hammer, but only carefully so as not to deform the pipe. We make markings on the pipe for drilling holes for the chain. For a reliable grasp of the filter, 2 of its segments are sufficient, mounted on the puller opposite the opposite ends of the cleaner. But you can also make a 3rd hole, between the 2 extreme ones, under another 1 chain. In this case, the puller will become more versatile, as it will allow you to unscrew filters with different heights.

passing through one of drilled holes pipe chain, we throw it around the filter with a loop, trying on how long the pieces will be needed. We measure so much that the puller in the unclenched state is freely worn on the cleaner. You can even make some margin of the chain along the length for filters whose diameter is larger than that installed on the car. But keep in mind that it will be less convenient to work with such a puller. According to the measured length, we disassemble the chain into separate fragments - we squeeze out the pins and disconnect the links in this place.
Having passed the obtained segments through the holes in the pipe, we make loops out of them - we connect the links of the ends and press in the pins. To unscrew the filter, we put the puller loops on it and, if necessary, when the chains are too long, manually turn the pipe counterclockwise, thereby choosing the slack. Then we insert a ratchet into the plug and with its help we begin to dismantle the cleaner.
In order for its transmission to serve for a long time and not create problems, it is worth periodically cleaning and lubricating the chain, as well as changing it approximately once every 10-15 thousand kilometers. Replacing a chain on a motorcycle is considered a rather complicated operation, and many experts recommend that such a problem be addressed to a specialized service station. However, you can change the chain yourself, saving a lot of money. Such work does not require special technical skills, but it has many nuances. By following the recommendations given in the article, you can achieve the reliability and durability of the transmission of your motorcycle.
Tools
To work with the chain, you will need a fairly extensive list of tools. The most important tool in this case will be a special chain riveter - such devices are produced by many companies, so finding it will be relatively easy. The cost of the tool varies between 1000-5000 rubles, depending on the manufacturer and the steel grade used. From some masters with experience we hear that the riveter is successfully replaced by a hammer, chisel and core. This point of view is completely erroneous - it will not be possible to achieve a reliable connection of the chain with their help, and, most likely, it will soon break.
In addition, changing sprockets and chain will require the following tools:
- Torque wrench with comfortable grip;
- A set of keys and heads;
- Compact grinder with a diamond blade for metal;
- Grease, as well as cleaner and chain cleaner.
It is better not to neglect the selection of high-quality tools, since it will be very unpleasant if the key breaks in the process of work and the motorcycle remains half disassembled. Remember that the chain will have to be replaced regularly, so it is worth buying a quality set once and then using it for several years.
Dismantling
First you need to remove the chain cover and unscrew all the bolts holding the cover of the drive sprocket. After removing the plastic covers, screw all the fasteners into their original places to prevent their loss. There is always a considerable amount of dirt under the cover of the star - it is better to wash it off using a special spray. After that, rinse the assembly with water and gently wipe off any remaining liquid with a non-abrasive cloth.
If the agenda is to replace the stars, you need to loosen their fastenings by unscrewing the corresponding bolts. This is where you need help as the rear wheel sprocket bolts are usually blocked by the swingarm and the bike has to be moved back and forth. Now it remains only to loosen the rear axle nut - however, no fasteners need to be completely removed yet! The motorcycle is installed on the center stand or a tackle, after which you need to finally unscrew the rear axle nut and remove the wheel. After completing this operation, begin to remove the stars, completely unscrewing the bolts that fix them.
To greatly facilitate the installation of a new chain, it is worth cutting the existing transmission mechanism. Some models of motorcycles have a special device called a breaker (Chain Breaker) - just lower it onto the chain and clamp it to knock the pin out of it. If it is missing, the chain can be riveted with a punch included in the riveting kit. However, experienced mechanics say that such a tool breaks too easily, and they advise cutting off the pin heads with a grinder first. After that, it will be very easy to break the link - if you do not have all of the above tools, the chain can be sawn with a hacksaw, although such work will take a lot of time.
If you are interested in how to change the chain using a special tool, then you should know that. A sleeve for cutting the chain is installed in the clamping mechanism of the riveter, after which it is combined with a pin with a filed head. The clamping bolt is wrapped with a pre-prepared torque wrench with a force of 10-12 Nm. It remains only to insert the punch and screw it in until the pin falls out and the chain breaks.
Installation
If you're going to be changing sprockets, cutting the chain can be dispensed with as you'll still have to install the new gear by hand. However, if they are saved, this operation can significantly reduce the complexity of the work. If you have purchased a new chain from a similar manufacturer, it is enough to simply connect it to the old one to achieve the desired result. Otherwise, you can use a strong synthetic thread or wire. The resulting long chain must be pulled over the stars, gradually turning them.
To understand how to replace the chain in this way, you need to wait until the old gear part is not in contact with the sprockets. Be sure to coat the engaging splines liberally with grease. Now the old chain can be removed and the new one can be installed. The leading star must be put in its place and the mount must be made. The next step will be the riveting of the chain, which is considered the most critical process in the entire replacement procedure.
If you are wondering how to rivet a chain with a hammer and chisel, you can read the recommendations below and do everything manually - however, the probability of breaking the transmission mechanism will be very high. Therefore, it is better to take a special riveter that limits the movement of the splines - this will keep the seals of the part intact. We generously lubricate the pins with a special lubricant for the chain, after which we put oil seals on them and lubricate them again. Now you need to thread them into the rollers, install one more oil seals, re-lubricate and fix the lock cover on top. We install this link in the riveter in such a way that the pins fall into a special groove - all that remains is to wrap the clamping bolt until they rest against its base.
Now you need to install a special nozzle for riveting pins into the tool. Press it against the surface of the chain - it is almost impossible to miss, because the tool has a special recess that makes it easier to aim. Using a torque wrench, tighten the hold-down bolt until the end of the free play. Depending on the chain manufacturer, this value can be in the range of 15-20 Nm, however, you should be guided by a sharp increase in the required force to turn the bolt. Do not try to overtighten the bolt, because in this case the lock will lose mobility, which will lead to accelerated wear on the transmission.
It remains only to install the rear star and make the mount. Now you need to install the wheel in reverse order, but also do not tighten its axle. Check that all parts are in place and that you have not lost any fasteners.
The ending
The next step is to adjust the chain - for normal, the transmission mechanism sags by 25-35 mm. Depending on what kind of mechanism your motorcycle uses, you may need to move the axle through a special slot, control it with the adjusting bolts, or turn the eccentric device. By setting desired level slack, tighten the rear axle nuts and make sure the rear wheel is fully locked.
Now start tightening all the fasteners to the right moment using a torque wrench - you can find all the values \u200b\u200bin the motorcycle owner's manual. Starting with the rear sprocket, tightening its bolts crosswise to avoid damaging the threads, fix the front sprocket and check that the chain rotates without significant slack in a certain area. Before using the motorcycle, the transmission mechanism will need to be lubricated using a special spray.
If you purchased the wrong chain model and need to learn how to shorten it, you should use the above recommendations. Using a punch, break the mechanism and remove the required number of links from it. After that, carefully lubricate all components and install the splines, not forgetting the seals and rollers of the friction pairs. However, such an operation should be performed only as a last resort - before buying a chain, you need to clarify whether it is suitable for a particular motorcycle model.
Hard work
Replacing the chain is not particularly easy, although this operation does not require special technical knowledge. The problem lies in the presence of a huge number of nuances - the transmission mechanism can be pulled, crushed, or simply mounted incorrectly. Therefore, you should check all the recommendations and use only a quality tool. If you do not feel confident that you can perform all the procedures correctly, it is better to entrust the replacement of the chain to specialists. In a motorcycle service station, they will help you make repairs within a minimum time, and they will also give a guarantee of the reliability of the transmission.
Despite the rather large variety, in the construction market, of tools for screwing or screwing various pipe connections, experts pay special attention to the chain wrench. The chain wrench is a prominent representative of a hand-held metalwork tool designed for installing pipes or fittings in hard-to-reach places. Such equipment allows you to work in conditions where the use of a standard adjustable wrench or sponge wrench is impossible.
Design features
The simplicity of the design of the chain wrench makes it very convenient and quite easy to use. Any of its models consists of a clamping mechanism and a handle. The clamping mechanism includes a chain and "cheeks" attached to the handle with bolts. The main element in the design of the chain wrench, of course, is a metal monolithic handle. At one end of its base there is a threshold, which serves as a kind of support for pipes. On the nut there are special notches that protect against the occurrence of scrolling of the pipes being held. The next important element is the chain. During operation, it wraps around the workpiece along the entire diameter. The chain is attached to the base of the key with a retainer that allows you to hold the generated voltage.
Special jaws and an adjustable flexible chain provide the necessary fixation of the pipes.
Due to the absence of any fixed elements in the design of the key, it is possible to work in confined spaces.
To use a chain wrench, it will be enough if there is a distance equal to the thickness of the chain between the structural parts and the pipe. In operation, the chain encircles the desired product around the perimeter, and the threshold in this case acts as a special obstacle when sliding. In turn, the lock that fixes the chain in a predetermined position does not allow the initial girth of the pipe to weaken. Due to the uniform distribution of the applied forces over the area of the products, the risk of various deformations or damage is eliminated.

The principle of operation of the chain wrench is as follows: the chain, fixed on the handle, is thrown over the pipe and tightened tightly, resting directly on the material with the sponges. Then, when applying efforts (pressing the end of the handle), the key turns in the required direction. At the same time, the jagged ends of the "cheeks" rolling over the product provide its maximum clamping with subsequent self-braking. The chain in this case acts as a fixing element. Usually it comes with a margin and, if necessary, can be easily replaced.
Working with a chain wrench is simple, but you should remember a few simple rules:
- thoroughly clean the teeth of debris that has fallen into them before and after finishing work;
- it is strictly forbidden to use any gasket materials between the pipe and the chain;
- do not increase the wrench lever with additional pipe cuts. This may break his handle.
Caution should be exercised when using this tool when working with parts with high finish parameters or with thin-walled pipes. Significant compression can lead to abrasion of surfaces or collapse of the product.
The main materials in the manufacture of chain wrenches are aluminum and steel. Keys made on the basis of high-strength steel will last a long time. To facilitate the design of the key, aluminum is additionally introduced into the composition, but this does not affect the strength characteristics in any way. Aluminum allows to reduce the total weight of the key by an average of 40%. Often aluminum is used in the manufacture of handles.

Specifications of the chain wrench
In the operation of the chain key, the following main parameters are distinguished:
- the ability to use the tool in places with difficult access;
- for small loads, the wrench is equipped with a one-piece forged alloy steel handle and a special sponge;
- key works with any metal pipes different diameters;
- for heavy loads, some chain wrench models have variable (double) jaws made from the same alloy steel. Such a key is considered indispensable when it becomes necessary to have a sufficiently rigid grip of the key with the pipe. In order to increase the amount of effort applied, an extension arm can be additionally used. Depending on the nature of the work, the chain wrench can be modified by placing replaceable jaws in the structure.
As with any other locksmith tool, the quality of the chain wrench itself is a very important factor. Many mistakenly believe that the main criterion for choosing a chain wrench is the allowable opening size. However, it is not. When choosing a tool, you should be based on the quality of the key, especially on its handle and "cheeks", since, as a rule, most of all loads are placed on them. It is very good if the key is made of high strength steel. In the future, this will determine its wear resistance in operation. Also, when choosing this type of equipment, you should pay attention to the trademarks of world famous manufacturers that have long earned the trust of many consumers.

To date, both classic and lightweight key models are produced. Often, standard models are characterized by a greater mass than lightweight keys.
To the most famous trademarks, which are in demand among buyers, include RIDGID, REED, SPARTA and STAYER chain wrenches.
The most reliable keys, known to professionals all over the world, are currently RIDGID. This company produces more than twenty types of different keys. World leader products are characterized by high strength, reliable grip for pipes different diameter, as well as an ergonomic handle and its length.
The choice of such a tool is quite wide, so be sure to weigh all the pros and cons before settling on any particular manufacturer.
Wrote in the title "universal wrench' and he had doubts. What a key it is when it comes to the real almighty lockpick-opener-twist, which can be made in a couple of minutes from an old and useless bicycle chain. Having such makeshift fixture, you can no longer google and yandex something like “buy a universal wrench”. You will have a truly almighty tool at your fingertips if you pick up a rusty chain and decide to put in just a little effort.
So let's go. First, we will tell you how this adaptation is made, and then we will show with several examples how it is able to move mountains.
Making a universal wrench: a minimum of words and a maximum of photos
For making it fantastic a simple tool you will need:
- unnecessary bicycle chain;
- a wooden block of such a thickness that it allows you to freely grab it with your hand;
- a sufficiently long screw with a nut;
- drill with a diameter corresponding to the size of the screw.
From wooden block We measure a piece with a length slightly exceeding the width of the palm.
Carefully cut off the measured piece.

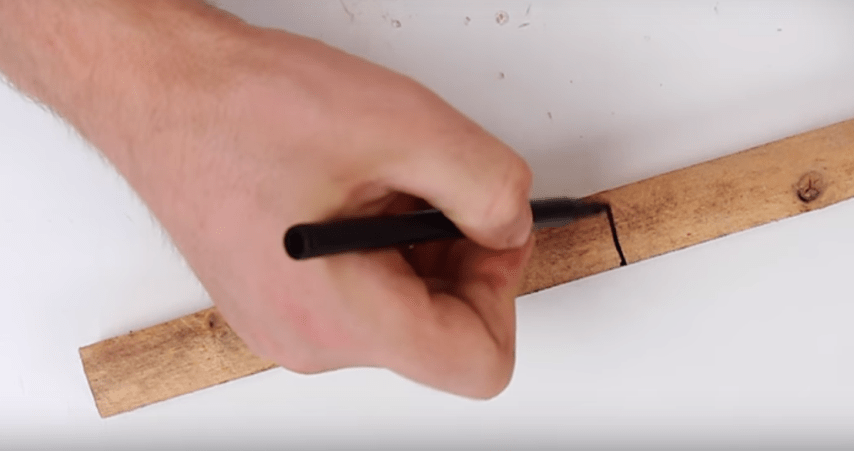
At 2-3 cm from the edge, we outline a place for attaching the chain.

We select a drill with a diameter corresponding to the size of the screw.

We drill a through hole into which the screw will freely enter and insert it there. Then we take the chain from which our universal wrench will be made, and we find in it a collapsible link that allows us to open it.

With an awl, remove the locking pad, disassemble the collapsible link, and then open the chain.


We put one of the extreme links of the open chain on the tail of the screw.

We fix the link with a nut, which we then tighten well.


And now our universal wrench, which we just intended to buy, is ready. And now let's see how our miracle tool works and how to use it.
How to use an Allen wrench and what it can do
The size of the capture of a home-made key can be selected by throwing on the tail of the screw that chain link that provides the required size of the capture loop.
So the loop turned out to be quite large.

If another link is hooked onto the tail of the screw, then the loop may be smaller.

As for the possibilities, for our tool they are almost limitless. For example, they can easily open the abutting cork of a plastic bottle.

With our key, you can completely free to rip off the completely round old nozzle that has rusted to the country tap.

A universal wrench made in this way will allow you to unscrew a rusted bolt of any size.

Our tool is capable of unscrewing the seemingly stuck head of an old faucet.

So, we see that the easily made universal wrench is almost omnipotent. Like this stuff? Do you want to give us praise for the fact that we reminded you of the existence of a well-known homemade product for a long time, or does this tool seem unnecessary to you and you have a desire to scold us? , write about your impressions, and your opinion will be immortalized on the Internet.
Ideally, the oil filter is screwed in by hand for removal when replacing in a similar way. In practice, drivers and service station employees overtighten the thread. There is a need for an oil filter puller to dismantle it.
The main problem is the poor location of the consumable element, the dense layout of the units under the hood of the car, several filter sizes and a rubber seal stuck to the ebb, so the most convenient tool for dismantling the oil filter for a car of a particular brand is selected.
Purpose of the puller
According to the car's operating manual, problems in principle, how to unscrew the oil filter yourself, cannot arise in principle:
- when changing the oil, a new filter is installed;
- sealing rubber must be lubricated with lithol;
- screw the consumable element by hand;
- tighten 1/3 turn with a little force.
In this case, the rubber sealing ring does not stick to the outflow of the internal combustion engine housing, the filter is dismantled without a puller by hand. In case of severe contamination of the body, a piece of sandpaper is used - the hand does not slip, the abrasive material ensures reliable grip of the palm with the filter body.

These requirements are often violated by the users themselves:
- there is no lubrication of the rubber ring, when high pressure and temperature, it loses its elasticity, sticks to the filter housing and the engine seat;
- it is not clear for what purpose the car owner tightens the thread with both hands, pulling it and flattening the rubber seal.
Even in this case, you can try to do without a puller:
- tap the rim in a circle from the side of the sealing ring to ensure its mobility relative to the filter housing or the ebb of the seating surface groove;
- pierce the rubber seal with a narrow screwdriver, separating it from the outflow side.

In all other cases, you have to use special tools to twist this consumable item. Since access to the filter is difficult, and its external size differs on different machines, the question of which puller is better does not make sense in principle for the following reasons:
- there are turnkey pullers or a head and with their own handles;
- some tools are made for a specific filter diameter;
- other pullers have repositionable grippers of several standard sizes;
- universal sliding devices are suitable for any filters of passenger cars.

To buy or self-manufacturing specific puller model, you should familiarize yourself with the design of each of them.
Factory puller options
A tool made industrially is usually more reliable than a homemade one. For the above reasons, manufacturers produce an oil filter puller in about ten versions. Moreover, for some of them, the working parts have a different size.
"A cup"
In fact, the oil filter puller The cup is a large die-cast head. The popularity of the design is due to factors:
- on the outside, the filter housing has a multifaceted surface for a special key;
- The cup is the key, easy to put on, even on a dirty filter, prevents slippage.

The only drawback is the presence of several filter sizes. If a car enthusiast needs to buy a Cup of one specific size, then for a service station employee, a set of oil filter pullers is the best solution:
- by analogy with a set of heads, each Cup is placed in a separate nest;
- the suitcase is convenient in transportation and storage;
- in addition to the fact that each Cup has an individual size, the number of faces differs - 8, 12, 14, 15 and 30, respectively.

From the outside, the fixture is equipped with a recess for a square key or a hex nut. Some manufacturers combine these two options - a square hole is punched through the center of the hex nut. Sets and individual Cups can be completed with a spanner.
A feature of this device is the minimum protrusion of the key beyond the outer diameter of the oil filter, so the puller is considered compact. The table below shows the marking of the tool depending on the size and number of faces:

When choosing and using a kit, you should consider for which cars its individual tools are intended:
| Diameter (mm) | Number of faces (pcs.) | Marking (vendor code) | Auto manufacturer |
| 93 | 36 | 4612 | Mazda, Ford |
| 76 | 30 | 4103 | Jaguar, Land Rover |
| 75 | 30 | 4668 | Mazda, Ford |
| 86 | 18 | 4670 | Renault, Citroen, Peugeot |
| 76 | 12 | 4669 | Renault, Citroen, Peugeot |
| 87 | 16 | 1522 | BMW, Volvo |
| 92 | 15 | 4104 | Ford, Porsche, Opel, GM, Jaguar, Land Rover |
| 82 | 15 | 1515 | Nokia, Nundai |
| 79 | 15 | 1403 | Suzuki, Toyota, Nissan, Honda, Mitsubishi |
| 75 | 15 | 4611 | Land Rover, Volvo, Mazda, Ford |
| 74 | 15 | 1521 | Audi, Volkswagen |
| 84 | 14 | 4695 | CDL, Benz |
| 74 | 14 | 1235 | Kia, Nundai, Opel, Volkswagen, Audi, BMW, Benz |
| 72,5 | 14 | 4667 | Toyota |
| 67 | 14 | 1021 | Suzuki, Kia, Hyundai, Mazda, Mitsubishi, Ford |
| 65 | 14 | 1114 | Honda. Nissan, Toyota |
Leading manufacturers mark the tool, packaging and corresponding slots in diplomat sets, so it is enough to measure the distance along the edges with a vernier caliper to select the Cup you need for the job. A package with one tool, depending on the diameter, costs 350 - 900 rubles. Sets cost 3000 - 8000 rubles, contain 15 - 30 nozzles, respectively.
"Crab"
Unlike the previous version, the Crab oil filter puller is a universal tool:
- paws are hinged between two plates;
- automatically adjust to the filter size;
- on top there is a hex nut with a square hole.

The three-legged oil filter puller can be rotated with a universal or ring wrench and a head, which is important in conditions of limited space with dense placement of engine components and assemblies.
The modification of the Crab with flat paws is completely identical to the tool with a round bar clamping device, but costs 10-15% less.

The main advantages of the Crab design are:
- versatility - one fixture is suitable for any filter size;
- cost - cheaper than purchasing a set of Cups, but more expensive than one instrument of this type;
- quality - all parts are stamped, which indicates a multiple safety margin;
- resource - unlike Cups, there are no slots, the paws practically do not wear out.
Crab costs in the range of 500 - 1000 rubles, covers sizes 60 - 125 mm.
Chain
For ease of use, the oil filter chain puller is available in two versions:

In the first case, the handle has several protrusions for attaching a whip of a single or two-link chain. There is no need to choose a free move, the lapel begins immediately after the application of effort.
In the second version, the cylindrical part is rigidly fixed in the chain break. During rotation, it first winds on this part, choosing a free play, then covers the filter slots, the force is transferred to the threaded connection of the consumable element of the internal combustion engine lubrication system.
A device with a handle is inconvenient in a limited space, as it protrudes much beyond the part to be unscrewed. The socket/wrench tool is more compact and much easier to work under the hood of the car.
The chain fixture is suitable for diameters of 60 - 140 mm, it costs an average of 250 - 600 rubles.
Tape
To work with small size from 30 mm, a belt oil filter puller is usually used, which has several designs:
- stepping - for each filter diameter, a steel tape of a certain length is fixed on the handle;
- with smooth adjustment of the clamp - the metal tape is crimped around the filter with a screw clamp;
- textile - the tool is equipped with a nylon tape, it can simultaneously refer to tape and belt devices, although the design is similar to a turnkey chain puller.
The most popular stepping tape clamp of the following design:
- the handle is equipped with a fork with several mounting holes and a hinged bracket;
- the kit includes 3 - 12 tapes for specific filter sizes, the ends of which are riveted into a tube;
- when installing the tape, the tubes are placed between the holes in the fork of the handle, fixed with pins;
- free travel is selected by moving the movable bracket;
- anti-slip notch is applied to the inner surface of the steel tape.
Depending on the number of tapes in the set, the tool costs 250 - 750 rubles, it is designed for diameters of 30 - 140 mm.
The design of the puller with continuously adjustable clamp differs from the previous version:
- a long piece of tape with an anti-slip notch is passed at both ends through an arched sole, fixed on a nut;
- in turn, the nut is screwed onto the thread of the bolt in a polymer handle, which is screwed into the sole from the outside.
Thus, the loop is wound onto the filter housing, the consolidated stroke is selected with a bolt. After that, the same handle unscrews the threaded connection of the consumable of the motor lubrication system.

Instead of notches, the tape can be equipped with pieces of wire welded across it. The price of this tool is 200 - 500 rubles, the working size of the loop is 30 - 120 mm.
A budget option (issue price 150 - 250 rubles) is a clip with a textile loop in the kit, the design of which is identical to a chain puller for a head or a spanner wrench.

belt
The cheapest is considered to be a belt tool for unscrewing the consumables of the internal combustion engine lubrication system. It usually has the following structure:
- a cast handle with a pointed end bent outward, having a notch on the outer side of the arcuate part;
- a bracket of two plates fixed near the bent end;
- one end of the belt bent into a loop is fixed on the bracket;
- the second loops around the filter, a loop is made at the free end, which is brought out through the bracket;
- free play is selected due to the hinged fastening of the bracket;
- notch on the foot of the handle prevents slippage of the working loop.

You can buy a belt clip for 300 - 500 rubles, the tool is suitable for diameters of 25 - 140 mm.
Sickle
A large-sized variety of a universal adjustable wrench is called an oil filter puller Clamp. The design of the tool is extremely simple:
- the handle is bent in an arcuate manner, on the outer side of the arc it has a notch, at the beginning of the rounding there is a hole;
- the free play of the puller does not need to be selected, since it immediately snaps into place on the filter housing in size.

This tool is good for loosening heavily soiled, greasy oil filters, but only with normal access to this assembly. It costs 200 - 300 rubles, suitable for sizes 60 - 120 mm.
"Ticks"
It was called the oil filter puller Pincers because of the similar shape of the working body. This tool is considered universal, but is suitable for a limited number of filter sizes:
- in the place of the hinged connection of the handles, an oval groove is cut by analogy with universal pliers for stepwise change in the arc of coverage of the jaws;
- the inner surface is equipped with a notch;
- handles have polymer or silicone nozzles.
The device is ideal for individual entrepreneurs who decide to start their own business, open a car service. For storage, you do not need to look for a place, the most popular sizes are 85 - 115 mm and 60 - 90 mm at a price of 450 - 850 rubles.
To work in confined spaces, pliers with two levels of adjustment have been created. In addition to step-by-step adjustment of the diameter of the jaws, they have a hinged mechanism that allows you to change the plane of the handles relative to the working body by 90 degrees in both directions.

For large service stations serving foreign cars, the modification of Pincers 53 - 118 mm is more suitable, suitable for a wide range of ICE models of automotive vehicles.

Sliding cup clamp
By analogy with the Cup and Crab, a universal puller of this type can be twisted with a head, open-end and box wrench. It does not slip on the filters, even if oil is spilled on their surface. The design differs from all previously considered modifications:
- the bowl is assembled from two parts that move relative to each other along the horizontal axis;
- a backstage assembly is assembled from three plates, having a hexagonal nut with a square hole in the center in the upper part.

The principle of operation of the tool is as follows:
- the device is installed on the filter;
- when transferring rotation from a key or head, the scenes are displaced;
- the edges of the parts from which the cup is assembled cut into the slots of the filter;
- unscrewing is performed.
The purchase budget is 500 - 900 rubles, the tool is suitable for filters with a diameter of 60 - 120 mm with any number of slots.
Homemade puller
After familiarizing yourself with the industrial options for a special tool, it is easier to understand how to make an oil filter puller on your own. To do this, you must select simple design fixtures, and copy it for personal use. The main nuances are:
- making Crab and Cup parts at home will be more expensive than buying a tool in a store;
- improvised materials, waste cutting of rolled metal, fasteners, used tape from the towing cable and consumable belts are usually used;
- the device should be convenient to use, then you unscrew the filter quickly;
- there is no need to copy the entire linear series, because a particular ICE uses one filter size.
The most popular homemade options are discussed below.
Chain
To build a chain oil filter puller on your own, you will need materials:
- a piece of a two-row chain, for example, a bicycle length slightly larger than the diameter of the filter (2 - 4 links plus);
- hexagon length 5 - 7 cm of any size under a standard key.
The chain can be welded to a hexagon or first riveted into a loop, welded a piece of rolled metal from the inside anywhere. The work will take 15 - 30 minutes, you will need a hammer and a welding machine.

In the absence of a piece of rolled metal, you can take an adapter shank for a cone drill. In this case, you will have to turn the upper part on a turnkey basis.

A piece flattened at one end of the tube will allow you to do without welding. To do this, insert the edges of the chain into the flattened end of the tube, drill a hole to fix it inside, for example, with a nail or screw through.

belt
When using a belt loop, a do-it-yourself oil filter puller will turn out even faster:
- a piece of belt, preferably with transverse slots, wraps around the filter with a smooth side;
- the ends are passed through the hole of a ring wrench of a suitable size;
- when rotating, the slots of the belt do not allow it to slip into the eye of the key.

The material has sufficient roughness and elasticity to transmit torque without tearing and scrolling.
If you make a slot in the end head, put a similar piece of belt into it, you get a more convenient device for working in a limited space.

Tape
In the garage, unscrewing the oil filter consumable element can be done with a piece of a used towing cable made of nylon tape. In principle, the handles of bags and backpacks are suitable, which allows you not to invest additional funds in repairs.
The characteristics of the tape are slightly inferior to belts, but they have a similar shape, so it is logical that all keys are made using the same technologies. The most popular end puller:
- a groove is cut in the hexagon, bolt, end head;
- drilled 2 through holes for the screws;
- the edges of the tape are laid, fixed with screws or rivets.

The taper drill adapter already has a groove, but the hardened metal it is difficult to drill holes for fixing the belt with screws, so you can sew a ring out of this material, pass one of its edges through the hole, insert an impromptu retainer from a nail or wire on the other side.
The principle of operation of the key will not change from this, it’s just that at the moment the free play is selected, this locking element must be held until the tape is fully tensioned.
clamping
This homemade device is copied from the Cup. However, at home it is difficult to make slots on inside pipes, so fixing the tool on the filter body is carried out with a clamping screw. The top arcuate plate is welded to the tubular spool to hold a hex head/wrench nut.

Due to the simple design of the key, a drawing is not required, it is enough to cut off a piece of pipe with an inner diameter slightly larger than the filter, about 5 cm long. With the top location of the nut, you can use a homemade puller, even in a confined space.
Puller key
A more technically complex wrench for removing the oil filter is made from a bar and a pipe coil:
- the coil is cut through;
- kerf width is 3 mm minimum;
- bars with a diameter of 12 mm and a length of 15 cm are welded near the cut.

This homemade key is an analogue of Pincers or Sickle. It is less convenient in limited space in comparison with the end modification of the puller. Long handles interfere with rotation near the units under the hood of the machine.
In conclusion, good advice: the puller is used exclusively for unscrewing the filter. There is no need to tighten the consumable with it after changing the oil, so I use this tool in exceptional cases, however, it pays off in the first year of car operation.
Thus, it is better to buy or make an oil filter unscrewing tool in advance, without waiting for the oil / filter kit to be replaced on the engine maintenance schedule.
If you have any questions - leave them in the comments below the article. We or our visitors will be happy to answer them.
In order for its transmission to serve for a long time and not create problems, it is worth periodically cleaning and lubricating the chain, as well as changing it approximately once every 10-15 thousand kilometers. Replacing a chain on a motorcycle is considered a rather complicated operation, and many experts recommend that such a problem be addressed to a specialized service station. However, you can change the chain yourself, saving a lot of money. Such work does not require special technical skills, but it has many nuances. By following the recommendations given in the article, you can achieve the reliability and durability of the transmission of your motorcycle.
Tools
To work with the chain, you will need a fairly extensive list of tools. The most important tool in this case will be a special chain riveter - such devices are produced by many companies, so finding it will be relatively easy. The cost of the tool varies between 1000-5000 rubles, depending on the manufacturer and the steel grade used. From some masters with experience we hear that the riveter is successfully replaced by a hammer, chisel and core. This point of view is completely erroneous - it will not be possible to achieve a reliable connection of the chain with their help, and, most likely, it will soon break.
In addition, changing sprockets and chain will require the following tools:
- Torque wrench with comfortable grip;
- A set of keys and heads;
- Compact grinder with a diamond blade for metal;
- Grease, as well as cleaner and chain cleaner.
It is better not to neglect the selection of high-quality tools, since it will be very unpleasant if the key breaks in the process of work and the motorcycle remains half disassembled. Remember that the chain will have to be replaced regularly, so it is worth buying a quality set once and then using it for several years.
Dismantling
First you need to remove the chain cover and unscrew all the bolts holding the cover of the drive sprocket. After removing the plastic covers, screw all the fasteners into their original places to prevent their loss. There is always a considerable amount of dirt under the cover of the star - it is better to wash it off using a special spray. After that, rinse the assembly with water and gently wipe off any remaining liquid with a non-abrasive cloth.
If the agenda is to replace the stars, you need to loosen their fastenings by unscrewing the corresponding bolts. This is where you need help as the rear wheel sprocket bolts are usually blocked by the swingarm and the bike has to be moved back and forth. Now it remains only to loosen the rear axle nut - however, no fasteners need to be completely removed yet! The motorcycle is installed on the center stand or a tackle, after which you need to finally unscrew the rear axle nut and remove the wheel. After completing this operation, begin to remove the stars, completely unscrewing the bolts that fix them.
To greatly facilitate the installation of a new chain, it is worth cutting the existing transmission mechanism. Some models of motorcycles have a special device called a breaker (Chain Breaker) - just lower it onto the chain and clamp it to knock the pin out of it. If it is missing, the chain can be riveted with a punch included in the riveting kit. However, experienced mechanics say that such a tool breaks too easily, and they advise cutting off the pin heads with a grinder first. After that, it will be very easy to break the link - if you do not have all of the above tools, the chain can be sawn with a hacksaw, although such work will take a lot of time.
If you are interested in how to change the chain using a special tool, then you should know that. A sleeve for cutting the chain is installed in the clamping mechanism of the riveter, after which it is combined with a pin with a filed head. The clamping bolt is wrapped with a pre-prepared torque wrench with a force of 10-12 Nm. It remains only to insert the punch and screw it in until the pin falls out and the chain breaks.
Installation
If you're going to be changing sprockets, cutting the chain can be dispensed with as you'll still have to install the new gear by hand. However, if they are saved, this operation can significantly reduce the complexity of the work. If you have purchased a new chain from a similar manufacturer, it is enough to simply connect it to the old one to achieve the desired result. Otherwise, you can use a strong synthetic thread or wire. The resulting long chain must be pulled over the stars, gradually turning them.
To understand how to replace the chain in this way, you need to wait until the old gear part is not in contact with the sprockets. Be sure to coat the engaging splines liberally with grease. Now the old chain can be removed and the new one can be installed. The leading star must be put in its place and the mount must be made. The next step will be the riveting of the chain, which is considered the most critical process in the entire replacement procedure.
If you are wondering how to rivet a chain with a hammer and chisel, you can read the recommendations below and do everything manually - however, the probability of breaking the transmission mechanism will be very high. Therefore, it is better to take a special riveter that limits the movement of the splines - this will keep the seals of the part intact. We generously lubricate the pins with a special lubricant for the chain, after which we put oil seals on them and lubricate them again. Now you need to thread them into the rollers, install one more oil seals, re-lubricate and fix the lock cover on top. We install this link in the riveter in such a way that the pins fall into a special groove - all that remains is to wrap the clamping bolt until they rest against its base.
Now you need to install a special nozzle for riveting pins into the tool. Press it against the surface of the chain - it is almost impossible to miss, because the tool has a special recess that makes it easier to aim. Using a torque wrench, tighten the hold-down bolt until the end of the free play. Depending on the chain manufacturer, this value can be in the range of 15-20 Nm, however, you should be guided by a sharp increase in the required force to turn the bolt. Do not try to overtighten the bolt, because in this case the lock will lose mobility, which will lead to accelerated wear on the transmission.
It remains only to install the rear star and make the mount. Now you need to install the wheel in reverse order, but also do not tighten its axle. Check that all parts are in place and that you have not lost any fasteners.
The ending
The next step is to adjust the chain - for normal, the transmission mechanism sags by 25-35 mm. Depending on what kind of mechanism your motorcycle uses, you may need to move the axle through a special slot, control it with the adjusting bolts, or turn the eccentric device. After setting the desired slack, tighten the rear axle nuts and make sure the rear wheel is fully locked.
Now start tightening all the fasteners to the right moment using a torque wrench - you can find all the values \u200b\u200bin the motorcycle owner's manual. Starting with the rear sprocket, tightening its bolts crosswise to avoid damaging the threads, fix the front sprocket and check that the chain rotates without significant slack in a certain area. Before using the motorcycle, the transmission mechanism will need to be lubricated using a special spray.
If you purchased the wrong chain model and need to learn how to shorten it, you should use the above recommendations. Using a punch, break the mechanism and remove the required number of links from it. After that, carefully lubricate all components and install the splines, not forgetting the seals and rollers of the friction pairs. However, such an operation should be performed only as a last resort - before buying a chain, you need to clarify whether it is suitable for a particular motorcycle model.
Hard work
Replacing the chain is not particularly easy, although this operation does not require special technical knowledge. The problem lies in the presence of a huge number of nuances - the transmission mechanism can be pulled, crushed, or simply mounted incorrectly. Therefore, you should check all the recommendations and use only a quality tool. If you do not feel confident that you can perform all the procedures correctly, it is better to entrust the replacement of the chain to specialists. In a motorcycle service station, they will help you make repairs within a minimum time, and they will also give a guarantee of the reliability of the transmission.
Most car enthusiasts believe that an oil filter puller is a useless tool that, if anyone should have, only car service workers. Drivers who have already encountered a problem when changing engine oil on their own when the filter cannot be unscrewed manually have already acquired a suitable puller. Picking up this tool is not so easy: there are many modifications on the market, but not all of them will be suitable for servicing a particular car model.
Types of pullers manufactured industrially
Depending on the design features and dimensions of the filter, pullers of one kind or another are used to unscrew it. Their body or base is usually made of steel and protected with a matt or silver chrome finish. A number of products, if provided for by the design, have plastic lining on the handles, which greatly simplifies the work with such a tool.
Almost all pullers allow you to unscrew both oil cleaners (hereinafter referred to as cleaners) and oil cups - filter housings with a replaceable insert. All pullers can first of all be divided into universal and designed for unscrewing filters of only one diameter or type.
Among the first, the following main types are distinguished:
- crab;
- belt;
- chain;
- tape;
- sickle-shaped and in the form of pincers;
- with 2 adjustable grips.
Their versatility is relative - not every filter can be unscrewed with them. Firstly, because they are designed for a certain range of cleaner diameters, and for some pullers it is wide enough, while for others it is not very wide, and secondly, because of their own design features and dimensions. After all, the location, as well as the availability of the filter on different cars, are different, and therefore it will be easy and simple to work with any tool in one engine compartment, and perhaps even impossible in another.
Only one type of tool is classified as a narrow profile - the “cup” oil filter pullers. They got this name for their appearance, reminiscent of the kitchen appliance of the same name.
The design and method of using the "cup" puller
This type of puller is produced for filters of all sizes, but each individual cleaner is only of one diameter. Therefore, when buying a cup, you need to be especially careful. This key should ideally fit the filters installed on the car engine. Even a difference of a few millimeters will turn the cup into a useless accessory.
Owners of auto repair shops immediately purchase whole sets of these pullers, including up to 30 wrenches for filters of various diameters. Such sets are supplied with a suitcase in which the cups are conveniently arranged according to the size numbers.
The "cup" pullers in their "bottom" have a square hole for the tip of the socket wrench. Some manufacturers additionally make a hexagonal "bottom" - for a cap tool. Many pullers, primarily their sets, come with a tip for a “cup” hole, on which a key is put on, and some come with all the necessary tools, including a cap and end.
The “cup” puller is put on the ribbed top of the filter with a wide open part, on the inner circumference of which there are edges. They must match those on the cleaner in quantity and size. Otherwise, the puller will not fit snugly and unscrewing the filter will be difficult or impossible. " Cup" is considered the most convenient instrument. It is compact in itself and with it, as a rule, it is easier to "crawl" to the filter. Moreover, a properly selected "cup" never slips relative to the circumference of the filter housing, which sometimes happens with some other types of pullers.
Details about the universal "crab"
The “crab” puller consists of two plates, which are the body, and 3 grippers installed between them. On the working surface of the paws there are notches that prevent them from slipping over the filter surface. The grippers are controlled by means of a clamping mechanism located in the middle of the crab body and between the swivel mounts of the paws.
The mechanism itself, as well as the puller as a whole, is actuated by a special attached key - this is one of the design varieties - either by an end or cap tool, under which a corresponding tip is provided that comes out of the body. The scheme of working with the "crab" is identical to the process of unscrewing the filter with a "cup" puller. You must first fasten it to the end of the cleaner. It is in this part of the work that the “crab” is fundamentally different from the cup, which makes it universal. In the initial position, its paws are moved apart and are able to cover the filter of the maximum diameter allowed for its design.
After throwing the grips onto the smaller cleaner, the clamping mechanism is activated. In this case, the “crab” will be able to capture the filter, the diameter of which corresponds to the minimum allowable for the puller design. After the paws grab the cleaner, you must continue to work with the key, put on the clamping mechanism drive. This will unscrew the filter. Moreover, the stronger the applied force, the more reliable the grip of the paws of the “crab” will be - slippage is excluded.
Depending on the “crab” model, it can be used to remove and install filters having a diameter in the range of 60–125 mm. This puller, like the "cup", is very good when working in a narrow and limited space.
What do you need to know about the rest of the pullers?
The oil filter chain puller, depending on the design, allows you to unscrew and tighten filters with diameters ranging from 60–140 mm. It is a handle and a chain attached to it at one end, which acts as an adjustable grip. Most pullers are equipped with a single row chain, but there are models with a double row. The second end of the grip, depending on the design, can be free or passed through a special groove located in the handle and having a lock.
At the first version of the puller, before unscrewing the filter, the chain is tightly wound around its body, almost to the end. The remaining segment of the grip is hooked to the hook on the handle. After that, the puller rests on the filter and acts like a lever. The second version of the tool has a ready-made loop from the chain, which has adjustable dimensions and immediately pounces on the filter. After that, pulling the end of the grip passed through the groove, tighten the loop and press on the handle of the tool in the right direction. At the same time, the groove lock securely holds the chain, preventing it from loosening its grip.

Belt pullers have a working diameter range of 25–160 mm. A special belt is installed in them to capture the filter, forming a loop. It can be fixed at both ends in a square steel bar. A belt is wound around it after a loop is thrown onto the filter. Then a suitable key is thrown onto the rod and the cleaner is unscrewed. Another type of puller is similar in design and use to the second type of chain tool.
The working range of tape filters is one of the narrowest - the difference between the minimum and maximum allowable filter diameters can reach only 30 mm. They use a band of steel or plastic fixed at both ends to the handle and forming a loop, which in some designs can be slightly adjusted in size. After throwing the grip on the handle, force is applied and it acts like a lever. The density of filter coverage is achieved in some designs with a screw on the handle, and in others - due to natural tightness when unscrewing. Most pullers of this type most often do not cope with filters that are too tight.

The sickle-shaped and pincer-shaped tools have 2 working curved jaws with notches and 1 or 2 handles. Their working range of capture is also small, in some designs it is adjustable. They work with these pullers, as with ordinary pliers - they grab the filter, squeeze it and turn it off.
The puller with 2 adjustable jaws consists of a thick narrow base plate, a screw and paws with notches on the working part. The threaded ends of the grips are moved in the longitudinal slots of the base and fixed in the desired position with a nut. When tightening the screw passing through the thread of the hole in the center of the plate, after it is firmly pressed against the filter, the latter is unscrewed.
Do-it-yourself belt puller - there is nothing easier
To make this key with your own hands, you will need a steel hexagon. Its standard size can be 19 or 17 - under the appropriate key, to whom it is more convenient. We cut off a workpiece about 150 mm long or another size from the hexagon rod. This must be determined by trying on in the engine compartment of your own car, so that it is as convenient as possible to unscrew the filter with a manufactured puller.
Then, along the hexagon in the middle, we make a cut with a grinder 55–60 mm long and 5–6 mm wide, which should pass through opposite corners of the section and parallel to the side faces of the bar. After that, we process the workpiece on emery - we remove sharp edges and burrs. Taking an old but undamaged car seat belt, cut off a piece of the desired length from it, depending on the diameter of the installed filter. The longer the length of the belt, the more versatile the puller will be, but it will also become less convenient to work with it when unscrewing small cleaners. In the general case, a piece of 500-550 mm is enough.

We insert the belt into the slot of the workpiece, align and center in it. Then, on the hexagon opposite the belt, we make markings for drilling 3 holes at equal distances from each other. We remove the belt from the cut. We drill through holes with a diameter of 5.5 mm. After that, on one side we expand the holes to 6.5 mm. Reaming is performed only up to the slot. In holes with a diameter of 5.5 mm, using a tap, we cut an M6 thread.
We melt both ends of the belt with a lighter so that they do not bloom, and then we put them together and thread them into the cut of the hexagonal blank opposite the holes. Got a loop. The ends of the belt opposite it should protrude from the slot by about 10 mm. We take a nail, and preferably a steel bar 6 mm in diameter, heat it well and, pushing alternately through 3 openings of the hexagon, burn holes in the tape with it. It should be burned through, and not perforated, so that the belt in these places does not delaminate and does not fluff.

Carefully, so as not to displace the loop, we put the future puller on the anvil and use a hammer to clamp the belt into the slot. Then we screw 3 bolts into the holes of the hexagon. They must be M6 threaded. The self-assembled oil filter belt puller is ready to use. The procedure for working with such a key is as follows. We put the loop on the filter, and then we begin to wind the belt around the hexagon. To unscrew it, do it counterclockwise. When the belt is fully wound, you need to take the key (17 or 19), put it on the hexagon and unscrew the filter.
If the belt option did not justify itself, we make a chain
To make your own chain puller, you will need a piece of half-inch or inch used pipe with uncorroded, undamaged walls and threads at one end. The length of the piece must be no less than the height of the filter. We select a suitable plug for the pipe so that it is wound onto its thread. You will also need a bicycle chain.
We drill a hole with a diameter of 9 mm in the center of the plug. With the help of a triangular file, we give it a square shape with our own hands. Processing is carried out until the dimensions of the hole begin to fit under the ratchet, or rather, under its limit switch. The latter should fit into the resulting opening of the plug rather tightly, with almost no backlash. We wind the plug onto the end of the pipe and tighten it very tightly. So that it does not unscrew when using the puller, it is recommended to grab it to the pipe by welding.
As a last resort, you can try to crush the metal at the end of the thread using a blunt chisel and hammer, but only carefully so as not to deform the pipe. We make markings on the pipe for drilling holes for the chain. For a reliable grasp of the filter, 2 of its segments are sufficient, mounted on the puller opposite the opposite ends of the cleaner. But you can also make a 3rd hole, between the 2 extreme ones, under another 1 chain. In this case, the puller will become more versatile, as it will allow you to unscrew filters with different heights.

Having passed a chain through one of the drilled holes in the pipe, we throw it around the filter with a loop, trying on how long the pieces will be needed. We measure so much that the puller in the unclenched state is freely worn on the cleaner. You can even make some margin of the chain along the length for filters whose diameter is larger than that installed on the car. But keep in mind that it will be less convenient to work with such a puller. According to the measured length, we disassemble the chain into separate fragments - we squeeze out the pins and disconnect the links in this place.
Having passed the obtained segments through the holes in the pipe, we make loops out of them - we connect the links of the ends and press in the pins. To unscrew the filter, we put the puller loops on it and, if necessary, when the chains are too long, manually turn the pipe counterclockwise, thereby choosing the slack. Then we insert a ratchet into the plug and with its help we begin to dismantle the cleaner.
Despite the rather large variety, in the construction market, of tools for screwing or screwing various pipe connections, experts pay special attention to the chain wrench. The chain wrench is a prominent representative of a hand-held metalwork tool designed for installing pipes or fittings in hard-to-reach places. Such equipment allows you to work in conditions where the use of a standard adjustable wrench or sponge wrench is impossible.
Design features
The simplicity of the design of the chain wrench makes it very convenient and quite easy to use. Any of its models consists of a clamping mechanism and a handle. The clamping mechanism includes a chain and "cheeks" attached to the handle with bolts. The main element in the design of the chain wrench, of course, is a metal monolithic handle. At one end of its base there is a threshold, which serves as a kind of support for pipes. On the nut there are special notches that protect against the occurrence of scrolling of the pipes being held. The next important element is the chain. During operation, it wraps around the workpiece along the entire diameter. The chain is attached to the base of the key with a retainer that allows you to hold the generated voltage.
Special jaws and an adjustable flexible chain provide the necessary fixation of the pipes.
Due to the absence of any fixed elements in the design of the key, it is possible to work in confined spaces.
To use a chain wrench, it will be enough if there is a distance equal to the thickness of the chain between the structural parts and the pipe. In operation, the chain encircles the desired product around the perimeter, and the threshold in this case acts as a special obstacle when sliding. In turn, the lock that fixes the chain in a predetermined position does not allow the initial girth of the pipe to weaken. Due to the uniform distribution of the applied forces over the area of the products, the risk of various deformations or damage is eliminated.

The principle of operation of the chain wrench is as follows: the chain, fixed on the handle, is thrown over the pipe and tightened tightly, resting directly on the material with the sponges. Then, when applying efforts (pressing the end of the handle), the key turns in the required direction. At the same time, the jagged ends of the "cheeks" rolling over the product provide its maximum clamping with subsequent self-braking. The chain in this case acts as a fixing element. Usually it comes with a margin and, if necessary, can be easily replaced.
Working with a chain wrench is simple, but you should remember a few simple rules:
- thoroughly clean the teeth of debris that has fallen into them before and after finishing work;
- it is strictly forbidden to use any gasket materials between the pipe and the chain;
- do not increase the wrench lever with additional pipe cuts. This may break his handle.
Caution should be exercised when using this tool when working with parts with high finish parameters or with thin-walled pipes. Significant compression can lead to abrasion of surfaces or collapse of the product.
The main materials in the manufacture of chain wrenches are aluminum and steel. Keys made on the basis of high-strength steel will last a long time. To facilitate the design of the key, aluminum is additionally introduced into the composition, but this does not affect the strength characteristics in any way. Aluminum allows to reduce the total weight of the key by an average of 40%. Often aluminum is used in the manufacture of handles.

Specifications of the chain wrench
In the operation of the chain key, the following main parameters are distinguished:
- the ability to use the tool in places with difficult access;
- for small loads, the wrench is equipped with a one-piece forged alloy steel handle and a special sponge;
- the key works with any metal pipes of various diameters;
- for heavy loads, some chain wrench models have variable (double) jaws made from the same alloy steel. Such a key is considered indispensable when it becomes necessary to have a sufficiently rigid grip of the key with the pipe. In order to increase the amount of effort applied, an extension arm can be additionally used. Depending on the nature of the work, the chain wrench can be modified by placing replaceable jaws in the structure.
As with any other locksmith tool, the quality of the chain wrench itself is a very important factor. Many mistakenly believe that the main criterion for choosing a chain wrench is the allowable opening size. However, it is not. When choosing a tool, you should be based on the quality of the key, especially on its handle and "cheeks", since, as a rule, most of all loads are placed on them. It is very good if the key is made of high strength steel. In the future, this will determine its wear resistance in operation. Also, when choosing this type of equipment, you should pay attention to the trademarks of world famous manufacturers that have long earned the trust of many consumers.

To date, both classic and lightweight key models are produced. Often, standard models are characterized by a greater mass than lightweight keys.
The most famous brands that are in demand among buyers include RIDGID, REED, SPARTA and STAYER chain wrenches.
The most reliable keys, known to professionals all over the world, are currently RIDGID. This company produces more than twenty types of different keys. The products of the world leader are characterized by high strength, reliable grip for pipes of different diameters, as well as an ergonomic handle and its length.
The choice of such a tool is quite wide, so be sure to weigh all the pros and cons before settling on any particular manufacturer.


