Options for thoughtful layout of tiles when finishing the bathroom
Ceramic tiles are an ideal finishing material for bathrooms, showers and bathrooms - rooms with high humidity and special requirements for sanitary and hygienic conditions. In addition, the assortment of ceramics produced by manufacturers in terms of the artistic component will satisfy every taste, and there are many options for resolving the issue of aesthetics of tiled cladding. However, choosing the format, size and color of the tiles correctly, it is possible, in addition to the decorative component of the finish, to simultaneously improve the situation with other parameters of the room.
In new buildings, sanitary rooms are quite spacious, while in older houses, bathrooms are often combined with a bathroom, have the minimum allowable or disproportionate dimensions. In situations where it is unrealistic to fix this by redevelopment of housing, they try to change the visual perception of such shortcomings, to mitigate the negative effect of crowding and disproportion. This can be done by certain rules, tile layout options in the bathroom, taking into account the dimensions of the room, their proportionality and the purpose of the correction.
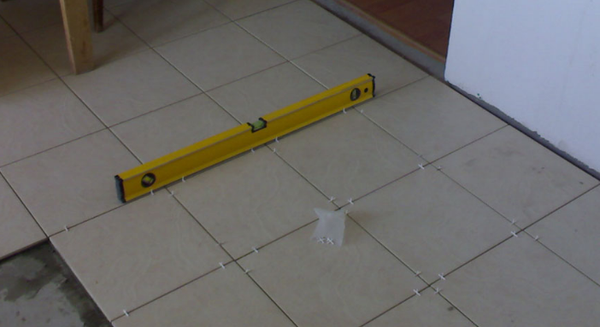
It is much easier and more profitable to think over the original layout in advance
Consider the common ways of laying ceramics that allow you to disguise the flaws in the geometric characteristics of the bathroom, the pros and cons of their use, as well as recommendations for enhancing the effectiveness of corrective tile laying in relation to each problem.
Methods for monotonous tiling
If the decoration of the room is carried out from one or two types of plain tiles of the same format and size, such styling is called monotonous. Monotonous facing of bases with ceramics has been used for several hundred years and is still widespread today, since the progress of its implementation is easily controlled visually by the location of the seams, and laying does not require design preparation.
Consider the three main subspecies of such tiling.
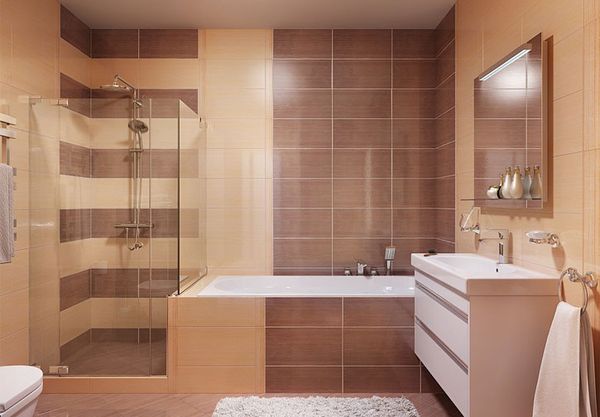
This is the most common type of tile laying, in which the vertical and horizontal seams of ceramics form a grid of continuous lines perpendicular to each other.
The square format of the tile does not have any effect on the visual perception of the bases finished with it, but the dimensions of the square should be commensurate with the dimensions of the surface to be tiled. Small-format ceramics in a spacious room will look like an unnaturally large mosaic, and large-sized tiles in a small bathroom will emphasize and even enhance the feeling of tightness.
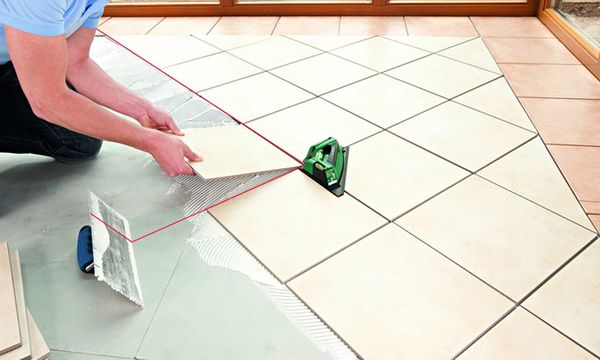
Direct laying - the easiest way in terms of technology
If the tile format is a rectangle, then you can enhance or weaken the visual perception of certain geometric characteristics of the room. For example, if the tiles on the walls of the bathroom are oriented vertically, then the room will visually lose in width and length, but add in height. With a horizontal arrangement of products, the walls will appear longer, but lower.
A feature of finishing in a direct way - the beginning of laying ceramics is made on both sides of the vertical axis of each wall, passing through the middle of the length of the base. This rule allows you to symmetrically decompose the extreme trimmed products in the corners.
The disadvantage of a direct layout is the need for a strict geometry of the corners of the surfaces to be trimmed, since an oblique cut of the extreme tiles will show deviations of the walls from the vertical, and the floor - from a rectangular format.
Tiled finish "offset" tiles
This method differs from the direct laying method only in the horizontal shift of the tile of each subsequent row relative to the tile of the previous strip by a fixed amount - a quarter, a third or half of the product.
Offset tile laying option
Laying tiles with an offset gives less of an impression of monotony than straight tiling. In addition, such a layout of tiles in the bathroom will hide minor deviations of the corners of the walls from the vertical.
The effect of using a vertical or horizontal tile orientation in "offset" tiling is identical to that of straight tiling.
With diagonal cladding, the rows of tiles on the base are arranged diagonally, while not necessarily at an angle of 45 degrees. Of the monotonous methods of laying ceramics, the diagonal one is considered the most time-consuming, since in the process of facing, in order to maintain the straightness of the seams, it is necessary to apply additional guidelines to the base, and it is more difficult to make the correct fit of the extreme tiles in the corners.
Diagonal floor tiles
In addition, with this method of finishing, the stock of material for trimming and fitting is taken in the amount of 15% of the area of the surface to be lined, and with straight and "offset" - 10%.
Diagonal laying successfully masks the deviations of the corners of the walls and floor from the value of 90 degrees, and the feeling of monotony of such an arrangement of tiles is minimal.
In a diagonal way, not only square tiles are laid, but also products of a rectangular format. Close to the vertical or horizontal orientation of the tiles also allows you to correct the visual perception of the shortcomings of the dimensions of the room. It should be borne in mind that the diagonal rows of both vertically oriented and horizontally laid ceramics will simultaneously "raise" the ceiling and "push the walls" of a small bathroom, only vertically laid tiles will do this more efficiently.
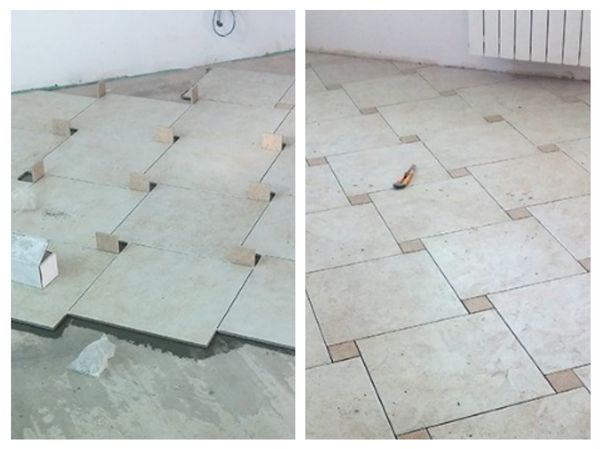
Combinations of monotonous tile layout
Three methods of monotonous ceramic finishing can be successfully combined, achieving a reduction in monotony, an increase in aesthetics and smoothing out visual discomfort from cramped or disproportionate dimensions of the room.
For example, we will describe how to visually expand the space of a cramped bathroom, “raise” the ceiling and reduce the monotony of the cladding:
- tile the walls of the room from the floor to the height of the bathtub with tiles slightly lighter than the floor and oriented horizontally;
- lay out 1-2 rows of tiles (border, frieze) of a contrasting color around the entire bathroom;
- continue laying ceramics of the same format and size, but of an even lighter tone, up to the ceiling, using the “diagonal” method and oriented close to the horizontal position.
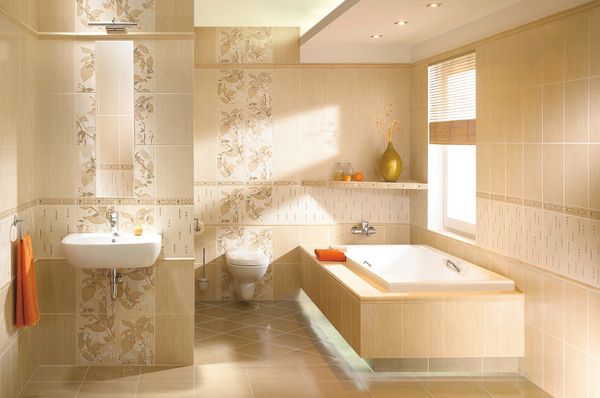
As can be seen from the example, it is possible to combine not only laying methods, but also the color and pattern of the ceramic finish. In addition, the well-composed use of larger tiles in the upper half of the walls than in the lower tier even creates the effect of expanding the space upwards.
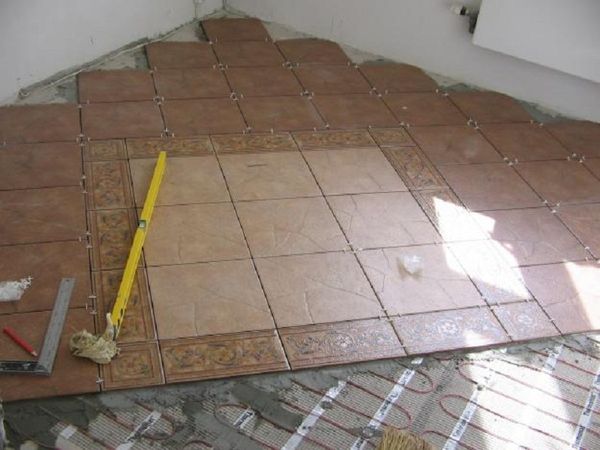
Several tile sizes allow you to create a dynamic original pattern
There can be many combinations of monotonous tile laying methods. It is important to decide which geometric characteristics of the room need to be visually changed, whether it is possible to achieve the desired degree of correction by corrective tile layout, and then select the best options for tile layout in the bathroom.
Ways to visually increase the height of ceilings
In addition to the vertical orientation of the rectangular facing tiles, a visual increase in the height of the ceilings can be achieved by laying out vertical strips-panels 15-40 cm wide from tiles in a contrasting color, in harmony with the main background of the walls, on a light wall background.
The room will also become visually higher if, when decorating the walls, horizontal stripes of the same width are used, but with a smooth change in tone from bottom to top from dark to light.
To visually increase the height of the ceiling, you can make vertical stripes
You can also “lift” the ceiling if you place an artistic ceramic panel on the wall depicting something narrow and tall: ribbon-like algae, pyramidal trees, a heron, a stork, a giraffe, and so on.
The most effective way to make the ceiling higher is to finish it with mirror tiles or mirror panels.
The effect of such a design exceeds all expectations, but you should be prepared for significant costs for the purchase of the necessary materials and the implementation of finishing using special technologies.
Techniques for visual expansion of the room
To make the room visually more spacious, in addition to the horizontal orientation of the tiles, horizontal stripes along the entire perimeter of the walls, made of dark, in harmony with the main light background of the walls, ceramic tiles will help. The border may differ in color from the tiles of the other stripes, but it must also be dark. However, in the colors of the wall cladding, the dark tones of the stripes should not prevail over the light ones, otherwise the effect of such stripes will be exactly the opposite - the room will visually lose in size.
Wall decoration with mirror tiles, especially large-format, laid out in an orderly manner, in combination with colored ceramics, as well as a mirror ceiling, is in the first place among the ways to solve the problem of tightness in a small room.
Basic requirements for laying ceramic tiles
When setting the task of tiling a room with ceramics and visually correcting the flaws in the geometry of the room, we must not forget about the basic layout rules that apply in any situation:
- proportionality of the format and dimensions of the tiles to the dimensions of the room;
- refusal to use dark colors in small rooms;
- exclusion or minimization of the use of narrow strips of tiles in open areas.
Light tiles visually expand the room
Otherwise, the aesthetics of ceramic cladding will be sacrificed for visual correction, the use of which often does not live up to expectations.
Conclusion
Corrective tile layout in the bathroom is not a radical means of combating tightness, and the effect of its application has its limits. But, regardless of the degree of effectiveness of the chosen layout, the correct layout of ceramics in any case will save you from making mistakes in the design, emphasizing the flaws in the geometry of the room.


