Laying tiles on the floor in the bathroom and toilet
The most practical and durable flooring in rooms with high humidity and high traffic is ceramic tiles. It is easy to clean, does not absorb grease and dirt and is highly moisture resistant. It is due to its moisture resistance that tiles are often laid on the walls and floor in the bathroom. But before you put this finishing material with your own hands in the bathroom, you need to learn how to do it right. By the way, the main drawback of tile is that the cold surface is easily eliminated with the help of a heated floor system. Therefore, it can be argued that such a product is an ideal material for a bathroom, bathroom, kitchen, hallway or corridor. The video at the end of the article will help you understand more clearly how to lay tiles on the floor in the toilet or bathroom.
Base Requirements
If everything is more or less clear when laying tiles on walls, then before putting this material on the floor, you first need to deal with the base. Laying such a product in the bathroom is allowed on monolithic cement screeds and subfloors. The main requirement for any foundation is strength and evenness. Therefore, before you start laying the elements on the old screed, you need to check it for reliability and evenness. All cracks, potholes and crevices must be repaired, peeled concrete removed, and the surface leveled and primed.
When laying tiles on a rough wooden floor, all floorboards must be checked for strength, rotten ones should be replaced, and creaking ones should be more firmly attached to the logs. To level such a base, you can use chipboard or plywood.
When laying tiles in the bathroom with your own hands, it is imperative to make waterproofing. In this case, the waterproofing material must be installed on the walls of the room. For these purposes, you can choose coating compositions, penetrating waterproofing or roll materials.
Styling nuances
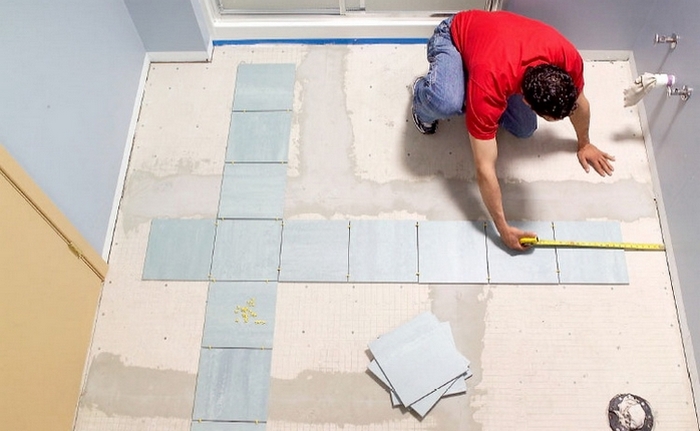
To properly make a tiled floor in the bathroom with your own hands, you need to start laying products from the center of the room. For this, marking lines are drawn from the middle of each wall. At the intersection point we get the center of the room. If the walls are not parallel, then we find the center by connecting the corners of the room with lines. When we have found the center of the bathroom, masonry can be done in three ways:
- the central point of the room coincides with the center of one of the elements;
- in the center of the bathroom is the middle point at the junction of the edges of two adjacent tiles;
- four elements meet at the central point.
Tip: the central point of the tile laying can be mixed in any direction, depending on the pattern, arrangement of furniture and sanitary equipment. If the masonry will be carried out diagonally in the room, then the center can also be shifted in the right direction.
How to apply glue correctly?
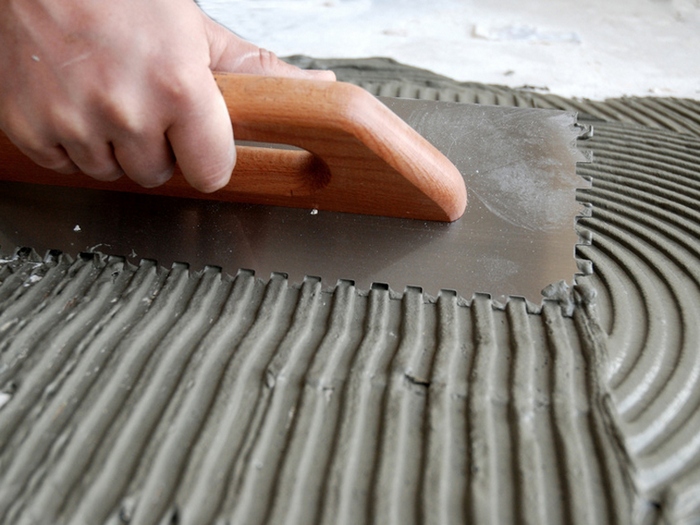
Before you start laying tiled elements in the bathroom with your own hands, you should first study the rules for applying glue. At the same time, for gluing tiles to the walls and floor of this room, the same special adhesive is used, which is applied with a notched trowel. To facilitate and speed up the process, you should familiarize yourself with the intricacies of working with tile adhesive:
- In order to qualitatively lay the elements on the walls and floor in the bathroom, it is necessary to choose the right notched trowel. To do this, using the selected tool, first apply glue to the product and press it firmly to the floor. Then immediately remove and look at the back side. The adhesive composition must be evenly distributed over the surface of the element. This indicates that the height of the trowel teeth is correct. If there are gaps between the adhesive strips, you need to choose a tool with higher teeth. If the adhesive is squeezing out from under the tile, use a trowel with smaller teeth.
Tip: the glue can be applied with any tool (trowel, trowel, etc.), but the composition can only be leveled with a jagged product.
- We place the spatula with glue at a right angle to the product and draw it over the surface. The teeth of the tool should leave the same grooves without glue. Only in this way will you be able to properly lay the masonry with your own hands.
- Sometimes glue is first applied to the floor or walls, after which the tile is applied and pressed. In order to qualitatively glue the finish in this way, after applying the adhesive mixture, no more than 15 minutes should pass. Otherwise, it will polymerize and will not adhere to the material.
- We check the horizontality of the masonry with a level in all directions.
- After laying adjacent elements, the glue squeezed out in the cracks should be cleaned with a damp cloth, since then this place will be treated with grout.
tiling
We do the laying of tiles in the bathroom with our own hands in the following sequence:
- First, we make a trial layout of the elements from the center of the room. At the same time, we maintain gaps. This will help us determine the width of the extreme products. If you want to lay out the tiles so that all the outer elements have the same width, you may need to shift the center of the layout to the side you need.
Important to know: the width of the edge tiles cannot be less than ½ of their size.
- Now the floor in the bathroom needs to be divided into two parts with a wooden slat, which we nail to the base.
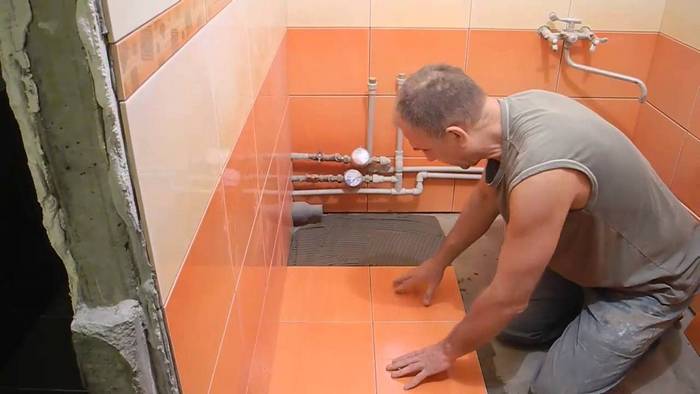
- We will lay the tiles on the glue applied to the screed. We work from the wall farthest from the entrance. We apply glue from the rail to the width of the element and a length of 1 m. We lay the first tile close to the rail. Between adjacent elements we set dividing crosses. We level the tile by level, tapping with a mallet through a piece of board.
- Thus, we lay the elements in one part of the bathroom, separated by a rail, after which you can lay tiles in the second half of the room. In this case, the glue under the first surface must dry, only after that you can remove the wooden lath. Fascia elements can be glued only after the glue has dried under the main tile. This will allow you to safely move on the surface.
- To trim the extreme elements, we use improvised materials. To do this, we place the cut tile on the last whole element in the row. To maintain the gap from the wall, we use a gasket of the required thickness. After that, we lay the ruler on the product to be cut, equalizing it along the edge of the whole tile. We draw a line along the ruler. On this line on the element and make an incision.
Attention: the outer elements are not laid close to the wall, but with a small seam.

- For cutting tiles, it is better to use a special tile cutter tool. First, an incision is made on the front side of the product, then with the help of a lever we make a break along the incision line.
- You can correctly make a curved incision using a grinder and a special disk for cutting tiles. The part of the tile to be cut must protrude beyond the workbench.
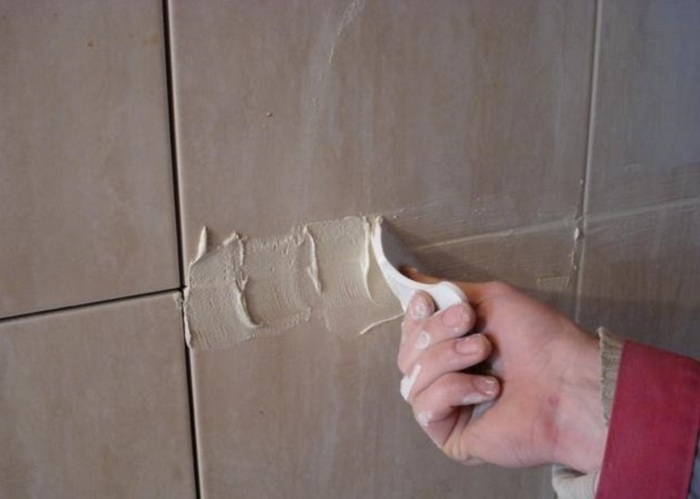
- When the masonry is completed, in a day you can proceed to grouting. The grout is applied with a rubber spatula. At the same time, try to press the composition into the seams. To evenly distribute the grout, do not apply it to very large areas at once. Otherwise, after setting, you will not be able to distribute it.
How to use grout correctly?
When the masonry is done with your own hands, it remains to apply the grout correctly so that the surface takes on a finished look. Our recommendations will help you master the intricacies of handling grout:
- When all joints are filled with grout, the excess composition must be wiped off the tile. For these purposes, you will need a special grater. It must be held at a right angle to the surface. To prevent the grout from getting out of the seams, the tool must be driven diagonally across the tile. If somewhere there is not enough grout, it can be added during the work.
- When the entire composition has been removed from the surface, the seams must be given time to dry. This usually takes 5 to 35 minutes. It depends on the humidity in the bathroom, the type of adhesive, the characteristics of the base and tiles.
- Do not wait for the grout to completely harden before using wet cleaning of the surface. Otherwise, you can only erase the grout with an abrasive tool. The fact that the grout is ready for final cleaning is indicated by its good elasticity and dense consistency. Now the surface can be wiped with a wet sponge.
Important: if the trowel reaches for the sponge during wiping, this indicates that it has not dried sufficiently.
- To remove dry grout, sandpaper and a grater are used. However, such tools can scratch the surface of the tile, so it is better to use a regular grater with a grid. After such removal of the dried composition, wet cleaning of the surface is used.
Sometimes in the bathroom, after using the grout, additional protection of the joints is performed using a sealant. This mixture is applied only after a thorough cleaning of the seams and the surface from excess grouting material. In this case, the grout in the seams should dry completely. This usually takes several days. To apply the sealant exactly to the seam, use a thin brush. If you want to protect the surface of the tile, then a roller is used for application.
Video guide for laying floor tiles:


