Mosaic tiles in the bathroom
Finishing rooms with high humidity or direct contact with water is difficult to imagine without the use of ceramic tiles. Both of these factors are present in the bathroom, so decorating it with mosaics, as a type of ceramics, is quite justified, and the artistic diversity, the affordability of many types of prices and the possibility of laying mosaic lining with your own hands make this material popular.
The mosaic impresses with its decorative effect and original appearance.
Let's consider what a mosaic is, the varieties of this material and the features of bathroom mosaic finishing technologies, depending on the types of chips (mosaic elements, mosaic modules).
What is a mosaic
A drawing, pattern or ornament made of small colored pieces of some material fixed on a plane is called a mosaic. The same name is used to denote the technology for performing such work, the finishing material itself and its individual elements (chips, mosaic modules).
Of the many varieties of mosaic technologies, do-it-yourself block (matrix) mosaics and mosaic decoration from multi-colored tiles cut or broken into pieces have become widespread.
Let's take a look at these two technologies.
Mosaic for the bathroom comes from different materials, a variety of textures and color palettes.
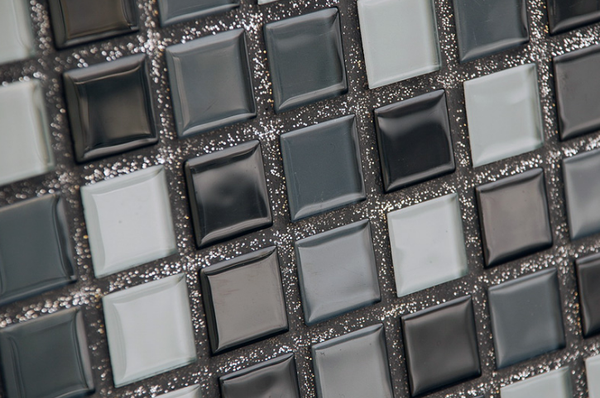
The bases are finished with block mosaics by laying matrices 327x327 or 200x200 mm in size on the walls or floor, which are pieces of mesh or paper on which mosaic chips of similar color are fixed in an orderly manner. If necessary, the matrix can be cut with ordinary scissors along the grid or paper to give it a different format. Mosaic tiles can be cut or pricked with special nippers. The format of the chips is a square with a side of 10, 15 or 20 mm.
Varieties of matrix mosaic by material
According to the material of manufacture, mosaic tiles are divided into the following types:
- glass;
- smalt;
- ceramic;
- porcelain stoneware;
- stone.
In addition to those listed, there are also metal, mirror and even gold mosaics, the laying of which requires professional skills, and the cost of the material is many times higher than the price of the usual varieties of mosaic lining.
In matrix panels, the mosaic is laid out in straight rows, at a cost it is the most economical
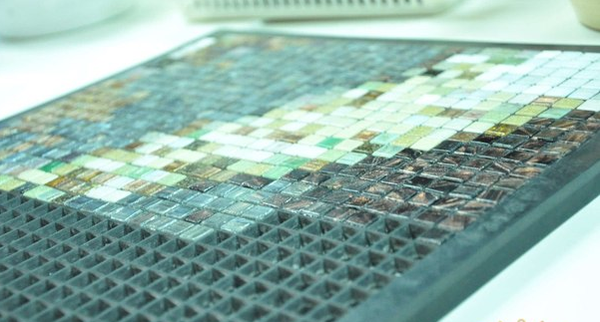
Mosaic material from self-cut ceramic chips
This method of finishing, although it cannot compete on equal terms with the technology of facing with mosaic blocks in terms of aesthetics, is perfect for repairing a bathroom or a bathroom in the country. The material for such a cladding is made by hand - the chips of the desired size and shape are cut with a tile cutter from the ceramic remaining after the repair or substandard tiles purchased at a reasonable price. The modest cost of this type of finish makes laying such a mosaic popular among craftsmen, and with a sufficient assortment of homemade chips and skills to perform this work, the result can even exceed expectations.
Matrix mosaic cladding
Consider the laying technology used for do-it-yourself facing of surfaces with popular types of mosaics, taking into account the characteristics of the tile material.
The preparation of the base for the mosaic does not depend on the material of the tile and consists in leveling and priming the surfaces to be tiled.
The preparation of the substrate for laying the mosaic plays an important role in how the mosaic will look later.
Preparatory work on the walls
You can level the base for the mosaic decoration of the bathroom walls with your own hands using any of the known methods, even with drywall sheets (GKL), since the chips do not require a high bearing capacity from the base. But when choosing this method, it must be taken into account that even moisture-resistant drywall (GKLV) does not tolerate direct contact with water and therefore needs enhanced waterproofing of both sides and ends of the material. Therefore, if it is possible to make leveling by plastering, then this reliable method should be preferred.
The priming of the walls is also done by hand with a moisture-resistant primer in two layers. As a primer, it is advisable to use an aqueous solution of latex, prepared in a ratio of 1:3.
Preparing the floor for laying the mosaic
Do-it-yourself bathroom floor surface is leveled with a screed from a cement-sand mortar prepared in a ratio of 1: 3. The screed is performed with a slope device in the direction opposite to the front door, or (if any) in the direction of the ladder. The slope should be 5%. The finished screed is covered with a layer of cellophane for a week to prevent premature evaporation of moisture from the solution, after which the film is removed and the base is allowed to dry until the surface acquires a uniform light gray color.
If there are only sinks on a flat floor, then its leveling can be limited only by grouting cracks with tile adhesive.
The floor is also primed with two layers of a moisture-resistant primer.
The quality of leveling the base under the mosaic is subject to increased requirements, since laying matrices will not succeed in hiding the unevenness of the base, and the mosaic will only repeat all the defects in the surface of the walls or floor. Differences in height of the base prepared for laying under the mosaic should not exceed 2 mm per 1 m of linear length.
Adhesive compositions for mosaic blocks
When laying the matrices on the walls in the bathroom, the choice of adhesive depends on the material of the chips and the characteristics of the substrate.
Adhesives for glass and smalt mosaics
When facing bases with glass or smalt mosaics, the adhesive should be white, since laying transparent and translucent mosaic chips on dark or colored glue is fraught with a change in color and loss of brightness of the finishing modules.
Examples of white cement-based adhesives for glass and smalt chips are Litoplus K55, CERESIT CM 115 or Mapei Adesilex P10. White polyurethane adhesives Mapei Keralastic T, SuperFlex Eco or Litokol Litoacril Plus can also be used.
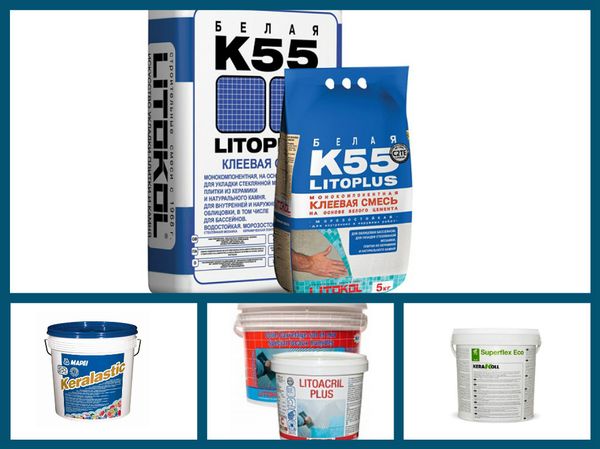
Adhesives: Litoplus K55, Mapei Keralastic T, SuperFlex Eco and Litokol Litoacril Plus
For mounting matrices with opaque ceramic chips, tile adhesive of any color is used. The selection of glue in this case is carried out depending on the characteristics of the bases of the bathroom. On concrete, cement-sand plaster or drywall protected by waterproofing, ceramic mosaics must be properly fixed with elastic tile adhesives, such as Litoflex K80 Eco, Bergauf Mosaik or Superflex K77. When tiling ceramics on complex substrates (plastic, wood), it is better to use adhesives based on reactive resins.
Adhesives for porcelain stoneware and natural stone chips
Porcelain stoneware and natural stone are close in characteristics, so the same adhesive compositions are suitable for laying blocks with chips from these materials. However, the variety of natural stone should be taken into account, as some types of natural marble may change color upon prolonged contact with water.
Mosaics made of such marble are laid on fast-curing cement-based tile adhesives, such as Litoston K98 or Litoston K99, as these compounds quickly come into contact with water, preventing the wet alkali of the adhesive from changing the color of the chips. It is also possible to use polyurethane and reactive adhesive mixtures such as LitoElastic, Keralastic T or Elastocol, which do not contain water.
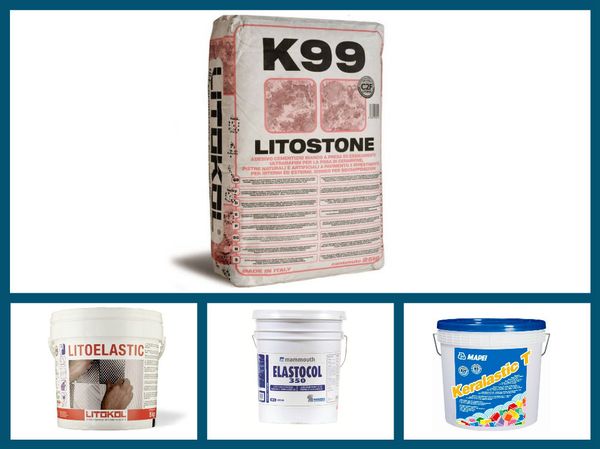
Adhesives: Litoston K98, LitoElastic, Keralastic T and Elastocol
If natural stone chips are resistant to prolonged direct contact with water, then the choice of adhesive material is made only with reference to the type of substrate.
If the surface of the walls of the bathroom is even ideally laid out with the same type of mosaic, then the result of such monotony will be deplorable - such aesthetics of the finish will ripple in the eyes. Therefore, the artistic solution for decorating the bathroom with mosaics is thought out in advance.
Elements of artistic solution
Wall cladding with mosaics can be diversified by using matrices that differ not only in color, but also in the material of the chips. In addition, when arranging such a finish, you can cut out fragments of any shape from blocks of a standard size with your own hands, cutting, if necessary, not only the base, but also the chips. In this way, it is possible to veneer the walls with different matrices in a checkerboard pattern, changing and alternating the color, material and size of squares or rectangles.
One of the auxiliary artistic elements used in the decoration of bathroom ceramics, including mosaic, is a border (frieze) - a horizontal border between lined surfaces of different colors or materials. The border on the wall can be made of various materials - tiles, mosaics, PVC (polyvinyl chloride) tiles. The adhesive for laying the curb is also selected depending on its material of manufacture.
Make sure that the distance between different sheets is equal to the gap between two mosaic chips
The width and configuration of the border should be in harmony with the dimensions of the room. At the same time, the color of the border or the background of its pattern are selected in contrast to the surfaces that it shares and aesthetically fit into the interior of the bathroom.
The horizontal laying of the curb is carried out under the control of the bubble level. If the curb is designed at an angle to the horizontal, then it is pre-marked on the wall.
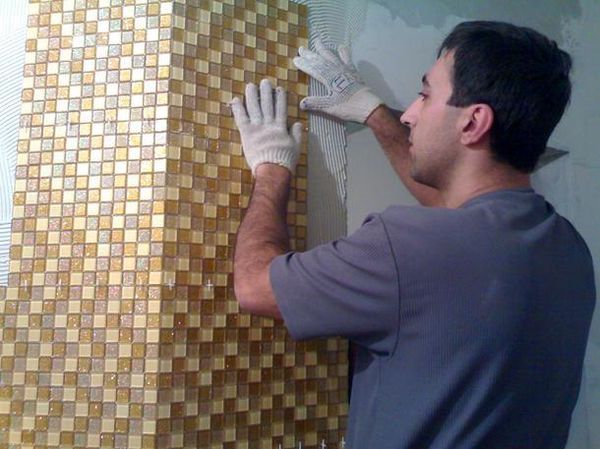
Matrices with chips are laid on the walls from the bottom up, spaced from each other at a distance equal to the width of the seam between the chips. This arrangement of blocks forms a seamless surface finish.
First you need to mark the wall
The sticker of the matrices on the walls is carried out under the control of the bubble level, the chips in a row from corner to corner should be located without differences in height. At the same time, it is desirable to place the rows of mosaics bordering the border symmetrically with respect to the ceramic elements of the frieze.
Laying on the glue of mosaic matrices on a grid basis is done with a grid down, since the chips are attached to it with the back side. Matrices on a paper base are placed with the paper up, since the chips are glued to the base with the front side.
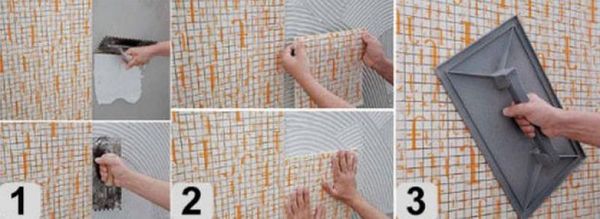
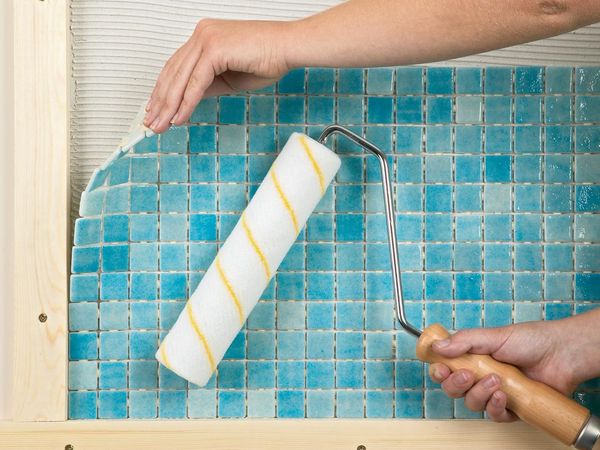
An adhesive composition is applied to the prepared wall with a flat trowel, which is leveled with a comb trowel with rectangular teeth 6-8 mm in size. The matrix is applied to the project site, slightly pressed, and then the mosaic is leveled on the base with a rubber roller without excessive effort.
Mosaic grouting
The arrangement of the seams of the borders and the mosaic decoration of the bathroom is done by filling them with your own hands with a moisture-resistant grout with antifungal additives, for example, mixtures with the appropriate characteristics from the manufacturers Litokol, Ceresit or Atlas.
Mosaic grout can be chosen to match the tile or contrast with it, it depends on the artistic solution. In addition, the color of the grout of areas of surfaces finished with different mosaics and tiles of the borders may differ from each other.
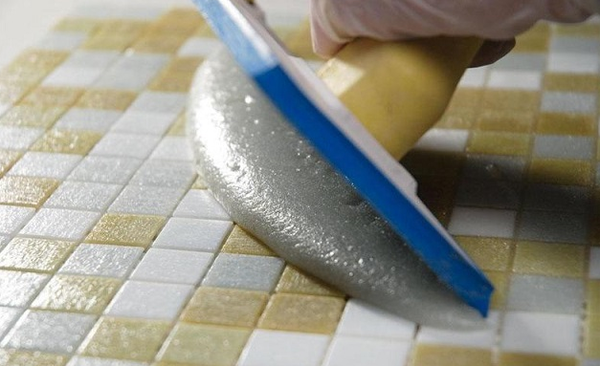
If the grout is not done well enough, you can spoil the appearance of the mosaic
The grout is laid out on the mosaic and spread over the surface with a rubber spatula, “puttying” the seams. After half an hour, excess glue that has set but not hardened is removed with a damp rag or foam rubber. A day later, the mosaic is polished with a dry soft flannel.
Conclusion
Despite the elegance, showiness and apparent complexity of the mosaic finish, this type of cladding, taking into account the modern matrix design of the chips and the availability of technology, is quite within the power of even novice home craftsmen, who improve the quality of the mosaic with each square meter of the surface finished with their own hands.


