How to start a bathroom renovation - a sequence of work
Many home masters do not know where to start repairing the bathroom and in what sequence to carry out such work. We have prepared detailed and understandable instructions.
1
The room in which we take water procedures is considered very specific. Serious humidity and temperature fluctuations are constantly present here, water flows in large volumes in it. It is clear that for the repair of such a room it is necessary to select special materials that can withstand all negative influences. To finish the premises of interest to us, they usually choose:
- plastic panels;
- porcelain stoneware;
- tiles (for walls and floors).
These materials have the required qualities that allow them to be used in a room where there is steam and high temperature.
Finishing the bathroom with plastic panels
In addition, the bathroom should have a special atmosphere that promotes relaxation of a person. So, you need to correctly think over the design of this room and choose the right color scheme for it. Most often, bathrooms are made in pastel colors that do not irritate a person, but, on the contrary, calm his nervous system after a busy day. Professional designers recommend finishing bathrooms with products in beige, blue, peach, and blue shades.
Thus, bathroom renovation should begin with the preparation of a design project, the selection and purchase of the required materials. At this stage, you will need to foresee a lot of little things and purchase a lot of various products, ranging from sewer pipes and glue for installing tiles to shutoff valves and a heated towel rail.
Now you need to decide on the scope of work and make a plan for their implementation. The sequence of self-renovation of the bathroom, as a rule, is as follows:
- Preparing the room for renovations.
- Analysis of the state of the existing floor covering and the choice of technology for its restoration or complete replacement.
- Floor repair, insulation and waterproofing.
- Installation of sewer and water pipes.
- Laying electrical wiring.
- Plastering of ceiling and wall surfaces, their sheathing with the selected material and insulation.
- Installation of an efficient ventilation system.
- Installation of sanitary equipment.
The given sequence will allow you to spend a minimum of time on giving the room for water procedures an ideal look.
2
Where to start preparing the described premises for its complete transformation with your own hands? Of course, from the dismantling of all plumbing fixtures installed in it, as well as furniture (if any), lighting fixtures, mirrors and hanging structures. If you are doing a major bathroom renovation, be sure to remove the faucets and faucets.
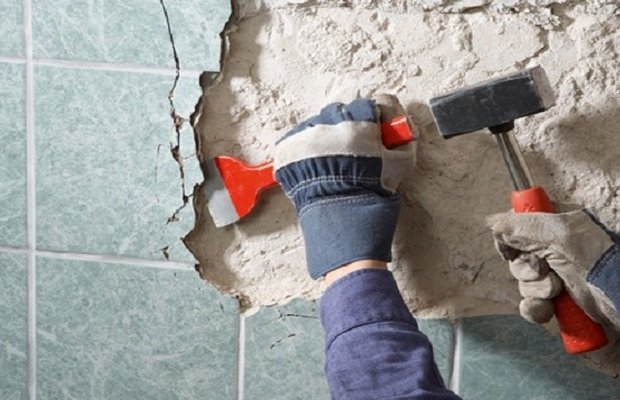
Removing old bathroom tiles
After that, proceed to remove the old finishing materials. Remove the lining from the walls and ceiling, knock down the ceramic tiles (along with the layer of glue that held them), wash off the paint. If you have a perforator, preparing the bathroom for a good repair goes much faster - feel free to knock everything that leaves the ceiling and walls. Your task is to get to the brick or panel masonry and floor slabs.
After such actions, it will be necessary that you "exposed" and carefully treat them with primers. They should be chosen wisely. Do not forget that now there are a variety of primers - bioprotective, hydrophobic, contact, increasing adhesion, strengthening. If you do not know what kind of composition you need to purchase, be sure to consult a specialist. Real help in this matter is often provided by consultants of good hardware stores.
The next step in preparing the bathroom is the revision of the flooring. When the old screed showed its best during operation (for example, you forgot to turn off the water, it flowed for a couple of hours, while not even a drop of moisture leaked to the neighbors below), leave it. If the screed has clearly served its purpose, it must be removed.
This operation is performed by a puncher with a chisel. With these tools, you can also remove the old cement substrate under the tile. Important point! If you do not touch the old screed, it is better to clean the substrate with a grinder equipped with a cleaning bowl-shaped circle (it is usually called a diamond cup). The cost of such a device is quite high. But it will always come in handy for a master who does all the housework with his own hands.
Now you can sweep away all the dirt and debris and proceed directly to the repair work.
3
- screened quartz sand;
- cement M500 (you can also take M400);
- PVA emulsion;
- water.
The ratio of cement to sand is 1 to 4. Water needs to be mixed as much as cement. It is most convenient to form a screed with your own hands using marker beacons. The mixture is applied with a layer of about 4–5 cm, rubbed with a building rule, after which it must be carefully smoothed out with a half-rubber made of polyurethane foam or stainless steel to an ideal state (no cracks, swell and other defects). Very important! A screed made on the basis of sand and cement must not be touched for 40 days. During this time, no work can be done in the bathroom.
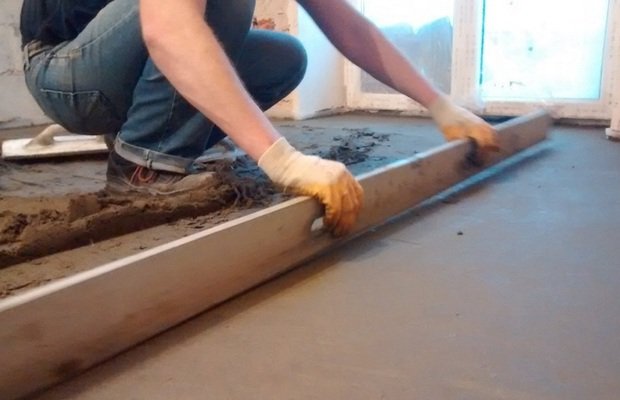
Creating a new concrete floor screed
Waterproofing a room with high humidity is best done with materials made of polyester or aquaizol. Do not use ordinary waterproof film for this purpose. Lay the waterproofing material as carefully as possible, the joints between its individual parts are connected in two ways:
- Building hair dryer.
- Adhesive mastic, which has a special composition.
On the walls, waterproofing is brought in by 25–30 centimeters. Note that cuts in the moisture-proof film are not allowed in the corners of the room. It is better to bend the insulating material, make folds. But in no case do not cut the film.
4
It is almost impossible to see open sewer pipelines in apartments these days. Such communications spoil the whole look of the bathroom, nullify all the tricks of designers. Chasing the walls in order to hide the pipes is also not an option. This procedure is very tedious, dusty and really long.
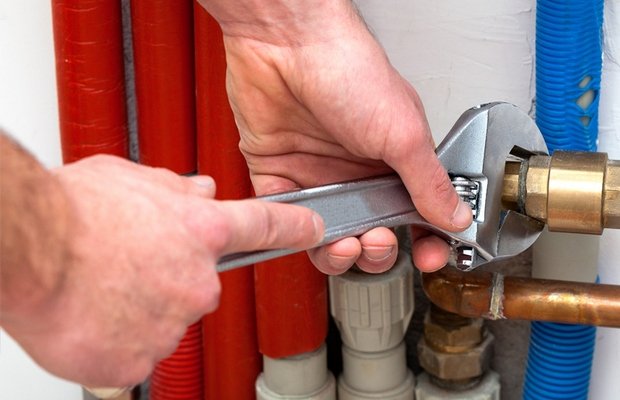
Installation of pipelines in the bathroom
For this reason, sewer pipes are now most often mounted according to a special technique - they are launched along the bottom in a bundle, and then masked with galvanized slopes. The latter can then be easily glued with silicone tiles (facing). The silicone composition is also used for fixing the slope from the floor surface and to the wall.
Unfortunately, bathroom renovations cannot be done without shaving. In any case, you will need to make two strobes for cases when a separate faucet is installed on the washbasin, or one if a common faucet is used. One thing reassures - the length of the strob will be minimal. In addition, they are located vertically. It is relatively easy to punch them with your own hands, which cannot be said about horizontal strobes.
For a heated towel rail, it is desirable to install metal-plastic pipes. It is not worth looking for other options these days. Such tubular products are ideal in operation. They can be easily bent downhill using transition fittings.
But for the cold water supply system in the bathroom, polypropylene pipes (PPN) are more suitable. They are easily welded into a solid and reliable monolithic structure, and then hidden in the walls. It should be said right away that it is advisable to purchase fittings for such pipes from solid plastic. It is not advisable to use metal reinforcing elements. They can leak at any moment. But sealed plastic will never let water through.
Installation of the pipeline should begin with the installation of sewer pipes. Using sealant and seals, you will spend no more than one day on their assembly. After that, feel free to install polypropylene products for cold water and solder them. Be sure to blow out the pipes in the strobes with mounting foam. So you will be sure that the pipeline does not fog up. Yes, and heat loss in this case will be significantly reduced. Follow the recommended piping sequence and your bathroom renovation will go faster.
Electrical wiring is carried out with a cable protected by a double insulating layer. It is desirable to place the wire in a metal or plastic corrugation. It is better to use a metal sheath, as it shields the wiring perfectly.
5
Having dealt with communications, proceed to the processing of wall surfaces. performed by two compositions - starting (it has increased tenacity) and finishing. The latter perfectly levels the treated surface. It is necessary to plaster from the ceiling to the floor.
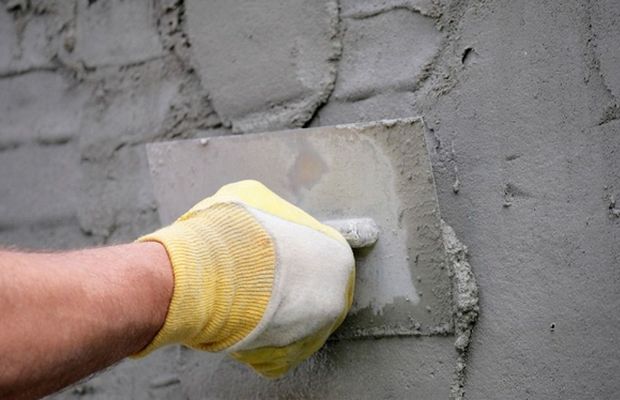
Plastering the walls in the bathroom
The following stages of repair work:
- Insulation and ceiling lining. Thermal insulation is recommended to be made in the form of a pie, consisting of two glass-magnesium sheets and a heater placed between them. Sheathing can be made with clapboard (plastic) or laminated boards, which are fixed to the ceiling with building silicone or strong mounting glue.
- Laying tiles on the floor. The sequence of the operation is as follows - mount the products on the glue, starting from the door, tap each tile with a hammer (rubber). All cut rows should be laid last and after the adhesive under the remaining rows has completely cured.
- Wall covering. It is produced with plastic panels, porcelain stoneware, ordinary tiles.
The last stages of work are cleaning the ventilation duct (or installing a new one), installing a sink, bath (shower booth), faucets, water meters. If you were able to do all the previous operations, the placement of plumbing will pass without difficulty. There are no special tricks here.
Here, in principle, is the entire step-by-step plan for self-repairing the bathroom. You just need to start implementing it and after a while enjoy the new look of your water treatment room.


