How to start a bathroom renovation
What can happen to the installed floor tiles if you start repairing the walls immediately after that? In the best case, the flooring will take a long time to clean. In the worst case, you will have to replace the floor finish in whole or in part. Therefore, when repairing a bathroom, it is necessary to clearly remember what sequence of actions must be performed.
In this article, we will understand the exact sequence of actions and answer the question - where to start repairing the bathroom?
Planning is considered the most important and mandatory step in the repair of any premises. But what is it for if you are going to renovate your bathroom? In this case, planning allows you to achieve the following:
- see the final decision;
- determine the sequence of repair work;
- determine the required amount of finishing and building materials.
Planning allows you to determine where to start. At this stage, you can decide on a suitable design solution, as well as choose the option of laying electrical wiring and placing plumbing fixtures. The project will allow you to choose the right communication scheme.
Bathroom renovation - layout
This is the longest stage, even if you are assisted by a professional designer. It is important to discard unsuitable options and settle on a suitable solution for each family member. You can proceed to the next stage only after a thorough study of this.
Purchase of materials
Do not give preference to the cheapest materials. This applies equally to building materials and finishing materials. Quality repairs are not cheap. So, when using a grout with low cost and low quality, you can lose safety. Over time, fungus may appear on the seams and behind the tiles. As a result, after 2-3 years it will be necessary to carry out repairs again.
The bathroom is a special room that has a certain level of humidity and temperature. These indicators are not constant here, but they are often increased. Therefore, it is impossible to use cheap finishing and building materials here, since they significantly reduce the duration of operation of this room. If you lay ceramic tiles on a cheap adhesive in the kitchen or hallway, it will not hurt the repair. But in the bathroom, this option is unacceptable.
You have decided to renovate the bathroom, where to start in the first place? After planning is completed, you need to move on to purchasing the necessary materials. You can save money if you use a cumulative discount system. It exists in almost any salon or large hardware store.
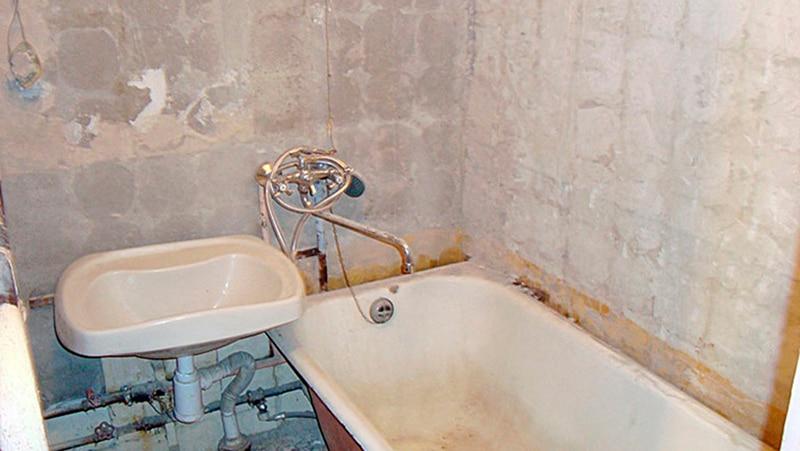
We remove everything unnecessary from the bathroom
If you want to save money, you can dismantle it yourself. In this case, the quality of the new repair will not suffer, and you will not have to pay for dismantling.
Features of dismantling in the bathroom
These jobs do not require professionalism. They must follow certain rules. When dismantling, you should not break anything. Everything needs to be taken apart carefully. It is not a matter of preservation for the purpose of further use and not for sale. The main problem is security. In case of improper work, you can not only damage the structure, but also injure yourself.

Dismantling the bathtub from the bathroom
Removal of old coatings and disassembly of the finish is carried out in a certain sequence. No matter how this process looks from the outside, it must take place according to a strictly worked out scheme. To protect yourself, you must first decide what and how to properly beat off or cut off.
If you're planning a major bathroom renovation, where do you start with the demolition work? Carry out the following sequence of actions:
- Remove all old fixtures and fittings from the bathroom.
- Remove old tiles and paint from wall, ceiling and floor surfaces.
- Dismantle the walls, if necessary for the project.
Please note that the walls are cleaned down to concrete or brick, and the floor and ceiling - to the floor slabs. Otherwise, your repair will not be of high quality and durable. But the greatest attention must be paid to the surfaces of the walls. It is important that they are perfectly even. If a deep notch or a hole from a perforator remains, sooner or later the finish will begin to deteriorate.
Another problem is the installation of hidden communications. It is important to do it correctly and very accurately. Usually, hidden communications in the bathroom are understood as plumbing and electrical wiring. They are installed in pre-made strobes.
If you want to make a major overhaul in the bath, the photos in our gallery will suggest a suitable solution. When carrying out a major overhaul, both the internal wiring of the electrician and the water pipes with risers should be changed. As for the wiring issues during the overhaul, a new input will be required.
Old wiring, as a rule, cannot cope with the load that modern electrical appliances exert. Previously, the bathroom used only lighting, which consumed no more than 200 watts. At the moment, not only more powerful lighting is being installed in this room, but also a washing machine and a tank for heating water. The total power consumption is usually at least 4.5 kW.
The increased power also dictates new safety rules that apply to both electricity and water supply. The main safety rules include the following:
- Quality grounding device.
- The presence of RCDs and circuit breakers.
- The presence of an "anti-flood" type system, which is mounted directly on the risers.
To decide where to start repairing the bathroom, the photos on our website will help you solve this problem.
Floor waterproofing
It must be carried out without fail. Thanks to the high-quality waterproofing of the floor in this room, it is possible to retain about 100 liters of water if the room floods.
This means that water simply will not penetrate to your neighbors from below. But it is unlikely to save from a large flood, which is associated with a breakthrough in the riser. But waterproofing will give the time needed to shut off the water supply. You do not have to worry about small leaks, which sometimes happen during the use of the bathroom.

Bath waterproofing
What should be high-quality waterproofing? At its core, it is a “trough”, the sides of which are the lower part of the walls, and the base of the floor is the bottom. To seal these surfaces, the following options are used:
- Bituminous mastic.
- Roll insulation.
Surface leveling
Smooth surfaces will be the key to an excellent view of the decoration of the room as a whole. You do not know where to start bathroom renovation? It is important to correctly level the surfaces before facing them. Many say that they do not need to be leveled, as this can be done during the tiling process with glue. But this is the wrong decision.
A significant layer of glue can cause it to "float". Because of this, the reliability of setting the tiles to the surfaces of the floor and walls is reduced. In addition, you will have to provide a fairly large budget for the purchase of adhesive composition.
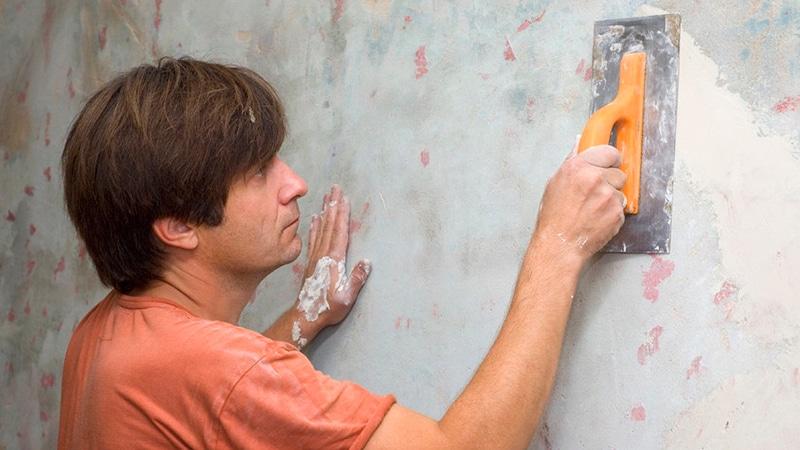
Leveling the walls in the bathroom
Leveling surfaces will be cheaper if you use drywall sheets or plaster mix for this. In this case, you will not need to buy a lot of glue to install ceramic tiles on the surface of the floor and ceiling. And proper alignment leads to the fact that the tile is glued exactly on all parts of the plane.
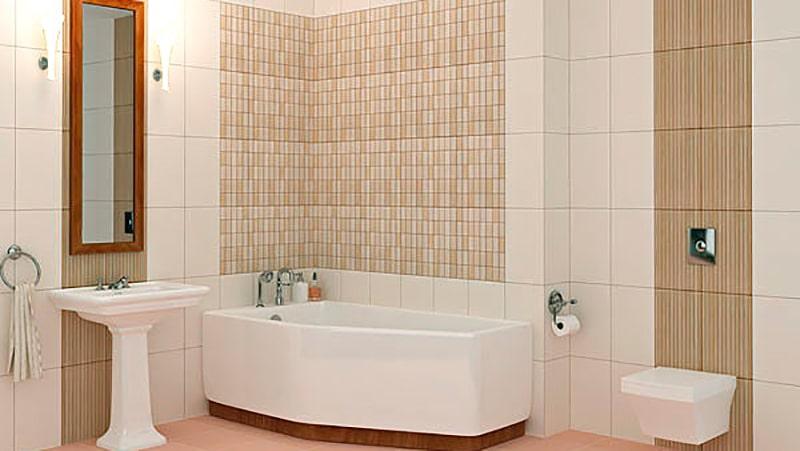
Finishing bathroom renovation
It is necessary to carry out the following sequence of actions:
- Coat floor and wall surfaces.
- Repair ceiling.
- Replace door.
- Furnish the room.
Surface cladding begins with wall surface finishing. Then finish the floor surface. After that, you can lay the bottom row of tiles on the wall. It is also called undercut. It is important to lay the tiles in this place last, as they will have to be cut in any case. After that, the tile should stand for at least 2-3 days. After that, you can start grouting and move on to other work.
Repair of the surface of the bathroom ceiling is carried out only after the completion of the finishing of the room as a whole. then install the door. It is important that it cope with high humidity. All actions must be carried out after the finishing work is fully completed.
Do-it-yourself bathroom renovation
When landscaping the premises, the following steps must be taken:
- Install plumbing fixtures.
- Install the necessary sockets and fixtures.
- Hang mirrors, shelves and other accessories.
Thus, if you follow the sequence of actions, you will carry out a quality repair. Only in this case, the new repair will serve you for a long time and will delight your family members every day.
Bathroom renovation - layout Do-it-yourself bathroom renovation Aligning the walls in the bathroom Dismantling the bathtub from the bathroom Waterproofing the bathtub We remove all unnecessary from the bathroom


