Plastic ceiling and plastic box in the bathroom.
. On this page, we will step by step analyze how to make a plastic box and a plastic ceiling from panels in the bathroom.
Bathroom in Minusinsk, plastic ceiling and plastic box.
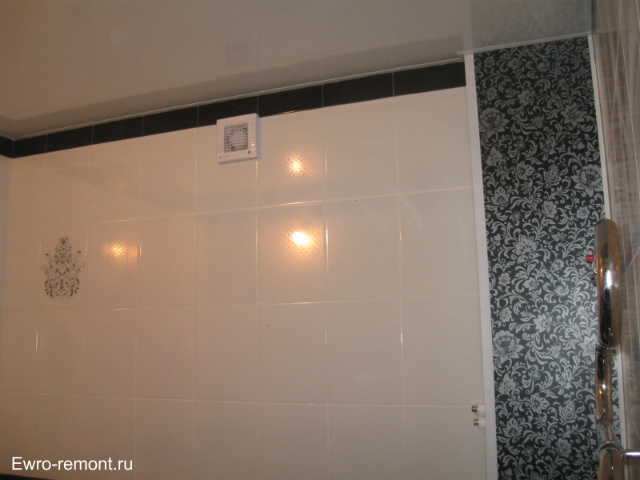
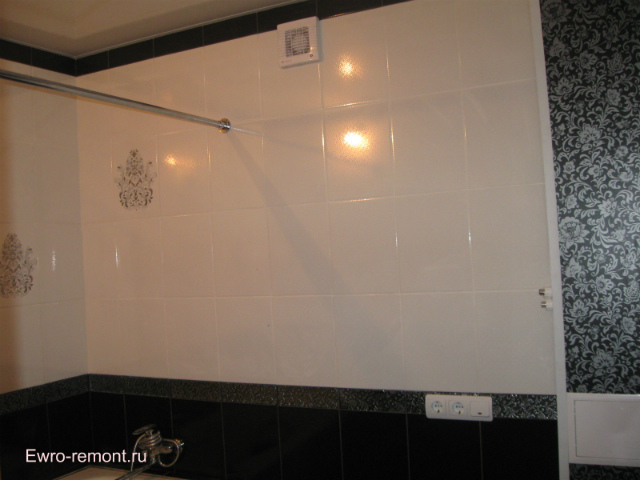
I make a plastic ceiling a little peculiar, not like in most cases, but it seems to me that this method is easier and faster than the others. The plastic ceiling is made at the end, after the tiles are glued and embroidered, electricity is supplied for spotlights (if they, of course, will be). I have a ceiling without lamps in the photo, the lamps in this bathroom are wall-mounted.
Unlike the ceiling, it is better to make a plastic box before laying the tiles. In my photo, the box was made before laying (meaning from profiles), and I closed it with plastic after laying the tiles. The pipe box is made before laying the tiles, for the reason that when laying you need to know where to glue the tiles or where to start (depending on which pattern or design).
Well, before you make a box, if necessary, you need to replace the pipes for hot and cold water, connect a heated towel rail, change sewer pipes and make pipes from meters to sanitary appliances. My photo shows a wiring made of polypropylene. In this case, I did the wiring from polypropylene and the sewer drain myself, the iron pipes and the towel were made before me.
So, the photo shows: two branches (cold and hot) go up from the water meters to polypropylene taps and from them to the outlets to the water heater. A faucet goes down from cold water to the toilet, then cold and hot water goes to the faucet to the bath, kitchen and tulip. The sewer outlet to the toilet is connected in the corner, the toilet will stand at an angle of 45 degrees to the wall.
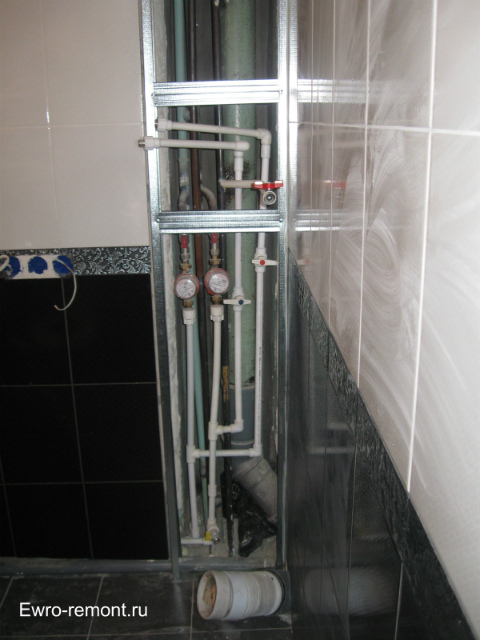
The pipe box is made of gypsum board profile 27*28 and 60*27.
Attaching the plastic panel
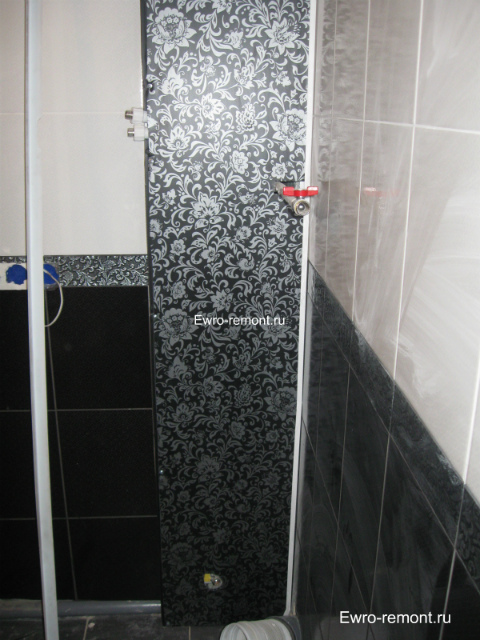
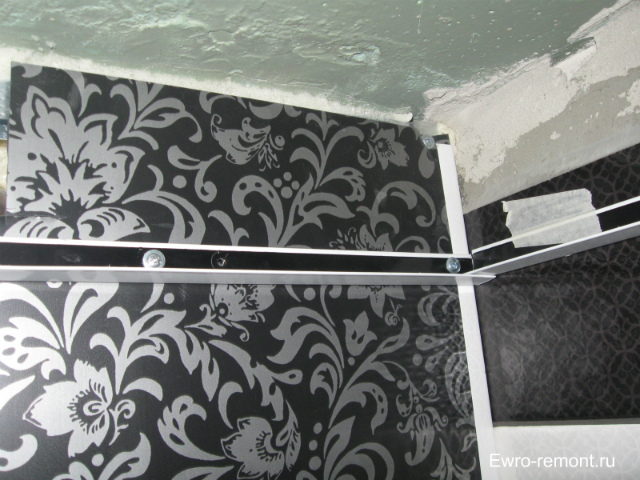
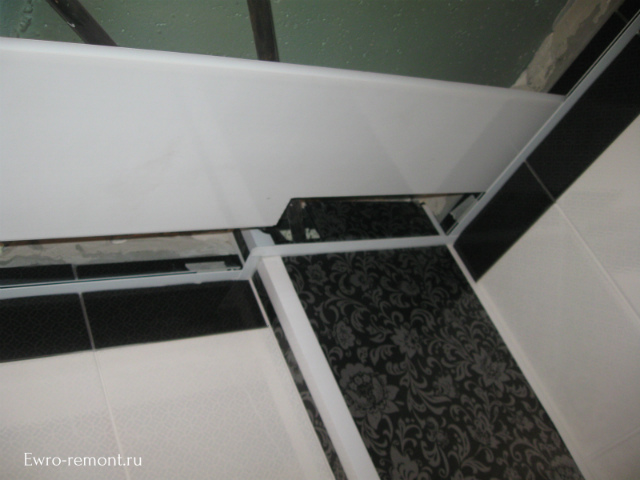
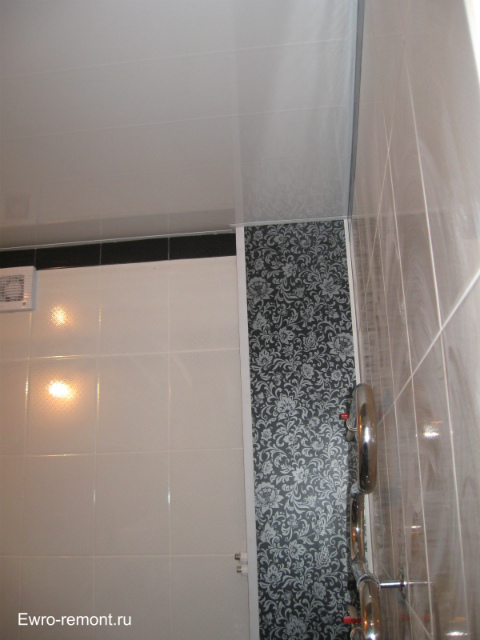
After the tiles are glued to the box, we fasten the plastic panel. Our panel is black with flowers; in terms of design, it fits very well with decorative inserts. Before screwing it on, they made a hole in it for the pipes of the heated towel rail, water meters, a hole for the cold water tap to the toilet, brought the ends of the pipes to the water heater, and inserted U-shaped plastic corners along the edges (the edge of the panel with tiles). When screwing the U-shaped corners, the edges are bent a little (carefully so as not to break), the panel is screwed to the profile with a screw (metal / metal screw with a press washer) and the edges, releasing, are smoothed by hand. If everything is done correctly, the edges should not move away from the panel anywhere.
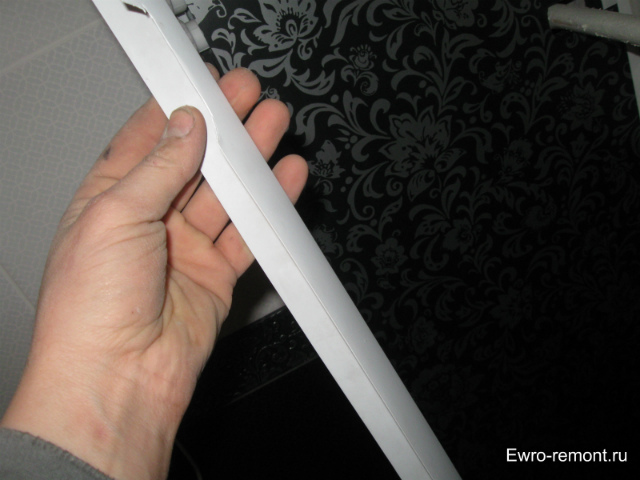
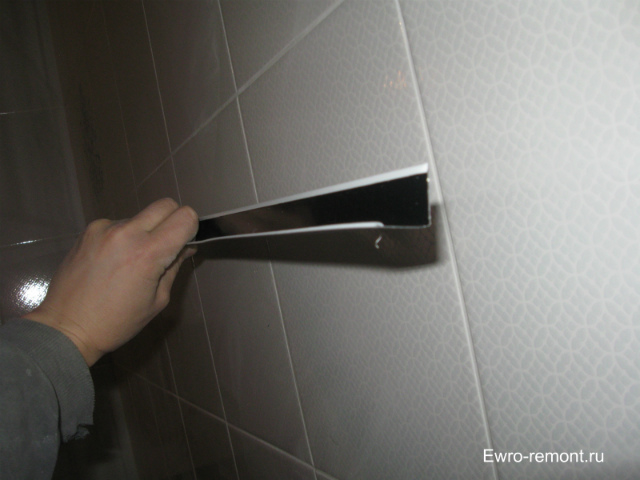
The plastic corner had to be trimmed a little
After screwing to the profile with self-tapping screws, we close the outer corner of the panels with a plastic corner, I have it 3 * 3 cm wide. I glue the corner on the “liquid nails” glue.
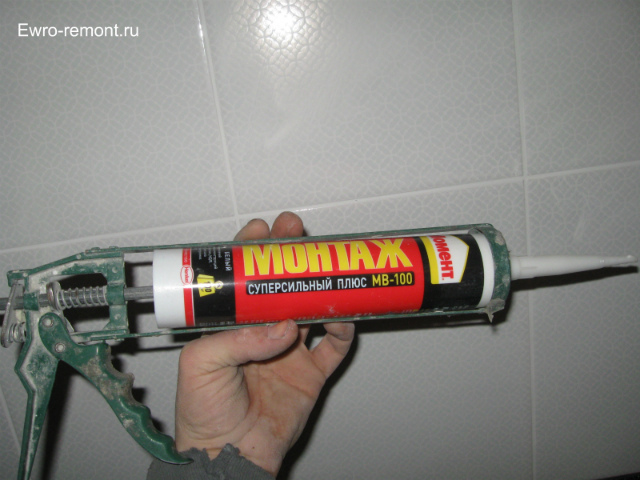
Glue "liquid nails" Moment Installation white under the gun.
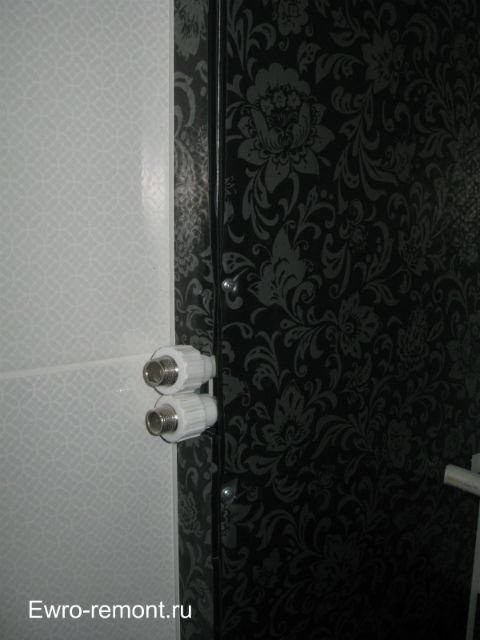
I made the holes in the plastic for the water meters to fit the size of the plumbing hatch 20 * 30 cm, taking into account that it was easy to crawl through it and turn off the taps of the water heater. The hole for the faucet under the toilet is made in the size of the plumbing hatch 10*10.
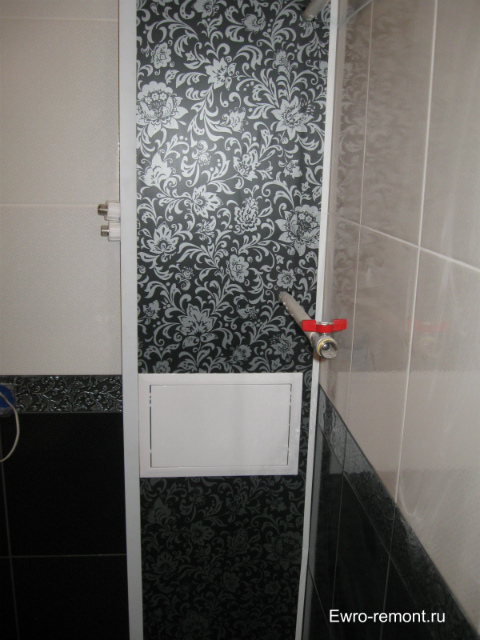
On the right, the U-shaped corner closes the edge of the plastic, on the left, the outer corner closes the plastic. The hatch 20*30 is installed horizontally.
We make the ceiling.
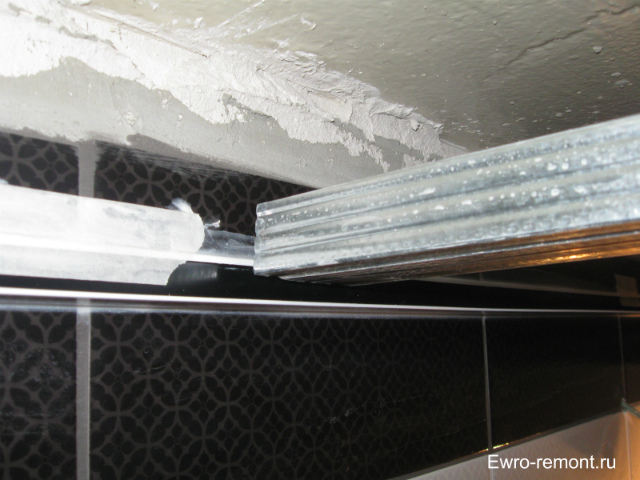
When edging the ceiling, I use aluminum corners for the slatted ceiling in white (the full name is “White edging for the slatted ceiling”). They are 3 meters long, width, in my opinion, 2 * 2.5 cm. A bath like mine takes 4 such corners.
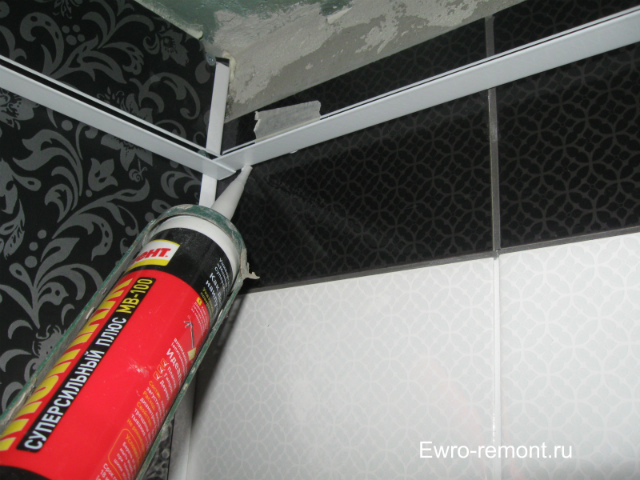
The corner is cut to length to fit the wall. On the side that will be pressed against the tile, glue “Moment Installation white” is applied (with pads) and pressed against the wall, while the glue dries, the corner can be fixed with masking tape.
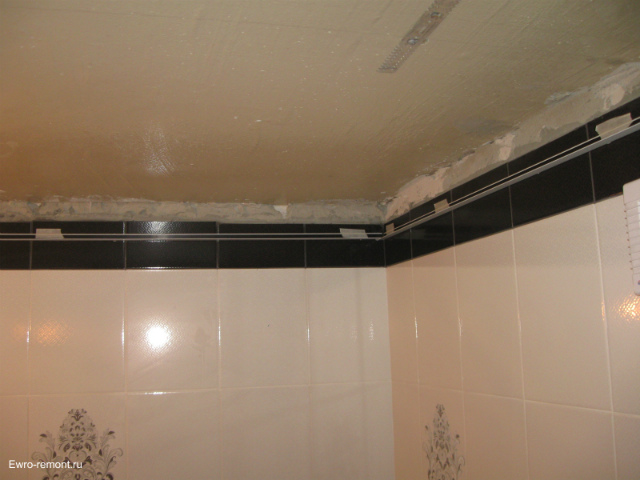
To ensure that no cracks are visible between the corner and the tile, gently squeeze the “Moment of Installation” glue into the crack with a pistol, run your finger over it, removing excess glue, and if necessary, if the glue is squeezed onto the panel or corner, wipe it damp sponge. So we pass with glue around the entire perimeter of the edging. Glue with a sponge must be wiped off almost immediately, as it dries very quickly.
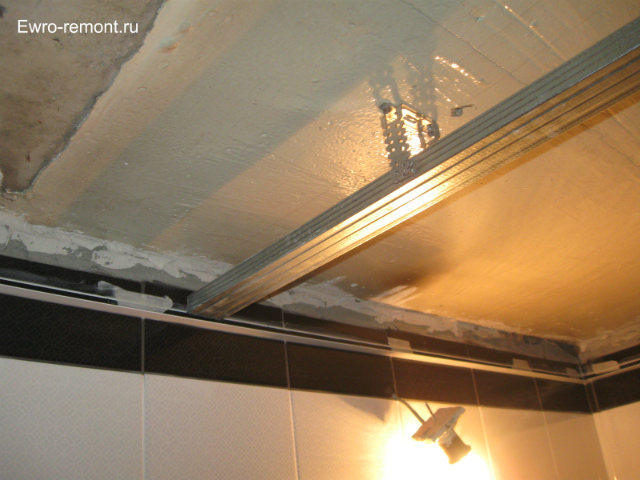
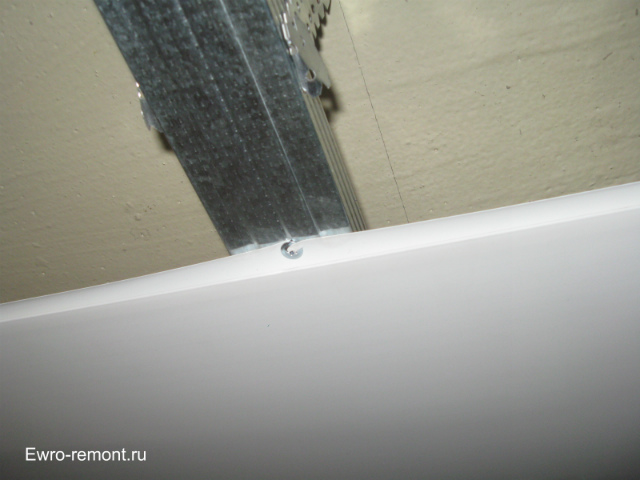
The edges of the plastic panels will lie on the edging. In order to fix the middle of the panels from sagging, in the center of the ceiling in a perpendicular direction from how the plastic panels will be laid, we attach a profile 60 * 27 to the ceiling. The profile is mounted on 2-3 straight suspensions, its edges should fit the corners of the edging and, if you look from the bottom up, then be higher than the upper edge of the edging corner by the thickness of the plastic panel from which the ceiling is made. In the future, the plastic panel will be wound with an edge between the profile and the edge of the corner and fixed in this way, and the middle of the panel will be screwed to the profile with a metal / metal self-tapping screw with a press washer.
It is better to start screwing the plastic panel from the “visible” edge and drive it to the less “visible” one. Before screwing the panel, it must be cut on the floor to the required dimensions so that its edges fit freely on the edge of the edging corner, without resting, but not sliding off them. If the edge of the panel in the corners slightly moves away from the edge of the corner of the edge (a gap forms), then you can press the panel on top with something, for example, a piece of tile (only this must be done immediately, and not after you further insert the following panels, since then you may not be able to get to the corner).
And more importantly, start leading the plastic panel to the wall with the groove that is inserted into the next panel, and the edge of the groove into which the next panel is inserted is screwed to the profile (if you do the opposite, you will not succeed, because then you will not be able to insert next panel).
Before screwing the panel, it must be cut on the floor to the desired dimensions.
Begin to lead the plastic panel to the wall with the groove that is inserted into the next panel, and the edge of the groove into which the next panel is inserted is screwed to the profile
when viewed from the bottom up, the profile should be higher than the upper edge of the edging corner by the thickness of the plastic panel
We collect panels, if necessary, cut holes in them for spotlights
If you have spotlights in the ceiling, then before making the panels, you need to mark the places where they will be, and when assembling the panels, make a hole in the right place in the panel according to the size of the spotlight and insert it into the panel.
When installing the last (last) panel, it usually has to be cut to the desired width. Its width should be such that when its groove enters the panel, its reverse edge lies on the edge, not resting against it, but not falling off it either.
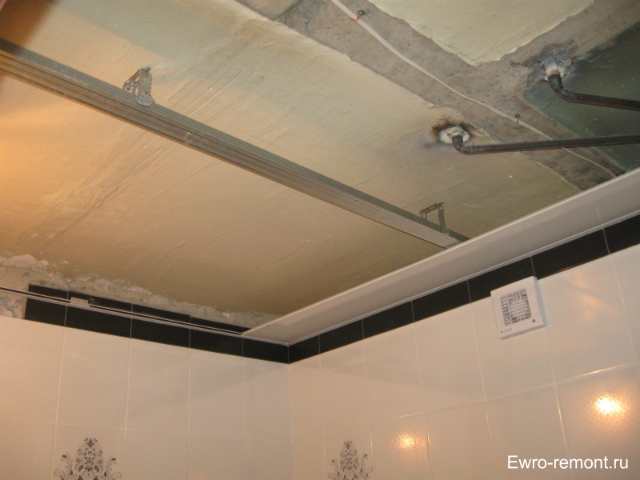
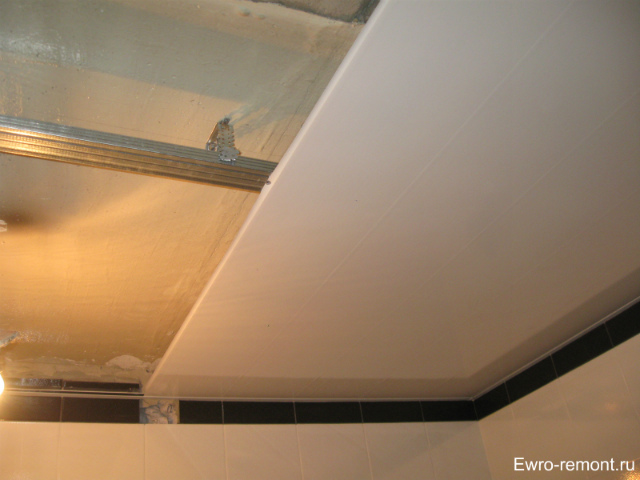
When all the panels are assembled, in order for there to be no gaps, I once again go through the edges between the edging and the panels with Moment Installation glue. With a not very great skill, the ceiling turns out to be even and without any cracks, curvature, and similar shortcomings. When assembling the ceiling in the bathroom, which is shown in the photo, it took me about 2 hours.
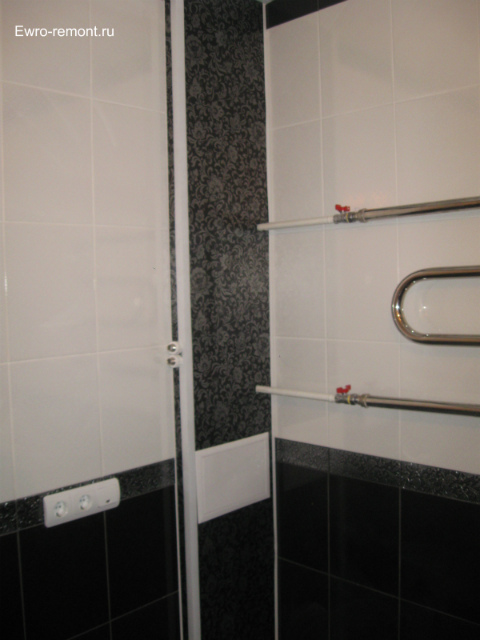
Finished plastic box in the bathroom


