Finishing the bathroom: step by step instructions
A bathroom is a strategic room in any apartment or building, because its permeability is much greater in comparison with other rooms. The risers of the water supply, sewerage and all ventilation networks of general house value are laid in its niches, after which they are divorced already in the apartment itself. Repair of a bathroom (combined or divided by a partition) includes the cost of finishing materials, high-quality modern plumbing and decorative elements. To cut down on future waste, you can carry out repairs on your own by removing the wages of a team of workers from the list.
The basic principles of finishing the bathroom and bathrooms
A bathroom in a house must be an optimally practical room, the functionality of which would meet the requirements of residents, as well as all sanitary standards. Especially this unspoken rule applies to the case when it is combined.
bathroom photo
- The bathroom has its own marking of the humidity zone, because it is in this room that large-scale water procedures are carried out. Understanding the distribution of moisture in it will allow you to carry out repairs as successfully as possible, after which there will be no need for an additional fan.
- The lower zone of humidity is considered to be the entire perimeter of the floor and 15 centimeters of walls from its pure level. Additional zones are surfaces that are in direct contact with moisture (covering around the washbasin, wall near the shower or bath), working with them requires additional compensatory measures to protect against the formation of mold and fungus.
Renovation of the premises, one way or another, will have several main directions:
- planning future design, dismantling of old coatings and equipment, marking the main work areas;
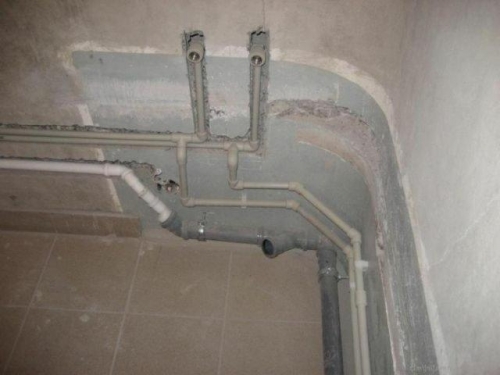
- replacement of pipes or their full re-laying in relation to the adopted design decisions;
- connection of modern, more compact and productive plumbing;
- marking the electrical network, installing new sockets - their number must correspond to the number of regularly used devices and one more backup;
- facing of walls, coverings and surfaces;
- final work on the installation of doors and all additional equipment.
The concept of finishing the bathroom
- The best option for a solid bathroom design would be any classic style that meets modern requirements and the pace of life of residents, and also retains a unique conciseness and color. The atmosphere of the bathroom requires the creation of comfort in it, which would help a person to relax and enjoy all the procedures. The toilet has a slightly different direction, but its style is also required to set the person in the right way.
- The stumbling block in the repair of the sanitary zone of the apartment is the lack of its area, which many owners solve by combining the toilet and the bathroom. Every woman tries to fill the room as much as possible with the necessary equipment, an abundance of places to store personal hygiene equipment, as well as complete a workplace for creating hairstyles or makeup. The practical location of the sanitary appliances themselves is remembered in the tenth place, when, in fact, there is no place left for them.
- An equally serious issue is the problem of increasing the risk of flooding with a combined bathroom, because there are more devices in one space, the piping has changed its configuration. Another "bonus" of this solution is the unpleasant smell after using the toilet.
- Before you arrange a bathroom, you should get acquainted with the main calculations of the science of ergonomics, which can stir up the mind as much as possible and push the usual boundaries of any room. Thanks to its simple rules, each person will be able to most comfortably approach the difficult task of arranging a bathroom, taking into account all the existing conditions.
Creating a design project for a bathroom
Independent design of the future design of the room will allow you to create the necessary atmosphere in it as accurately as possible and fill every little thing with your own character and immediacy.
To complete the repair, you must do the following:
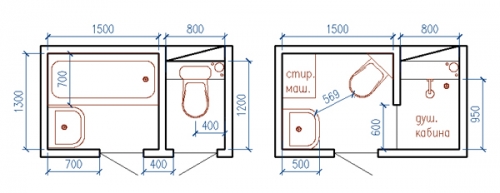
- make a visualization of the future design - the layout of all the details of the room will make it possible to feel all its real dimensions;
- draw schematically all the existing walls, clearly number them, which will give certain boundaries for calculating the amount of work and the required amount of materials;
- use a pencil to carry out an approximate arrangement of furniture, power supply networks and main working areas - this will help to equip the space with the necessary devices and details as much as possible (it is best to do this on a wall sweep diagram);
- calculate the approximate cost of all materials for the bathroom, additional equipment and inventory, taking into account the coefficient of real stock (do not measure all dimensions end-to-end, trimming and fitting can add about 20%);
- after connecting any networks, it is worth conducting a test, and only then begin decorating the walls.
All decorative elements must be selected relative to the drawn plan, otherwise you can oversaturate the room with an abundance of little things that will only make it difficult to operate.
Dismantling old equipment in the bathroom
- First of all, they begin to dismantle old sanitary appliances, additional equipment and decor. Each detail must be carefully unscrewed and taken out of the room. Then it's up to the small - the analysis of the old cladding and engineering networks. This process applies only to those apartments that were purchased on the secondary market. New buildings offer their customers clean walls, without the slightest hint of their past life.
- Old tiles should be removed especially scrupulously, because walls often have hidden deformations, sharp shocks can aggravate repair work with additional volumes. The plaster must be checked for strength, all receding parts will need to be scrupulously knocked down, leaving only its strong sections.
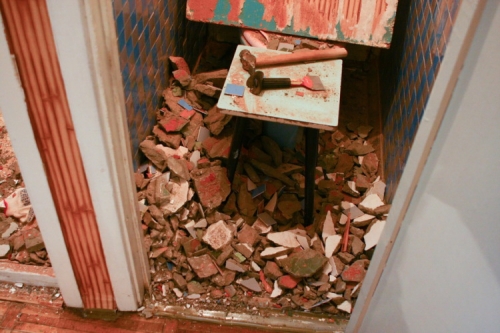
- If it is necessary to replace the old door, it is also necessary to dismantle it, check the strength of the opening and clean the floor under the door sill. Next, you should remove the bathroom and adjacent rooms from construction and household waste. The completely vacated space will make it possible to once again measure all building dimensions, assess the extent of the disaster of all supporting structures, and also conduct a more accurate analysis of the required supply of materials.
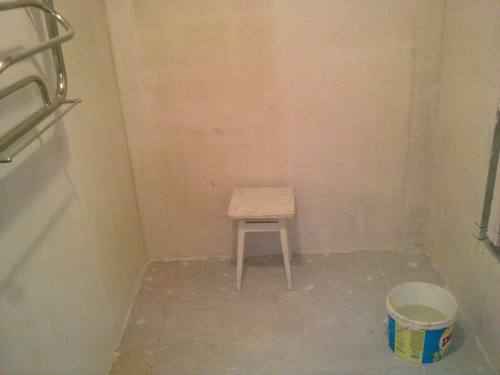
Wall preparation
The walls and partition of the bathroom are constantly exposed to temperature changes, moisture and steam, which must be taken into account when choosing materials. Each of them must be moisture resistant.
- At the first stage of wall processing, a scrupulous inspection of the room is carried out, all cracks and defects are eliminated, and only then comes the moment of leveling the surfaces with putty. The finished solution should be applied in thin layers to avoid it sliding along the walls under its own weight or cracking. After applying the putty, it must be generously sprinkled with a primer. After the bottom layer has completely dried, you can start applying a new one.
- Smooth concrete surfaces can be puttied with a thin layer of mortar, but wooden walls require a thorough approach - the thickness of the putty must be up to 2 cm, a thinner layer will be subject to deformations and external influences. The period of complete drying is 1 mm solution / 1 day, (a 2 cm layer will reach its maximum strength after 20 days).
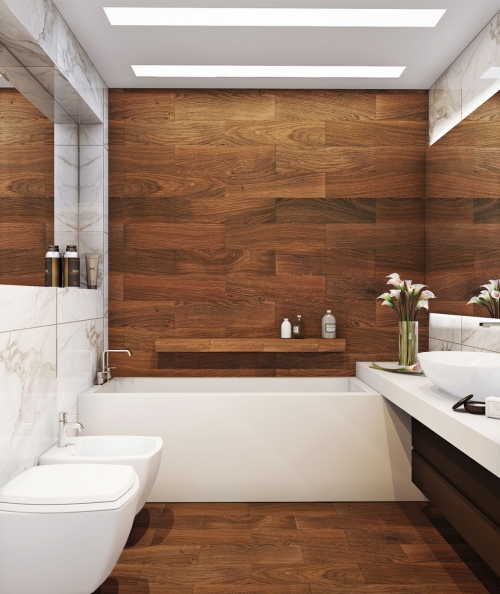
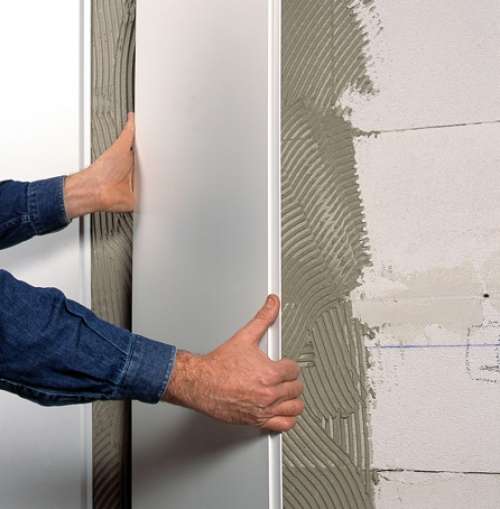
Bathroom paneling
If you do not want to lay tiles, wall panels will be an excellent option for finishing the bathroom, they are perfectly mounted, and thanks to a wide choice they allow you to create cozy and modern designs. Plastic varieties are very popular, but for some styles, wooden ones are often used.
- The initial stage of working with panels involves the installation of a mounting frame - it consists of high-quality wooden slats 40x25 mm, which makes it easy to place them on the wall surface and attach each with self-tapping screws on dowels. The approximate step between the mounting strips should not exceed 45-50 cm, otherwise the elements will bend or deform under the influence of a sharp temperature drop.
- After installing the guides, you can take on the plastic lamellas themselves. They are easy to match the color of the bathroom according to the intended style, the modern market offers a lot of color variations. It is convenient to fasten each panel using a high-quality construction stapler. Many craftsmen advise putting lamellas on glue in the toilet, which allows you to save the available space in the room.
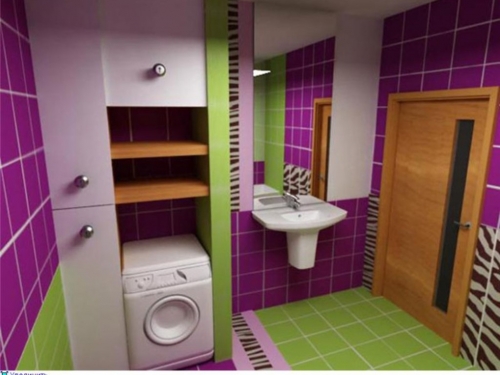
Multi-level tiles - a solution to a spatial deficit
Qualitatively laying out multi-level tiles is a great skill and luck, because clear lines of geometry will give even the smallest room a look of perfection and inimitable style.
First of all, it is recommended to paint all the contours of the room being renovated, the beginning and end of each individual zone, as well as the marking of all its functional parts. To visually expand the space, it is necessary to carry out an accent separation of surfaces, so the tile will be divided into three main tiers:
- the lower one, many masters advise to dial from a narrow tile, the shape of which resembles small light-colored bricks (20x5cm), this trick will help to visually stretch the room, as well as simplify the washing of surfaces by the hostess;
- the middle level should be placed from the edge of the lower one (60-70 cm from the clean floor and up to 4/5 of the wall height) and filled with tiles measuring 20x20 cm; the best option would be a floral ornament in the color of lingonberries or muted sky blue - these two shades will make it possible to fill the room with light and comfort as much as possible;
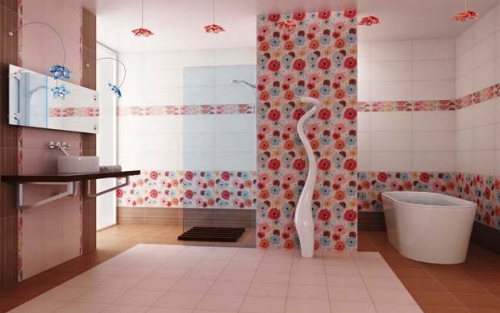
- the upper tier, most designers try to pick tiles from a thin bright strip of brick-shaped tiles and bring them to the ceiling in light beige (for the version with lingonberry ornament) or pale blue for azure.
When choosing a tile for a wet room, it is necessary to monitor its moisture absorption class, as well as the direct method of its manufacture. For a bathroom, the first class of tiles made by the extrusion method (punching a viscous base) is suitable, which provides the highest strength characteristics of products, as well as their comfortable operation.
- Before laying any tiles (especially mosaics), it is necessary to prime the walls with concrete contact, which will ensure super-strong adhesion of the tiles to the surface and prevent moisture from penetrating into the thickness of the wall itself during the dense operation of the room.
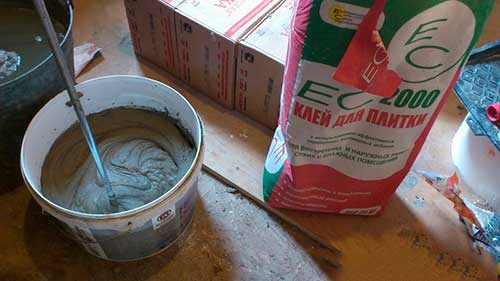
- It is worth planting tiles on a special moisture-resistant adhesive composition, which can most often be purchased in powder form and prepared immediately before laying. You can get a homogeneous composition only after thoroughly mixing the product with water with a drill with an armed nozzle - no manual manipulations will result in the required consistency.
Tiling order
Any builder knows a little secret: no one lays the first row of tiles, by default they skip it until better times, starting the laying out of building parts along a clearly drawn line in advance, set according to the level. Next, do the following:
- with a convenient notched trowel, it is necessary to apply an adhesive composition to the wall (in no case should the tile itself be smeared with it, this will disrupt its adhesion to the surface);
- then attach the tile to the smeared part, fixing it tightly (strong pressure can lead to cracks in the product), the distance between the elements must be adjusted using building crosses, which are subsequently either removed or covered with grout;
- remove excess glue with a sponge over the entire width of the laid tile;
- each row must be checked with a building level to avoid bumps and bevels;
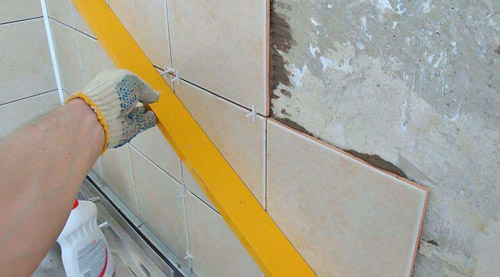
- the first row is laid last under a clear level of the finished tier, all pieces or corner elements can be cut with a tile cutter.
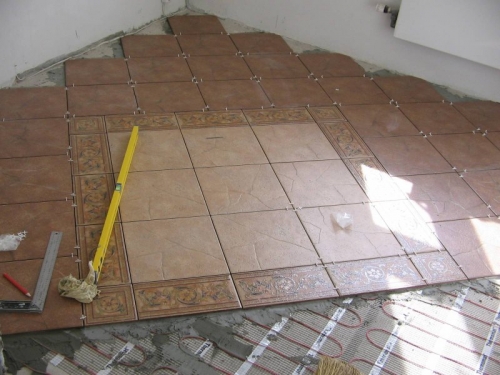
The process of laying floor tiles
Before laying the floors, you need to carry out all the necessary communications and networks, which depend on the size of the bathroom.
In the case of a combined location, it is worth considering several factors:
- non-built-in bathtubs are so popular lately, they require a certain dexterity in their connection - the siphon and the outlet itself must be carefully mounted, tested, and only then the floor should be laid;
- the toilet bowl, bidet and wash bowl are also marked, their sewer outlet is also firmly mounted, additional waterproofing and water spillage are carried out;
- some craftsmen and designers recommend dividing the toilet and bathroom areas, thus creating a kind of ornament on the floor surface.
A divided bathroom allows you not to become attached to the design of two rooms, but can lead to some problems:
- the presence of a bathtub on legs may force the use of the so-called step (when the slope of the new gasket cannot meet regulatory requirements, one of the rooms must be raised artificially, this can be beaten with a decorative step or ledge);
- a partition for a bathroom will significantly limit the space that is so important to every person, so many designers are increasingly turning to partitions and glass walls, the surface of which continues the given design (painting in the same color scheme, spraying similar motifs).
It is worth starting laying floor tiles from the center of the room, this will create a unique symmetry and accuracy in any room. All residual strips are easily formed with a tile cutter. After a day, you can start grouting existing joints - a way to decorate tile joints, as well as to make them resistant to moisture.
Ceiling area finishing
- The last decade pleases with the designers' attachment to decorating the ceiling area in the form of sections or geometric sectors, this helps to visually stretch the entire space and deftly beat the entire interior.
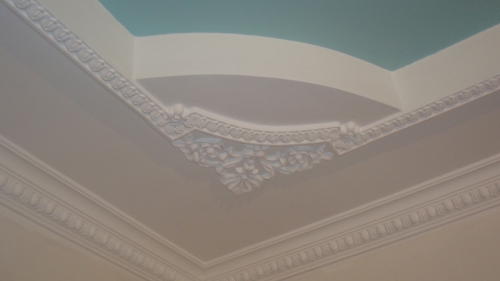
- No less popular are perfectly clean white surfaces using stucco with a moisture-resistant coating.
- The last option is perfect for the azure wall ornament - it will silently continue the light line and give the overall picture a touch of lightness and carelessness.
- Ceiling decoration can be carried out using multi-layer putty, gypsum elements, as well as manual laying out of decorative elements. Finishing the ceiling is carried out using paint for wet rooms. It prevents mold and flaking.
Modern plumbing and decor
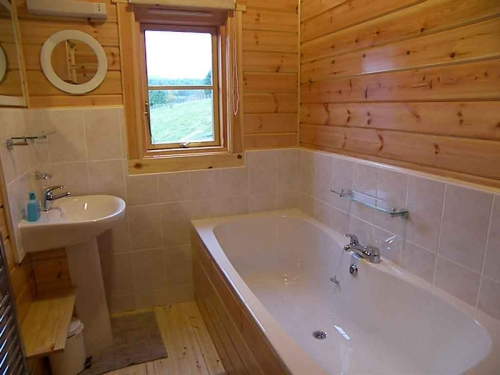
- The modern pace of life requires maximum comfort and coziness from every corner of the home. Therefore, before you make a bathroom, it is important to select all sanitary appliances and equipment with particular scrupulousness.
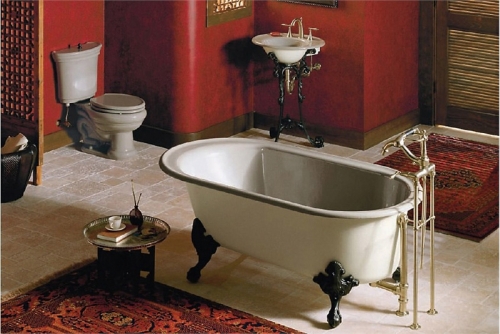
- A bath with wide rounded sides and high forged legs is the ultimate dream of any aesthete; you can spend hours basking in fragrant water and reading a classic work. The faucet should be chosen in the corresponding parallel - gold or silver vintage faucets, ivory-style handles, streamlined shapes and complete convenience of sizes. A great idea would be an additional metal shelf for storing pleasant little things, as well as a tray with fasteners for installation on the sides of the bath itself.
- Shower lovers are obliged to take a closer look at the new trend - cabins with a floor ladder, which free their owners from uncomfortable boxes. Such a shower is installed using a sprayed glass door, the floor under the shower head is mounted with a slope to the installation site of the ladder, which allows you to fully enjoy the flow of water without fear of water pouring into the room itself.
- The sink for washing will look best in marble imitation with a deep streamlined bowl and a sensual strong leg, which will faithfully keep all communications and connecting pipes from the eyes of the person who entered. Such a luxurious washbasin must have a companion - an old large mirror in a massive frame.
- The toilet bowl can be picked up with a high large external cistern, which will qualitatively complement the surroundings of the room. In the case of a separate bathroom, this type of toilet will be a great find: the wall will be effectively filled, thereby not causing undue attention to itself. A bidet is a sign of respect for a woman. Therefore, its presence is a must in a modern spacious bathroom. Its pleasant oval shapes, small faucets and user-friendly design will help complete the overall picture.
Cabinets and shelves look most colorful from durable lacquered wood, but here you need to remember about the increased level of moisture, so often small details are selected from metal.


