How to choose tiles for the bathroom floor and lay them correctly with your own hands
The bathroom has transformed from a cramped place for mandatory hygiene procedures into a luxurious space for relaxation and pleasure. One of the main reasons for this wonderful transformation is the emergence of new finishing materials that help create comfort and coziness. Of course, tiles were laid on the bathroom floor several decades ago, but those floor tiles are in many ways inferior to modern ceramic products. It's time to update your bathroom and forget about renovations for many more years!
When choosing floor tiles for the bathroom, you should take into account all the negative aspects of this wet room and take care of your own comfort and safety. The main requirements for tiles in the bathroom:
- minimal water absorption rates (high-quality floor tiles have a denser structure than wall tiles);
- maximum inertness to chemicals and abrasives used for cleaning (it is recommended to choose AA class finishing material for this indicator);
- good resistance to temperature changes;
- durability of decorative coating;
- general wear resistance;
- non-slip surface (it is better to avoid smooth glossy products for safety reasons).
The range of tiles is impressive! It is important not to make mistakes when purchasing
The most durable ceramic tile is porcelain stoneware; it meets the above requirements in all respects, and a huge range of colors and textures provides the opportunity to decorate the interior in a rather unusual way. In addition to a variety of colors, there are porcelain tiles that imitate natural stone, parquet, leather, metal surfaces and even fabrics.
Ceramic granite has only one drawback - its high price, so in order to save money, you can choose the usual tiles with a low-porosity structure for the bathroom floor. Pressure glazed ceramic tiles are suitable for flooring.
It is important to know: floor tiles are thicker than wall materials. Manufacturers mark floor tiles with a special icon - shoes on a black background.
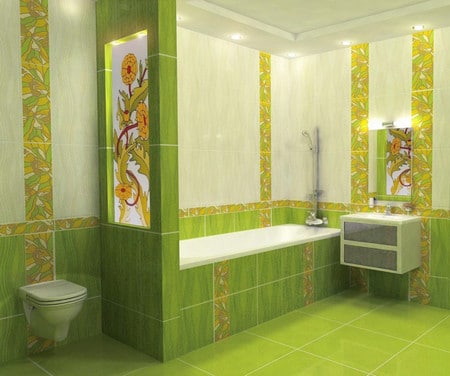
It is advisable to take tiles for finishing walls and floors from the same collection
Preparing the floor for tiling
Laying tiles in the bathroom on the floor can only be done on a perfectly level base. Any unevenness, cracks or deflections will lead to breakage of expensive tiles. Small cracks can be repaired with special solutions, but large cracks should be shown to specialists - special measures may be required to eliminate them.
The old floor will have to be corrected using a new concrete screed. It is important to consider that the new floor covering must be given time to dry and “mature”. It is advisable to start laying tiles 4 weeks after pouring the floor. It is better not to use agents that accelerate the fixation of concrete; they can impair the adhesion of the base and tile adhesive.
Alternatively, if the floor has minor unevenness, it is convenient to use a self-leveling self-leveling floor. It is easier to work with; after two days you can begin laying tiles, but you will definitely need to pre-prime the base.
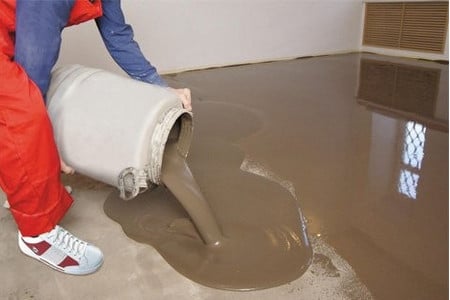
A self-leveling floor will quickly make the base perfectly level and smooth.
In order not to have to spend money on unforeseen repairs in the apartment of the neighbors below, the preparation of the floor in the bathroom must necessarily include waterproofing. The optimal choice is coating waterproofing - it does not raise the floor level, is resistant to temperature fluctuations, is easy to apply and does an excellent job.
In addition to the floor, the walls must be coated with a protective composition at a level of 20-40 cm, and the joints between the floor and the wall are covered with self-adhesive rubber tape. For maximum protection, it is recommended to treat the concrete base with the product, then level the floor using a new screed or self-leveling floor and apply a final waterproofing coating.
Features of laying tiles on the bathroom floor
The use of cement mortar to fix tiles is a thing of the past. To lay tiles on the bathroom floor, you need to purchase a special moisture-resistant adhesive with a high degree of adhesion. For large tiles and porcelain stoneware, you need to buy reinforced adhesive. We must not forget that the bathroom is a place of high humidity, very attractive for the growth of fungi and mold formation. Special fungicidal additives prevent this unpleasant problem.
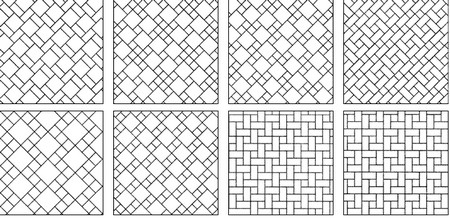
There are a lot of options for laying out tiles, some of them can only be done by professional craftsmen.
Laying begins by laying tiles on a dry surface along the walls along the entire perimeter. This approach allows you to avoid cut pieces at the joints near the walls. For non-standard pieces, it is advisable to allocate a place in an inconspicuous area, for example, under a bathtub or washbasin, and mark the position of the elements with a pencil. Beginners are advised to lay out the entire floor and mark out the rows before gluing on the decorative covering.
The adhesive solution is applied to the floor with a notched trowel, covering an area of no more than one square meter. To begin with, you can take as a basis an area equal to 4 ceramic tiles. The thickness of the glue should not exceed the thickness of the finishing material. The tiles are carefully placed on the adhesive solution and pressed evenly, tapping with a rubber mallet. If excess glue protrudes onto the surface, remove it.
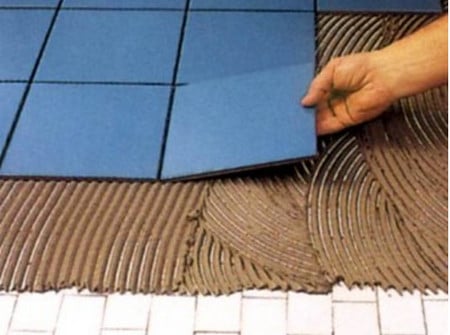
The tiles are laid on the mortar applied with a notched trowel.
To ensure that the seams between the elements are even and have the same width, it is necessary to use special crosses, selected according to the size of the tile. The evenness of the floor should be controlled using a building level. Errors are corrected by dosing glue, making the layer thinner or thicker if necessary.
Experts recommend laying whole squares first, and at the end filling the remaining voids with tiles cut using a tile cutter. It is better to walk on the floor no sooner than every other day, otherwise unevenness may appear. Then you can begin the final stage - grouting the joints.
Cement grout for bathroom tiles must be moisture resistant, improved with polymer additives. Epoxy grout is more durable, but working with it may seem quite difficult for non-professionals. The grouting compound is applied with a rubber spatula, filling the entire depth of the joint with the solution. You should move across the seams, or in a herringbone pattern, placing the spatula at an angle of 30 degrees. The treated seams are smoothed with wooden jointing and trimmed with a sponge.
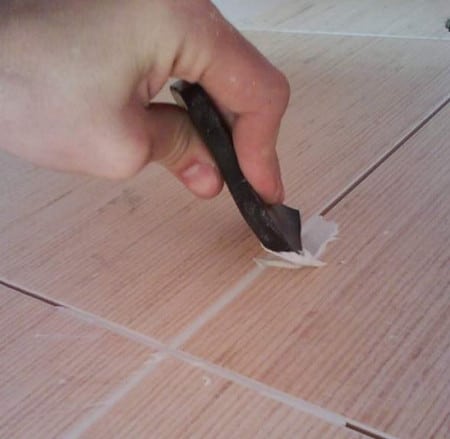
The grout is applied with a spatula, gently pressing the solution into the seams
It is important to know: It is recommended to treat the seams of tiled floors in bathrooms with sealant - this will reliably protect them from moisture and mold.
Of course, laying tiles requires professionalism and experience. For those who don’t yet have either one or the other, it’s better not to take risks, but to immediately turn to professionals. Of course, such repairs will cost more, but quality work done will last much longer, delighting you with the results for many years and not requiring corrections.


