Do-it-yourself bath screen - installation without the involvement of specialists
The screen is not a mandatory part of the bath, but it can be used to close communications and other unsightly "views" under the bath. In our article, we will look at how you can make this design yourself, because in some non-standard situations it is simply impossible to purchase a screen that is suitable in shape and size.
Why should you cover the bath with a screen?
With modern bathtubs, screens that are suitable in all respects usually immediately come with the kit - installation of such a design will not take even an hour. But if we are talking about steel or cast iron products, then screens are not provided for them, so there are only three options left: buy it, leave the space open, or make a screen for the bath with your own hands.
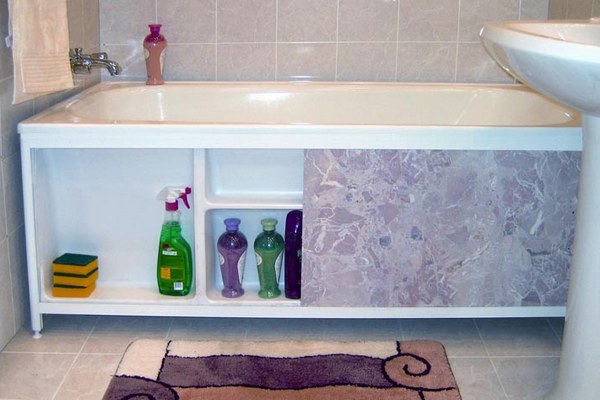
To use such a screen for a bath or not - the owner of the apartment should make the decision himself, but, most likely, everyone wants to have a beautiful and tidy bathroom, because it is the cladding that allows you to give the room a finished and attractive appearance, closing unsightly communication. But aesthetics are not the only reason for installing such a product. So, you can make a screen, additionally equipping it with small containers for storing various containers, jars with household products, which means you can save a significant amount of space in the room.
In addition, when using a bath without a screen, water can get under it, dirt begins to accumulate - all this will soon lead to a dangerous fungus. In addition, the floor in the room wears out faster, losing its attractiveness. It is the installation of the screen that will avoid such problems.
What are the design requirements?
There are various options for arranging such a design, however, when choosing a material, shape, etc., one should take into account the basic requirements for the screen. First of all, remember that this product is installed for the bathroom, which means that it will be used in humid conditions, the material of manufacture must be moisture resistant, able to withstand sharp temperature fluctuations.
If this is not taken into account, then literally in a couple of months a fungus will begin to appear on the material, it will begin to collapse under the influence of external factors. It is also important to remember about tightness, water should not enter the space under the bath itself. But it is also impossible to completely close the access of air - the lack of ventilation will lead to the appearance of mold. That is why it is necessary to provide doors or windows in the design.
There are also some other requirements:
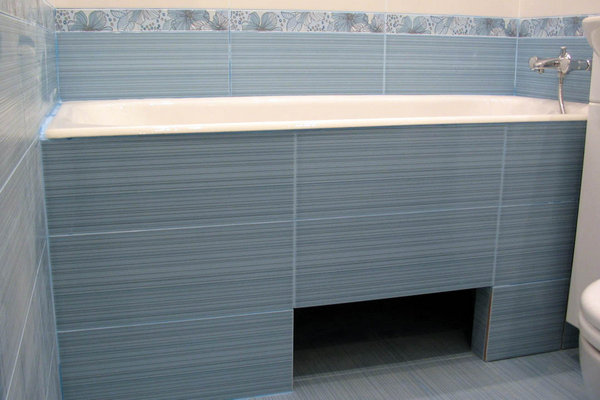
- Equipping the screen, it is necessary to provide for the possibility of quick access to the main communications.
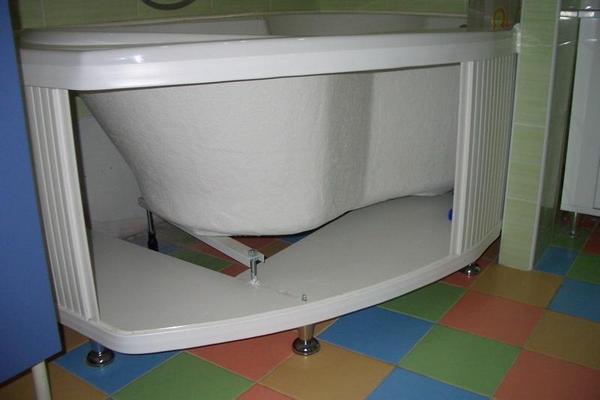
- The product should not interfere with approaching the bathroom, for which you can make a special recess for the legs in it, which is very important for small rooms.
The first thing you need to do is to make a frame for installing the screen. It can be made of bricks, metal profiles, wood bars. Moreover, it is better to do brickwork to install a tile screen so that it can withstand the weight of the material; in the case of working with plastic panels or plasterboard sheets, other options can be used. But let's talk about everything in more detail.
- Brickwork
This option is rightfully considered the most reliable. Such a base will withstand any material. It is necessary to build a brick wall from one wall to another, laying in half a brick. In this case, you need to make a new row with a slight offset to the side. We make a gap of 2-3 cm between the upper side of the bathtub and the masonry, and after the cement mortar has dried, we fill the gap with mounting foam. Also, when arranging the masonry, do not forget to make a convenient recess for the legs.
- Wooden crate
Such a frame will also be quite durable, but the main disadvantage of wood is that it begins to rot when it is in wet conditions for a long time. Therefore, it is better to use cedar, alder or larch to create a frame. To arrange the structure, you will need bars with a section of 4 * 4 cm. When carrying out work, it is very important to correctly mark the places for installing the structure; skipping this step, you will ensure that the frame starts to go to the side.
To get a smooth design, markup:
- 1. Draw vertical lines from the corners of the tub (which are adjacent to the walls) to the base using a plumb bob.
- 2. Step back 3 cm and make a second vertical line, completely parallel to the first.
- 3. Draw a vertical line from the free corner of the bathroom and draw a square with sides of 3 cm at the point of contact of the line with the base.
- 4. Draw horizontal lines from the inner corner of the square to the walls of the bath.
This will be the perimeter along which we will install wooden bars. We fasten them to the base with self-tapping screws, after which we mount the vertical racks and fix them to the walls with self-tapping screws. We install a horizontal wooden beam on them and fasten it with a corner. From the corner posts at a distance of about 0.5 m, intermediate boards must be installed. To achieve maximum strength, coat all joints with liquid nails.
- Metal carcass
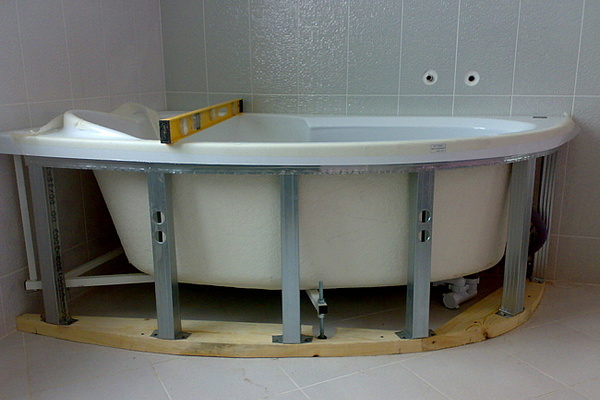
In the manufacture of such a frame, it is better to use the PN 27 * 28 profile, which is ideal for the further installation of plasterboard, plastic panels and MDF. If you want to make a frame that can withstand tiles, it is better to use metal profile pipes, however, in this case you will be faced with the need for welding. We carry out the marking in the same way as for a wooden crate. We fix the lower guide to the floor with dowels, we install side racks on them, fixing them to the walls.
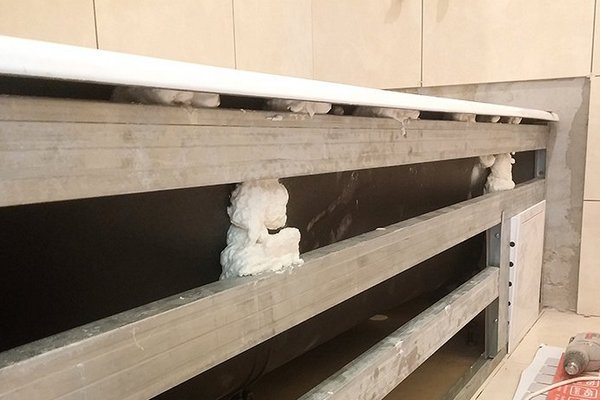
To give the structure strength, make a bar at the middle of the height. We fix the upper profile on the side supports, and to strengthen the upper guide, put two profiles together and fasten them together. It remains to mount the vertical racks at a distance of 30-40 cm between them. After installing the frame, we coat the free space between the bathtub rim and the structure with mounting foam.
What to do if the bath is of a non-standard shape?
The most important thing here is to repeat exactly all the bends of the structure. For the manufacture of the frame, you can use a galvanized metal profile, and for sheathing - extruded polystyrene foam of maximum density. Before starting work, it is worth measuring the length of the bathtub and cutting off a profile of the same size, cutting it every 3 cm.
In the future, follow the following instructions:
- 1. Attach the profile to the side of the bath and secure with adhesive tape. Gently bend it along the cuts made and continue to secure with adhesive tape after short distances. To hold the shape, also stick tape along its entire length.
- 2. Carefully unfasten the profile from the bathtub and fix it to the floor, gently pushing it inwards by the thickness of the profile. If you use tiles to create a screen, then in addition to the thickness of the material itself, add about 5 mm more for glue and putty.
- 3. Cut two sections of the profile (based on the height of the bath), attach to the walls with self-tapping screws. Cut the Styrofoam into individual panels about 20 cm wide and insert each panel into the profile with the low end and the top under the tub rim.
Treat the inside immediately with mounting foam. Carry out the installation of all panels, remembering to leave a small distance for the hatch. It can be mounted after the foam has hardened. It remains to carefully putty the entire surface. After the mixture has dried, you can decorate the screen with tiles, plasterboard or other materials.
Making a screen with your own hands - step by step instructions
To create a high-quality screen, you need certain tools and materials that will allow you to do the job quickly and efficiently. The devices used in the work must be selected based on the material.
When working with plastic you will need:
- Bars for props.
- Liquid Nails.
- Profiles with fasteners.
- The right amount of plastic panels.
From the tools you can not do without a stapler, perforator, cutting knife, square. Before starting work, be sure to measure the marking line so that it completely repeats the outlines of the bath. After that, attach the profile to the coating, and the fastening must be carried out from the inner edge (where you will install the plastic panels).
The use of liquid nails will ensure that there is no damage to both the bath itself and all surfaces. We also fix the panels to the bars with liquid nails: from below, we fix the piece of material along the upper part of the profile, since we need to additionally leave free space for installing the plinth. It is important to understand that to install the last panel you need to have skill, try to combine the first and last part so that you do not additionally trim.
How to mount a tile screen? Ceramic tile is a popular material for making a screen, since this material is not only visually attractive, but also reliable and durable. Pleases and a huge variety of options for colors and textures. To mount this design, prepare metal corners, drywall, tiles, metal profiles. Everything is quite simple here: after assembling the metal frame, it must be sewn up with plasterboard sheets, and tile glue is already applied on top and tiles are mounted.
To install a screen from GKL sheets, you will need the same tools as when working with tiles. After mounting the frame and drywall sheets, simply apply decorative plaster on top, paste over with water-repellent wallpaper, for example, from vinyl to decorate the front side of the screen.
Features of the arrangement of the screen for corner baths
The corner bath has a non-standard shape, you will have to tinker a bit when creating the screen, but the time spent will allow you to enjoy the result of your work for a long time.
A curved product is best made of plastic, since drywall sheets are quite difficult to bend, and even more so to install on a rigid profile in this form.
To mount the frame, install the rails on the floor so that they follow the shape of the bath. We attach wooden blocks to the top panel using liquid nails to secure the top rail. A plastic panel of the desired size is cut out and carefully inserted into the guide panel - the lower joints can be covered with a plinth.
A corner bath made of brickwork and decorated with mosaics will look no less effective. After completing the work, all joints on the structure must be sealed with a moisture-resistant sealant.


