How and how to paint the walls in the bathroom
How to prepare the walls for painting in the bathroom? The use of paint when decorating walls in the bathroom is affordable and inexpensive for every owner.
This can be done by hand, without doing too much work. However, if the walls were previously painted in the room, then before applying a new coating, you should clearly know how to remove the paint from the wall in the bathroom, which this article will tell you.
Painting in the bathroom of the walls is the most common and quite popular way of budget topcoat. With the right choice of paint, it optimally copes with aggressive conditions due to high humidity in the room. Finishing bathroom walls can be done in many ways.
These include:
- Laying ceramic tiles (see).
- Mosaic.
- Use of plastic panels.
- Application of decorative plaster.
However, often the only correct solution is to apply paint to the walls of the bathroom.
The benefits of this coverage include:
- Economy. At the same time, for a major overhaul, it is worth initially spending a lot of money on purchasing quality materials in order to prepare the walls in the bathroom for painting. After that, subsequent cosmetic repairs will not require large financial outlays. What kind of paint and how to paint the walls in the bathroom, everyone will choose on their own in order to transform the interior, after the boring old decor.
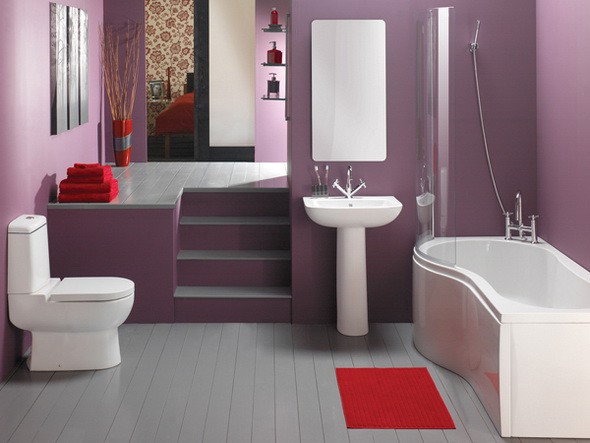
- The original appearance of the room. No one will be surprised by the tiling of the bathroom. And the painted walls for the bathroom have a non-standard look, which the photo shows.
The disadvantages of painted surfaces include:
- The coating is not very durable. The bathroom is a room with high humidity. Even the best paint and varnish coatings produced by modern manufacturers cannot guarantee long-term operation of the coating without the appearance of various defects on it, the appearance of mold fungus on the walls.
Tip: When painting walls in the bathroom, it is necessary to equip the room with high-quality ventilation, preferably forced.
- Certain difficulties in care. When using paint for walls from dirt, they must be washed carefully, without the use of abrasive products, preventing their mechanical damage.
- Pretty simple, unpretentious finish. Often, monochromatic painting of the walls in the room, combined with old samples of plumbing, makes the bathroom interior ordinary, the price of which is not high, and the appearance is unattractive. But this can be avoided by carefully choosing all the details of the room's furnishings.
How to prepare bathroom walls for painting
Before applying a new wall coating, the wall must be properly prepared. Very often in old buildings wall paint was used in such a room.
Therefore, the question is acute, how to remove paint from the walls in the bathroom? There are several ways to do this.
Most of them are used:
- Removing layers of paint with a hammer and a regular chisel.
In this case, by hitting the chisel with a hammer, the old paint is beaten off in small parts.
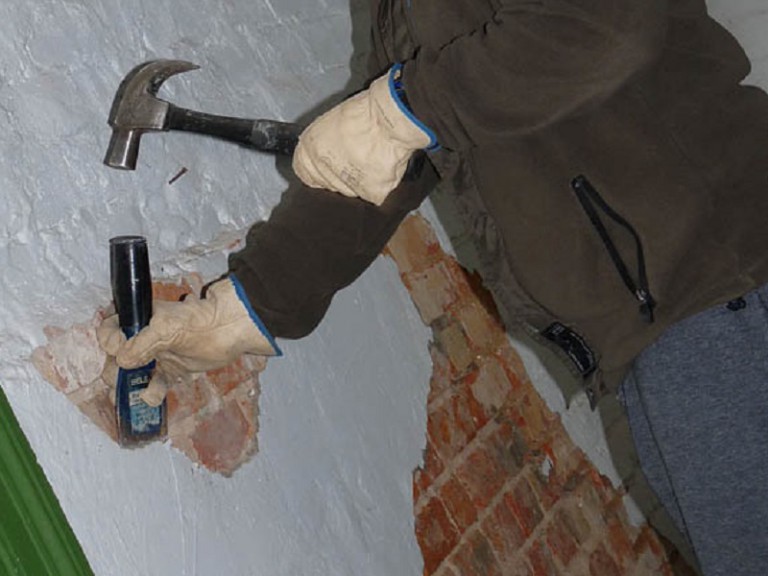
The chisel can be used in any kind, depending on the preference of the owner.
Tip: You need to purchase several chisels at once, preferably of different types. This is due to the fact that during operation the tool becomes dull, which requires its replacement.
- Removing paint by chemical method.
In this case, the paint is etched with a caustic substance - a paint destroyer. An approximate instruction for removing old paint looks like this:
- take an ordinary brush;
- the tool is dipped into the destroyer, which looks like liquid jelly;
- the substance is applied to the painted wall;
- after about 15 minutes, the coating on the wall begins to swell;
- the paint is removed with a hard spatula.
Expanded paint is easier to remove than regular paint. But if the coating is very ingrained, you will need to go over this place several times with a reagent, and use the spatula again.
Precautions when handling this reagent:
- all work must be done with rubber gloves;
- in case of contact with the hand, the mixture must be washed off very quickly with water;
- it is necessary to ensure good ventilation in the room, which is associated with the presence of harmful concentrated substances with a pungent odor in the liquid.
Tip: After spreading the walls, you should leave the room and wait until the coating swells. An opened jar should be tightly closed at the end of work. Otherwise, the lid may shoot on the jar and fly out with a pop, which will create the prerequisites for liquid to get on the face.
- Removing paint with a cord brush attached to a drill.
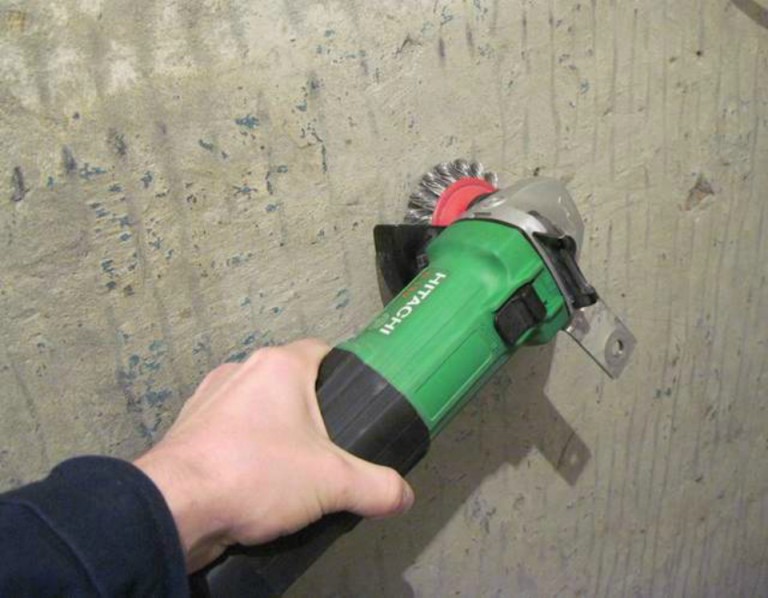
With this method: a cord brush is placed on the drill and the surface of the wall is processed. Disadvantage of the method:
- a lot of dust is generated;
- sometimes the cord brush may not cope in places where the paint is knocked off with a chisel and a hammer;
- you need to work in a respirator and protect your eyes.
- Thermal way.
The method is based on heating the wall with old paint:
- the surface is heated until the paint becomes soft;
- the coating is scraped off with a spatula.
For heating, you can use a building hot air gun, a blowtorch, but this is not safe. The disadvantages of the method:
- release of harmful toxic fumes;
- different thermal conductivity of the walls. On a wall made of wood, the paint heats up well, but on concrete or brick it does not heat up well, which requires the use of a powerful hair dryer.

For more details on how to remove paint from the wall in the bathroom, the video in this article will tell you.
How to putty walls before applying paint
After the old paint is completely removed, all irregularities must be puttied (see), choosing a moisture-resistant putty for this, for interior work.
It is best to purchase material based on acrylic or latex. They have all the necessary characteristics, which will allow you to qualitatively prepare the walls in the bathroom for painting.
When carrying out work:
- All existing gaps are carefully sealed with putty.
- After the solution dries, excess irregularities are removed with sandpaper or a grinder.
For greater convenience, it is better to use a grinder with dust extraction with a special hose attached to an industrial vacuum cleaner. This will protect the room from dust.
- The walls are primed. The coating is applied up to three layers, which is indicated in the manufacturer's recommendations. The primer must be purchased with antibacterial properties, which will prevent the appearance of mold and fungus on the walls.
How paint is chosen
Tip: you need to pay attention to its resistance to moisture and high room temperature.
For the bathroom you can use:
- Water based paints. The benefits of coverage are:
- environmental friendliness;
- no unpleasant odor;
- ease of application.
Minus water emulsion:
- low mechanical strength;
- it is easy to damage;
- "Afraid" of certain detergents that can simply wash it off.
- Acrylic and. Such water-dispersion coatings are much more durable, have greater resistance to physical damage.
- Chlorinated rubber paint. This is a new type of coating that can be used for walls in the bathroom, the walls of swimming pools in their homes.
- Oil paint. This is the most common type of such a coating, its cost is not high, it is resistant to damage and moisture. Flaws:
- a sufficiently long drying period;
- bad smell.
Tip: When choosing paint for covering walls in the bathroom, it should be borne in mind that glossy is only suitable for absolutely flat surfaces, and matte can hide small wall irregularities well.
What tools are needed
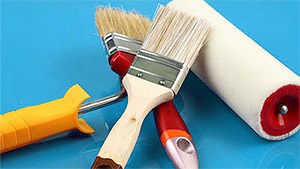
To paint the walls you need to purchase:
- Several brushes with different widths. They will be needed when repainting walls in places that are hard to reach for a roller, for:
- bathroom;
- toilet;
- washing machine;
- water supply pipes;
- under the washbasin.
- Paint roller. Such a tool should have a short pile. Wherein:
- made of polyamide, purchased for painting walls with latex or oil paints;
- an acrylic roller is selected to cover the walls with emulsion paint;
- from velor, used for applying nitro-varnishes.
The amount of pile on the tool depends on the size of the roughness on the walls to be painted. With a well-prepared surface for painting, a long pile is not required. In this case, it is enough to purchase a roller with a pile of 10 to 15 millimeters.
Tip: When purchasing a roller, you should carefully examine it. The threads should hold firmly on the tool, and the seam should not be noticeable.
If you want to get a drawing on the wall, a textured roller is selected.
- Tray for paint.
- Masking tape.
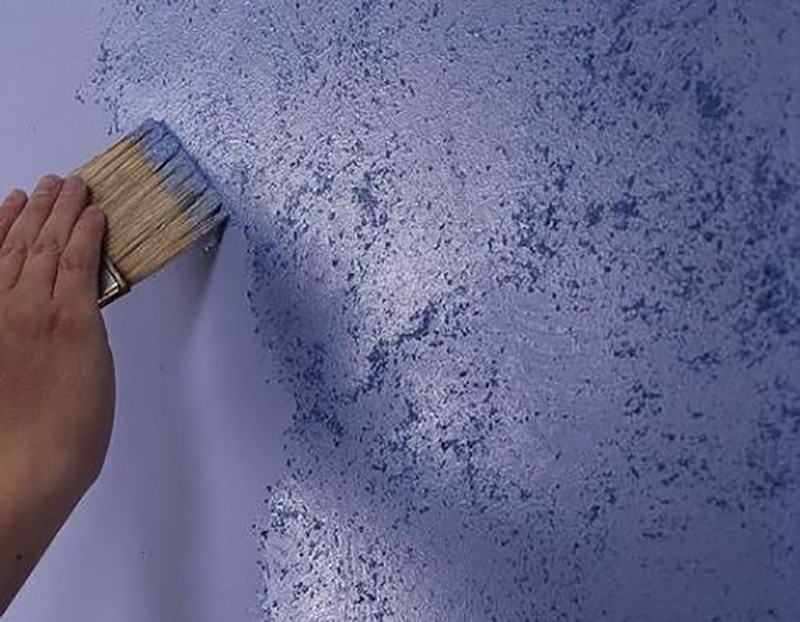
How to paint bathroom walls
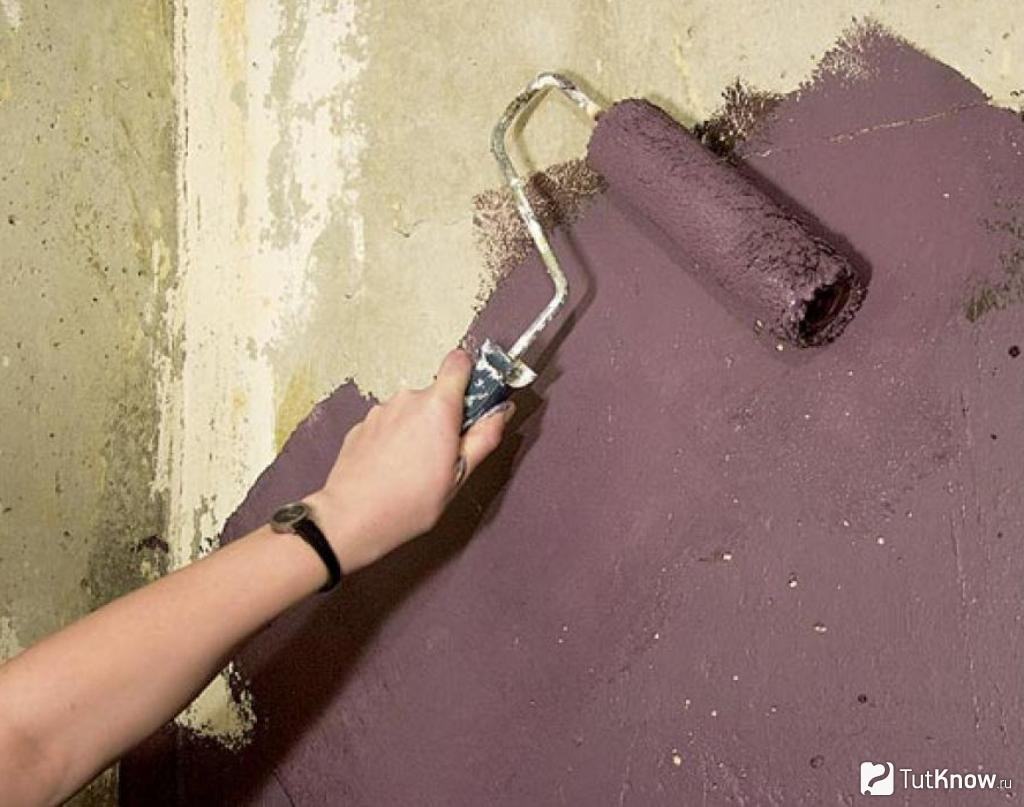
To increase the durability of the coating, the bathroom wall should be painted over twice.
Painting sequence:
- All hard-to-reach places are stained with brushes.
- With a paint roller, paint is applied to the remaining surface.
- After the paint has dried, a second layer is applied.
In places where colors change, it is necessary to stick masking tape, which will prevent paint from getting on them. In places where the floor and ceiling adjoin the walls, it is recommended to glue protective paper tape. Properly and beautifully designed bathroom will allow you to enjoy comfort and warmth in it.


