Master Class. How to make a do-it-yourself "Nature Calendar" stand
Placing information corners is one of the important requirements in kindergarten. There should be information for parents about the daily routine, thematic and educational materials. Buying ready-made boards is not cheap. It remains to apply creativity.
What material to use to quickly and inexpensively decorate a room? Ceiling tiles are the best option. The most necessary thing is a little effort, creative thought, time. The result will not keep you waiting.
Three in one: inexpensive, fast and efficient
A do-it-yourself tile stand is the best solution for preschool educational institutions and schools, as it is characterized by many advantages:
- low cost;
- ease;
- ease of processing;
- manufacturing speed;
- availability of necessary materials;
- different design options.
Styrofoam products lend themselves to any processing, so the originality of the stand is the main feature of the information corner. To do it yourself, you need to stock up on the necessary tools, materials, imagination, and the result will surprise you with brightness, colorfulness, highlighting a group in kindergarten.
Necessary materials
To make stands for a kindergarten with your own hands from ceiling tiles, you need to visit a hardware store. To create, you will need several tools and some materials:
- stationery knife;
- scissors;
- two types of adhesive tape: painting and stationery;
- double-sided adhesive tape;
- PVA glue;
- colors;
- acrylic paint;
- brushes, sponges, gloves;
- decorative means.
The design of the layout is limited by the imagination, and with a few efforts, the information corner will be ready.
How to make stands from ceiling tiles
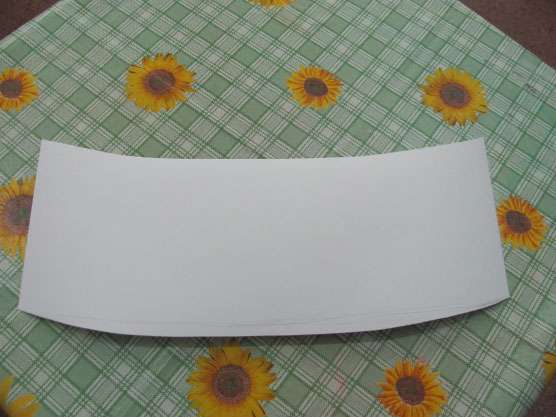
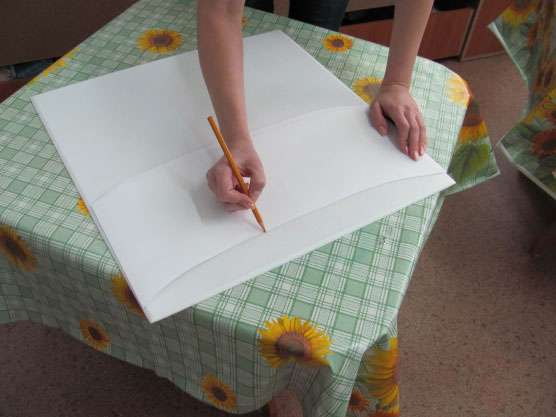
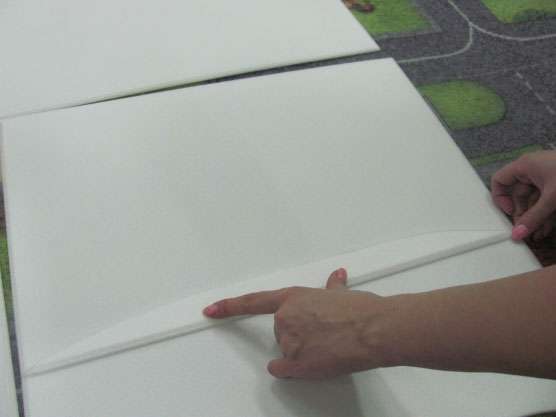
Easiest to do. The first step is to develop a layout and design. To facilitate the task, you can use computer tools of graphic editors. After that, the required number of tiles is fastened, the surface is given the desired shape.
When the background is dry, additional details are made. Windows are created using folders or files, double-sided tape, adhesive tape or ceiling plinth. Subheadings can be cut out of tiles according to a template or paper letters can be attached, after pasting over with adhesive tape to increase the service life. Pictures, figurines and other objects serve as decorative elements. Everything should be placed in the designated places and glued.
To make a themed stand, you need to create a base of Styrofoam and give it the desired shape. The main thing: do not forget to fasten the parts of the tile from the back. The background is created with the help of paint and color. The header can be made from foam, paper, cardboard, painted with the desired colors and glued. The surface is decorated with decorative elements: pictures, butterflies, letters, patterns. Windows are made if necessary.
Styrofoam Tile Stand:
- easy way to save money
- decorate the interior of the kindergarten group
- to create an effective didactic tool
For manufacturing you will need:
- a little time
- efforts
- fantasy
- helping children
- parents
- educators
Thanks to the available materials, it will not be difficult to create an information corner, and the simplicity of the methods and minimal costs will save the parents' resources and budget.
An example of making a stand in pictures step by step


Children are indefatigable dreamers, and their activities can endlessly touch and delight adults. When the results of creativity are in a clearly visible specially designated place, young fidgets are delighted.
Exhibition board equipment is not always associated with large cash outlays. Any interested parent is able to make children's stands with their own hands.

How to choose the right material
Among the large assortment of modern stands, more and more consumers opt for cork boards. They are easy to use, reliable, durable, affordable.

Natural material - cork oak bark - meets the general safety requirements for children's products and has a number of positive qualities:
- ecologically pure;
- easy to clean, does not attract dust;
- moisture resistant;
- refractory;
- chemical resistant;
- not damaged by fungus, insects;
- not electrified;
- shockproof;
- wear-resistant.
Cork stands will be a win-win option for both home and kindergarten.

How to make a stand
You do not need to have special craft skills and knowledge to please yourself and your children with a functional novelty in the house.

Think in advance how to harmoniously fit the new stand into the interior.

You can experiment both with the color of the board itself - paint it or upholster it with a fabric of the desired color, and with the frame, choosing the best combination.
The frame is usually made of wood, plastic, metal profile. It is also advised to use cable channels, the width of which is slightly greater than the thickness of the board.

Choose the type of wall mount for the stand: non-removable version with glue or free hanging on hinges.

The minimum set of blanks and tools used, 30 minutes of work - and the result will be on the wall.
Determine the desired dimensions of the stand, prepare a cork sheet to fit.

Choose the material for the back wall - plywood, fiberboard.

Glue both sheets. Glue - liquid nails, you can use another. Degrease the surface first, after applying the glue, press the parts tightly against each other. If desired, cover the working surface of the stand with a cloth.

Attach the previously prepared frame to the base. If desired, attach loops for fastening on the reverse side.

Fix the stand to the wall with glue or double-sided tape for a non-removable option. For an alternative method - hang on loops.
How to rationally use the stand
After you have made a stand with your own hands, you can begin to actively exploit it.

Note!

There are two main formatting methods. You can fix pockets on the surface of the board. These can be files for papers, or transparent pieces of thin plexiglass, fixed on double-sided tape.

This type of design is used for information stands.

Sheets of paper are placed in the pockets with important information that parents should know about the working hours, routine, rules of behavior for children in kindergarten.

The information can be updated daily (food menu) or as needed.

Stands are actively used by people of different ages both at work and at home. Reminders of important events, planning for the near future, pleasant memories captured in photographs, visualization of your desires, a convenient organizer - everyone will independently add the most relevant for themselves to the list of useful functions.
On cork demonstration stands, the necessary items - photographs, pictures, paper notes, small souvenirs are fastened with buttons, pins, tailor's needles.
Note!


The surface of the board does not suffer from this, there are no holes visible to the eye. When designing a stand for children, you need to make sure that sharp objects cannot harm the kids.

The stand, on which educators attach the results of children's work for the day, is always popular with caring parents. And the children are happy to present new crafts and arrange mini-exhibitions already in the apartment.

Take a photo of the filled stand as a souvenir, and let it be constantly updated - the world of children's imagination is inexhaustible.

DIY booth photo


Note!


Larisa Zubareva
After the repair, our group had to be re-registered. From what to arrange information and parent corners? Of course, there is a huge selection of materials from which you can brightly and colorfully decorate the room. There were many ideas. But as always, we have a question with finances. And I opted for a rather simple option - ceiling tiles. It is affordable, easy and simple to work with, paints well, cuts well, is light in weight and results in excellent mobiles. Can be attached to any wall for decoration purposes.
I bring to your attention my work from ceiling tiles. Stands and panels. They are quite easy and simple to make, showing only a little imagination and creativity. She painted the work with facade paint with the addition of color. The paint lays down very evenly without streaks.
This pano adorns the central wall of the group

Health Corner


Stand That's How We Live


Stands. We do it ourselves
Registration of information stands from ceiling tiles.
Informational stands widely used in various situations. They are convenient when it is necessary to convey some information to parents or present a photo report on some event, or simply congratulate them on the holiday. If it is not possible to order stand, you can always issue do-it-yourself stand! Can be issued stand using inexpensive ceiling tiles. Its convenience lies in the fact that the filling booth can be easily changed. Here are a few stands (if you can call them that) which we use in our work. Stand - call

And immediately the response of the parents - feeders!

Posting information about holidays


Our group is called "Sunflowers" Made a symbol of the group from ceiling tiles and place our newspapers on it, including congratulatory ones.


Dads were not left without attention. For them made a ship

Then he continued his "swimming"


And this one booth i made in sunday school, where I was invited to engage in artistic creativity with children


I apologize for the quality of the pictures.
Children's crafts for March 8 "We will not buy a gift for mom, we will prepare it ourselves with our own hands" This work was done by children of a different age group of a compensatory orientation for children with TNR aged 5-7 years. We wanted to congratulate.
Children's project "Let's plant flowers ourselves, with our own hands" Analysis of the situation: I often noticed that children of older preschool age are not careful about wildlife - trees, flowers.
Do-it-yourself dolls I am very impressed with this kind of dolls, like dolls with a “live hand”. I think that these dolls have bright expressive possibilities and are comfortable.
Master Class. We make a gift with our own hands “Piggy Piggy from the program “Good night, kids” 1. Take an ordinary orange dishwashing sponge. 2. Peel off the rough part on one side of the sponge. 3. Tie two threads.
Making a kindergarten with your own hands. Stands, exhibitions Hello dear colleagues! We organize exhibitions in our kindergarten. I bring to your attention a master class: “Manufacture of stands,.
Project: summer, experimental - experimental, medium-term "We create a fairy tale ourselves - with our own hands" RELEVANCE: teachers and parents are convinced that the kindergarten is called upon to participate in shaping the personality of the child, an active member of ours.
We create ourselves, we play by ourselves (photo report) Good evening! We are very glad to welcome you, we can tell you about how we prepare props for our games. At the GCD for drawing, the guys created.
Review competition of didactic games for ecological development “We make games with our own hands: we play together, we play ourselves” Opening remarks: (slide No. 1) Good afternoon, dear colleagues! Today I welcome you to the competition of didactic games for the ecological.
«
The teacher needs to constantly learn
learn from each other.
And the best incentive for this should be
exchange of professional experience...
»
L. Borovikov
Master Class
Subject:
Making a cool corner
"Scarlet Sails"
in the technique of "Modular design"
from ceiling tiles
Presenters:
Baradulina Lyubov Yurievna
primary school teacher
higher qualification
Members:
Baradulina Daria
Kuznetsova Masha
Mironova Masha
Ginevskaya Julia
Purik Liza
With. Sokolovka
year 2014
Introduction
Making a class corner is an important part of the work of any class teacher. Sooner or later in the classroom, the question arises about the design of the stand for the class corner.
Classroom corners differ from school stands in content, volume of information, and its target direction. The classroom corner is an integral part of the overall design of the classroom. It reflects the life of the class, and in primary grades, it can be more playful than informative, so the design of the class corner deserves special attention.
A stand for elementary school students should be bright, attracting the attention of a child, have information that would be both useful and interesting to schoolchildren.
The task of the stand is to reflect the latest information about the events taking place in the classroom and school.
How to make a cool corner at school, original, beautiful?
This question often arises before the class teacher.


The purpose of the master class:
Creation of conditions for the full manifestation and development of the pedagogical skills of teachers on the basis of professional communication on the exchange of experience.
To give an idea about the modules and the technique of "Modular Design", their types and practical application in school everyday life.
To teach how to make a stand "Scarlet Sails" using the technique "Making a school classroom corner using the technique of" Modular Design "from ceiling tiles
Tasks:
Representing the line of business - the "Modular Design" technique of ceiling tiles.
Transfer of innovative pedagogical experience into the practical activities of teachers through direct and commented demonstration of actions using presentations, methods, techniques and forms of pedagogical activity, methodological support in the manufacture of products using the "Modular Design" techniquefrom ceiling tiles.
Develop creative thinking, imagination, fantasy, creativity;
Development of methodological techniques for the implementation of the product, set in the lesson program, the ability to work with ceiling tiles, the involvement of participants and spectators of the master class in joint activities.
Members: 2nd grade students (4 girls), 6th grade student (1 girl).
Teaching methods:
Visual (story, show, conversation, practical implementation).
Research (the ability to independently distribute the activities of work, the choice of the action of its method, freedom of creativity).
Methodical equipment:
Presentation " Making a cool corner "Scarlet Sails"
in the technique of "Modular Design" from ceiling tiles » ( I stage
work);
Materials for practical work (II stage of work).
Tools and materials: A large panel for the manufacture of a stand during a master class in the "Modular Design" technique, ceiling tiles, scissors, stationery knives, pens, glue for ceiling tiles, "Yellow" color scheme, water-based paint.

Basic concepts: modules and "modular design".
Master class progress:
1. Organizational stage:
Task: preparing the participants of the master class for work.
2. Preparatory stage (preparation for new content):
Task: providing motivation and acceptance by the participants of the purpose of the learning activity.
3. Main stage.
1) Assimilation of previously acquired knowledge and methods of action, completion of work.
Task: providing perception, understanding the memorization of connections and relationships in the object of study.
Practical part I .
We choose a stand from hand-drawn pictures - samples suitable for the size of the place of the future stand.

On a mathematical sheet, we draw a sketch of the future work, decide on the color, size.


We measure, draw the tile into 9 identical parts, prepare the modules, fold the stand.


We breed blue and scarlet colors in water-based paint.


We color the blanks.


We leave to dry.

Attaching modules.
The stand is ready!
I hope that the knowledge you have acquired will help in solving creative problems in educational activities.
conclusions
The results show that this type of work:
- relevant;
- expedient;
Stands - constructors from modules using the "Modular design" technique:
- aesthetic;
- easy to make (they can be made even with children of primary school age);
- do not require large cash costs;
- not flammable.
I consider it necessary to disseminate innovative experience in order to apply it in practice to other educational institutions.
Sources used:
http :// www . virtualacademy . en / news / view /419/
http://nsportal.ru/konkurs/ya-klassnyi-rukovoditel/ugolok-klassa
Content
Title page ……………………………………………………… 1
Introduction ………………………………………………………… 2-3
Master class ………………………………………………………… 4-9
Conclusions ………………………………... 10
Sources used ………………………………... 11
Contents …………………………………………………………….. 12
Application
Watch the presentationMaster class "Making a cool corner
"Scarlet Sails" in the technique of "Modular Design" Primary school teacher Baradulina Lyubov Yurievna
Watch the presentation Master class"Practical results in the manufacture of a cool corner" Primary school teacher Baradulina Lyubov Yurievna
Presentation Master class "Making cool corners and stands"Primary school teacher Baradulina Lyubov Yurievna