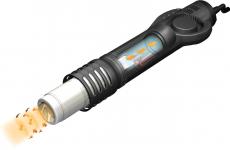
Power supply for LED spotlight 50 watt. LED Spotlight
LED floodlights are in great demand among consumers for illuminating shop windows, store facades, courtyards in private homes and other objects. They are durable, have good light intensity and consume much less energy compared to conventional incandescent lamps.
But any equipment has a certain service life and is not guaranteed against breakdowns, therefore it requires repair. It is always cheaper to fix problems yourself than to contact specialists in workshops. Let's look at a simple repair of some faults on LED floodlights, but before describing the repair process, you need to study what types of floodlight designs there are and the principle of their operation.
LED spotlight operation
The voltage from the power source is supplied to the electronic board, the converted current is supplied to the LED element, which emits streams of light. The designs of spotlights may be different, but they all have common elements:
- Power supply;
- Electronic current and voltage conversion board;
- Operating mode control drivers;
- Heat sink;
- Optical elements, lenses, mirrors built into the body;
- Terminals for connecting wires and fixtures for fastening the housing.

Floodlights have LEDs of different sizes and power, but the principle of operation and symptoms of malfunction are common.
Basic spotlight malfunctions
Most often, the malfunction of spotlights is manifested by the following symptoms:
- Complete absence of glow when turning on the power;
- LED flickering;
- Dim glow, not at full power;
- Changing the shade of emitted light;

There are obvious signs of deformation of the housing, destruction of the LED structure, after mechanical shocks or breakage, burnt out wiring, which are visible visually.
Main causes of malfunctions
Manufacturers make LED matrices and conversion boards that are reliable and, if used correctly, guarantee a minimum trouble-free period of up to 5 years. Most often, malfunctions occur for the following reasons:
- Unstable characteristics of the electrical network, voltage and current surges exceeding the operating mode values;
- Short circuit of a phase to the spotlight body or neutral wire;
- Incorrect connection;
As a result of these violations, the electronic board on which the floodlight control drivers, voltage and current converters that power the crystal structure of the matrix with LEDs are programmed may fail.
The LED matrix in spotlights can consist of several dozen elements. If the structure of 3-5 crystals in the matrix is destroyed, the spotlight can function, but with a larger number of faulty elements, irreversible processes disrupt the operating mode and all the crystals burn out. In this case, a complete replacement of the matrix is required.
Diagnosing a fault on an LED floodlight
Let's consider identifying a fault on a floodlight, which is in greatest demand among consumers, rectangular in shape with a matrix of 9 diodes, with a power of 10 W. One of the models in this series is the Volpe 10W floodlight with a luminous flux of 750 Lumens.

Regardless of the brand of spotlight, diagnostics begins with a visual inspection:
- The integrity of the wiring from the power source is checked, the absence of breaks, burnt insulation and kinks in the cable, where there may be a break in the current-carrying conductor hidden under the insulating layer;
- The body of the spotlight and the LED matrix are inspected for absence of deformation, cracks and chips;
- If there is no light at all, first of all you need to unscrew the back cover of the case and check the voltage at the input and output of the electronic board of the converter. There should be 220V AC at the input; if there is no voltage, then the reason is not in the spotlight, but in its power supply circuit; measurements can be carried out with a conventional multimeter. The output terminals are 12V DC.

- If there is no voltage at the output, the fault should be looked for on the voltage converter board. Inspect the board for oxidized contacts, tin cracks in solder areas and burnt parts;
- If there are no signs of malfunction in all of the listed points, the last element remains, this is the LED matrix.
Repair and replacement of faulty elements of LED spotlights
Faults such as broken wires can be resolved quickly and do not require special qualifications. The most difficult repair is identifying a faulty element on the driver circuit board, voltage converter and replacing the LED matrix. Therefore, to make repairs yourself, you must have certain knowledge and practical skills in electrical engineering, be able to read diagrams, use measuring instruments and a soldering iron. If you don’t have such experience, it’s better to turn to specialists.
The simplest way is to replace faulty elements with similar ones; they can be purchased from electrical goods or removed from spotlights on which other parts are faulty. Assemble one working one from two or three faulty ones. A matrix with LED crystals filled with compound material cannot be repaired.
Tip No. 1 If 2-3 diodes out of 9 have burned out in the matrix, then you don’t have to wait for it to burn out completely; this can have a detrimental effect on the drivers and voltage converter. Change the matrix at the first sign of malfunction.
Replacing the spotlight matrix

- Unscrew the front cover of the case, which presses the glass;

- Unscrew the screws and remove the reflector;

- Unsolder and unscrew the faulty matrix;

- We solder the new matrix and assemble the spotlight in the reverse order.

Sometimes the wires from the printed circuit board pass to the matrix through holes in the metal substrate, which acts as a heat sink for the matrix. At the transition points, they must be insulated, especially the positive wire, so that there is no short circuit to the housing.
Tip No. 2 When replacing the matrix, wipe its substrate and the surface on which it is screwed. Lubricate these places with heat-conducting paste, only then screw the matrix to the body.
When replacing the matrix, be sure to observe the polarities, the red wire is positive, blue or black is negative, yellow-green is on the body.
LED floodlights are a very popular thing today. But, like any electronics, spotlights break down relatively often.
Today's article will be devoted to repairing LED spotlights with your own hands.
All the theory on the design of LED spotlights and terminology, and here is practice for home craftsmen.
The spotlight is not on - where to start?
First of all, you need to make sure that 220 V power is supplied to the driver. This is Azy. Next, it remains to decide what is faulty - the LED driver or the LED matrix.
Checking the driver
Let me remind you that the word “driver” is a marketing ploy to designate a current source designed for a specific matrix with a certain current and power.
In order to test the driver without an LED (idle, without load), simply apply 220V to its input. A constant voltage should appear at the output, a value slightly greater than the upper limit indicated on the block.
For example, if the range of 28-38 V is indicated on the driver unit, then when it is turned on idle, the output voltage will be approximately 40V. This is explained by the principle of operation of the circuit - in order to maintain the current in a given range of ±5%, when the load resistance increases (idle = infinity), the voltage must also increase. Naturally, not to infinity, but to some upper limit.
However, this test method does not allow us to judge whether the LED driver is 100% serviceable.
The fact is that there are serviceable units that, when turned on idle, without load, either will not start at all, or will produce something unclear.
I suggest connecting a load resistor to the output of the LED driver to provide it with the desired operating mode. How to choose a resistor - according to Uncle Ohm's law, looking at what is written on the driver.

LED – driver 20 W. Stable output current 600 mA, voltage 23-35 V.
For example, if Output 23-35 VDC 600 mA is written, then the resistor resistance will be from 23/0.6=38 Ohms to 35/0.6=58 Ohms. We choose from a range of resistances: 39, 43, 47, 51, 56 Ohms. The power must be appropriate. But if you take 5 W, then it will be enough for a few seconds to check.
Attention! The driver output, as a rule, is galvanically isolated from the 220V network. However, you should be careful - cheap circuits may not have a transformer!
If, when connecting the required resistor, the output voltage is within the specified limits, we conclude that the LED driver is working.
Checking the LED matrix
For testing, you can use a laboratory power supply. We supply a voltage that is obviously lower than the nominal voltage. We control the current. The LED matrix should light up.
What to do if the power of the LED module is unknown
There are situations when there is an LED chip, but its power, current and voltage are unknown. Accordingly, it is difficult to buy it, and if it is working, it is not clear how to choose an adapter.
This was a big problem for me until I figured it out. I am sharing with you how to determine from the appearance of an LED assembly what voltage, power and current it is.
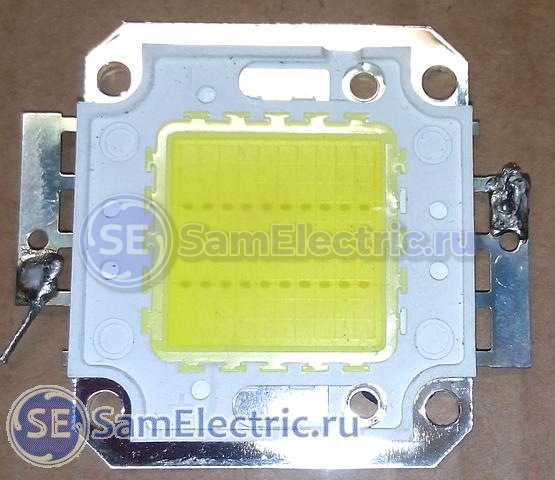
For example, we have a spotlight with the following LED assembly:

9 diodes. 10 W, 300 mA. In fact - 9 W, but this is within the margin of error.
The problem is that the LED matrices of the floodlights use 1 W diodes. The current of such diodes is 300...330 mA. Naturally, all this is approximately, within the margin of error, but in practice it works accurately.
In this matrix, 9 diodes are connected in series, they have one current (300 mA), and a voltage of 3 Volts. As a result, the total voltage is 3x9 = 27 Volts. For such matrices, you need a driver with a current of 300 mA, a voltage of approximately 27V (usually from 20 to 36V). The power of one such diode, as I said, is about 9 W, but for marketing purposes this spotlight will have a power of 10 W.
The 10 W example is a bit atypical due to the special arrangement of the LEDs.
What's new in the VK group? SamElectric.ru ?
Subscribe and read the article further:
Another example, more typical:
You already guessed it two horizontal rows of dots of 10 pieces each are LEDs. One strip is, offhand, 30 Volts, current 300 mA. Two strips connected in parallel - voltage 30 V, current twice as much, 600 mA.
A couple more examples:

Total - 50 W, current 300x5 = 1500 mA.

Total - 70 W, 300x7 = 2100 mA.
I think there is no point in continuing, everything is already clear.
The situation is slightly different with LED modules based on discrete diodes. According to my calculations, one diode there usually has a power of 0.5 W. Here is an example of a GT50390 matrix installed in a 50 W floodlight:

LED floodlight Navigator, 50 W. LED module GT50390 – 90 discrete diodes
If, according to my assumptions, the power of such diodes is 0.5 W, then the power of the entire module should be 45 W. Its circuit will be the same, 9 lines of 10 diodes each with a total voltage of about 30 V. The operating current of one diode is 150...170 mA, the total current of the module is 1350...1500.
Anyone who has other thoughts on this matter is welcome to comment!
LED spotlight driver repair
It is better to start repairs by searching for the electrical circuit of the LED driver.
As a rule, LED spotlight drivers are built on a specialized MT7930 chip. In the article about the Design of Spotlights, I gave a photo of a board (not waterproof) based on this microcircuit, once again:

LED floodlight Navigator, 50 W. Driver. GT503F board

Attention! Information on driver circuits and a little more on repairs!
LED replacement
There are no special tricks when replacing the LED matrix, but you need to pay attention to the following things.
- Carefully remove old heat-conducting paste,
- Apply thermal conductive paste to the new LED. It is best to do this with a plastic card,
- fix the diode evenly, without distortions,
- remove excess paste,
- do not confuse the polarity,
- Do not overheat when soldering.

When repairing an LED module consisting of discrete diodes, first of all you need to pay attention to the integrity of the soldering. And then check each diode by applying a voltage of 2.3 - 2.8 V to it.
Where to get spare parts for repairs
If you need quick repairs, then the best thing, of course, is to run to the store across the street.
But if you are engaged in repairs on an ongoing basis, then it is better to look where it is cheaper. I recommend doing this on the well-known AliExpress website.
I'll end here. I encourage my colleagues to share their experiences and ask questions!
LED Spotlight
Until recently, LED floodlights were quite expensive. Not everyone could afford to buy them. Technologies do not stand still. LEDs are improving, drivers are becoming cheaper, etc. and so on. Accordingly, the final product becomes an order of magnitude cheaper than its predecessors.
The main purpose of any spotlight is to illuminate large spaces. And it doesn’t matter what it is - architectural structures or territory. Compared to other light sources - DNAT, DRI or DRL, the payback of LED spotlights is quite fast.
The power of LED floodlights varies greatly and can be from 10, 20, 30 W to especially powerful ones - 50, 100 W or more. Most spotlights are produced with a color temperature of at least 6500 K. This is understandable. We do not install such a light source in the apartment. We install it outdoors, and accordingly we want to get bright, “strong” light. It is this temperature that will give us the highest luminous flux, compared to 2700, 3000 K or 4500 K.
In general, the design of any LED spotlight is practically no different from each other and does not depend on the installation location: be it a 220V, 110V spotlight with a power of 50 or 10 W (100W), street or industrial.
LEDs in LED spotlights
From the name of the light sources themselves it is clear that LEDs should be considered one of the main components) Oil). The following types of LEDs remain the most popular:
- high-power LEDs 350 mA (1,3,5 W)
- heavy-duty diodes based on COB technology (for me, these are the most preferable)
- SMD LEDs
About the main advantages, disadvantages, structure, etc. You can read in Below I will only focus on the main differences between these types of diodes. All other information can be read at the link above.
Features of the device of powerful 1,3,5 W LEDs for floodlights
 Visually, you will not be able to tell the difference between powerful 1,3,5 W diodes, unless, of course, you are a “super professional”. The difference can only be determined by the intensity of the light. And then, not always. There may be some pitfalls. If you have a special tool, you can determine how powerful the diode is by comparing the dimensions of the crystal itself. But not everyone has such devices. And in everyday life they are not really needed.
In the photo you can see that the production of these types of diodes is quite complex. And this leads to higher prices for the latter. 
By and large, powerful 1,3,5 W diodes are already outdated. If we take into account the use in LED spotlights. To obtain more or less high-quality light characteristics of diodes, you need a large number. And this is far from the best option from a pricing standpoint. I have been observing for a long time how most sellers are trying to “at least” sell their goods somewhere.
But there are also advantages to such LEDs - thermal heating. It is quite easy to handle compared to other types of chips.
Heavy Duty COB LEDs for Floodlights
 For 2015-2016, floodlights based on such diodes received great preference among buyers. And this is not only because of the cheapness of the chips, but also for the most part because you can easily “stuff” several crystals into one such diode and get 10, 20, 30, 50 watts or more. Up to 500 W! There are already such diodes. I didn’t “torture” them, but I think there must be terrible problems with the heat sink.
Structurally, SOB diodes also have big differences. From round, oval, to rectangular and square. From 9 to several dozen crystals are placed in one case and filled with phosphor.
High-quality LED spotlights differ from cheap ones because they have good chips. On good ones, the board consists of a copper alloy or materials with increased thermal conductivity. This makes it possible to obtain up to 0.5 K/W. This allows for efficient heat dissipation. Floodlights with a power of 10, 20, 30 and 50 W have become very popular using COB diodes.
Ultra-bright SMD LEDs in floodlights
 SMD LEDs got their name from the English Surface Montage Details - surface mounting of parts. The most common SMDs in floodlights are SMD 5050, SMD 2835 and SMD 5630 (5730). I also often see SMD 7230 on sale, but I haven’t tested them yet and I can’t say anything about them. But according to the first impression, the light is more than good. The production of floodlights using any diodes for surface mounting is economically justified. The cost is quite low (compared to COB) diodes, plus it’s quite easy to “fight” heat dissipation.
Types and types of LED spotlights using different LEDs
Type of spotlights with different diodes
1 of 2


Depending on the diodes installed in the floodlight body, the latter have a variety of types and shapes. The most compact ones are based on SOB diodes, the medium-sized spotlights are based on SMD and the largest ones are based on powerful 1.3.5 W diodes. In general, the large size of floodlights on powerful chips is due only to the fact that many diodes are required for a good luminous flux. Also, do not forget about the need to install secondary optics (collimators, lenses) on such LEDs, which also affects the tip size of the spotlight.
Reflectors and lenses in LED spotlights
 The design of spotlights is unthinkable without reflectors and lenses. Both of these optical devices serve to form a certain angle of the light flux received by high-power LEDs. Properly selected optics will maximize efficiency and luminous flux density. All available optics are divided into lenses and reflectors for LEDs.
Most lenses are made from durable glass of the highest quality. For the most part, they are installed in spotlights or street lighting fixtures, industrial light sources.
The basis of any lens is borosilicate material, whose composition is capable of imparting strength characteristics and giving the product a high level of transparency. Lenses with pie and cosine diagrams are very popular in stores.
Any LED has initial optics with an emission angle of 120 degrees. We don't always need this angle. As a rule, LED spotlights illuminate only a certain area of the room. To change the scattering angle, manufacturers use collimator and focusing lenses, Fresnel refractors, etc. in the design of searchlights. 
Using collimators we obtain a variety of beams of light. The most common lenses are 15, 30, 45, 60, 90 degrees. Less common are 126-degree lenses, which allow the LED to expand its beam angle. I repeat once again... Collimator secondary optics has found wide application in spotlights with high-power LEDs. 
Focusing lenses are widely used in COB LED devices.
Working principle of focusing lenses
1 of 2


Types and types of reflectors in spotlights

According to the method of distribution of the reflected flux, reflection can be specular (directional), scattered (diffuse), directionally scattered and mixed. Based on this, corresponding reflectors are also used in spotlights. If you look at the types, reflectors are divided into: symmetrical, asymmetrical, circularly symmetrical, capable of creating different light fluxes in direction and degrees.
Circularly symmetrical parabolic reflectors
 Symmetrical reflectors are installed in spotlights if there is a need to limit the solid angle of distribution of the light flux under the condition of a wide light distribution in the longitudinal plane. These types of reflectors have different depths and diameters. Depending on the depth of the reflector, a narrow-beam, flood or scattering light flux is obtained.
Parabolic diffusion reflector
 The most common reflectors. Such reflectors give us the opportunity to receive a uniformly distributed beam of light from the LED. The only disadvantage of such devices is that they cannot be made of non-ferrous metals.
Driver in the device of LED floodlights

LEDs are current-critical semiconductor devices. For power supply, special drivers must be used. Powering LEDs does not require any high voltage at all. For example, for powerful diodes, 3.2V at 350 mA (1W) is sufficient. COB crystals are capable of operating from 5.5 V. In fact, you can “throw” 6000 Volts at LEDs. The diode takes only the voltage it needs. There will be problems with the current. If you want and apply a current to the crystal that exceeds the factory specifications, you will simply burn out your diode. It’s good if these are cheap devices, but what if they are 20,30,100 W matrices? The price for them is steep. And not everyone wants to spend their hard-earned money again on buying new matrices just because they decided to experiment and supply a current that was obviously not intended for it. Based on this, any LED light source device, be it a lamp, lamp or spotlight, has an LED driver. Its main and main purpose is direct current stabilization. The main requirement of any driver is efficiency, output current stability and reliability.
If it is more popular, then at a voltage of 220 V, a certain set voltage value and a STRICTLY certain current will come out of the power supply (driver). Of course, no one is stopping you from assembling the spotlight yourself on your knee and powering it with the first power supply you come across, for example, from a computer. But I will guarantee that in 90 percent of cases your miracle creation will not work for long. The power supply is not a driver. It produces the required voltage, but does not stabilize the current in any way.
In 2015-2016, according to manufacturer statistics, the most popular floodlights were and are 10 W lamps. For spotlights with such power, it is necessary to use a driver with a voltage range of 20-38V and a current of 350-700mA.
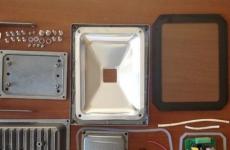
Circuit boards and radiators installed in the floodlight housing
 The last thing we have to look at today is the heat sink.
The efficiency of any LED light source is an order of magnitude greater than that of incandescent lamps. The temperature regime of the LN is about 200 degrees Celsius. In LEDs - no more than 100-150, depending on the type. The temperature of the lighting fixtures should not exceed 80 degrees, which will minimize the process of degradation of LED crystals.
To reduce the operating temperature of the LEDs, the floodlight device has a circuit board and a heatsink. Previously, boards were made of aluminum. Currently, the technology for producing boards based on ceramic-aluminum materials is being developed. This allows you to obtain not only a good electrical connection, but also a fairly effective heat dissipation. When installing diodes on a board, it is necessary to generously lubricate the junction of the chips with the board with thermal conductive paste.
There is a misconception that a circuit board made of aluminum can handle the heat on its own. This is not true. An additional heat sink in any LED light source is simply necessary. For spotlights and lamps, this is a radiator. Each manufacturer has its own developments. Radiators are shaped like circles, balls, rectangles, etc. and so on. There are good examples of floodlights - with additional artificial cooling - a fan. These include sources with a power of 100 W or more. In such designs, coolers are more than desirable.
In general, radiators are a rather sensitive topic. And someday I will definitely devote a large article to this. In the meantime, I bow...)
Although LED technology (including spotlights) is highly reliable, it also sometimes fails. Repairing LED spotlights allows you to eliminate most faults when you need to restore the functionality of the device. Repair work is relevant not only when the device does not shine brightly enough, but also if it completely stops working.
Operating principle and diagram
The LED spotlight (LED) includes the following components:
- LEDs (provide glow);
- drivers (control the operation of the device);
- frame;
- light diffuser (allows you to increase the efficiency of the lamp);
- lenses (control the shape, color and some other characteristics of the light flow).

The spotlight operates thanks to the coordinated actions of several of its components, including optics, power supply, drivers and heat sinks. The inside of the case contains light diodes, as well as small electronic components. The power supply supplies voltage to the LEDs, where the current is transformed into light output. Thanks to these actions, the device glows.
The figure below shows a standard electrical circuit for an electronic spotlight driver.

As for the operating principle of the driver, it does not differ on different spotlights. Power from the mains is supplied to the driver input, bypassing fuse F1. Next, filtering occurs using LC elements and rectification using a diode bridge. Smoothing is carried out by an electrolytic capacitor (C13). DC voltage (280 V) is generated at the capacitor terminals.
From the electrolytic capacitor, the voltage is directed through current-limiting resistors to the zener diode (D12) and pin No. 6 of the described microcircuit. The zener diode is responsible for the 9-volt power supply to the microcircuit, which is the main factor ensuring the functioning of the driver. From capacitor C13, current flows through the transformer winding (T1.1) through the lead part of the field-effect transistor (Q1).
Note! The amount of current flowing through the light diodes depends on the resistance parameters of the resistors on the microcircuit.
Signs of a spotlight malfunction
The most common signs of a malfunctioning spotlight:
- the lamp does not light up, although the power is turned on;
- the light diode flickers;
- the glow is too dim, as the lamp burns weakly - not at full power;
- the shade of the light flux has become unnatural.
Other signs may also be present, including physical damage to the structure of the case, deformation of the diode, burnt out electrical wiring.

Causes of failure
Possible reasons for the spotlight not working properly:
- Unstable electrical network (voltage drops beyond the operating current);
- short circuit of a phase to the device body or to neutral;
- incorrect connection;
- overvoltage;
- use of overcurrents.
In the event of these violations, the board on which drivers, voltage and current converters are installed, supplying power to the matrix crystals, may fail. Damage to 3 to 5 crystals in a floodlight matrix is allowed. If the number of faulty crystals is greater, the spotlight will not be able to operate with a sufficient degree of functionality and the matrix will need to be replaced.
Diagnostics
First of all, it is necessary to determine the cause of the LED spotlight malfunction. As an example, let's talk about checking the performance of a rectangular Volpe spotlight with a matrix including 9 diodes. The total power of the lamp is 10 W. The luminous flux is 750 lm.
The check is carried out in the following order:
- Inspect the wiring for physical integrity. Check for breaks, burnt insulation, or kinks in the cable. The purpose is to ensure that there are no breaks in the conductor.
- Check the device body, as well as the LED matrix for mechanical damage (deformation, chips, cracks).
- The next task is to check the input voltage by opening the back panel of the case. The input voltage should be 220V (AC). If there is no voltage, the cause of the breakdown is not in the lamp, but in the electrical circuit. Measurements are carried out with a standard multimeter. The output voltage is 12 V (DC).

- If there is no output voltage, the breakdown is looked for on the converter board. Inspect the contacts for oxidation, look for cracks in the tin coating in areas of soldering or burnt-out elements.
- If the above verification methods do not produce results, test the performance of the matrix.
Replacing parts
Eliminating broken wiring does not require special qualifications from a home technician. It is much more difficult to find and fix a breakdown on a printed circuit board, driver, voltage converter or matrix. You can't do this without special knowledge. You will also need the ability to work with diagnostic instruments and a soldering iron.
The following parts may be subject to repair or replacement:
- limiting capacitor;
- power unit;
- driver;
- matrix.
Current limiting capacitor
This component causes a malfunction when the spotlight lamp burns unevenly, constantly flickering. This problem is usually associated with the fact that manufacturers, in an effort to save money, install a current limiter that does not match the characteristics of the driver.
power unit
A common cause of malfunctioning of the spotlight is a breakdown of the power supply. In such a situation, you can purchase a new power supply or pick up this part from another device (for example, from a printer). If you decide to buy a new unit, it is recommended to take it with you to the store, since its technical characteristics are indicated on the case. To get the block, you first need to disassemble the spotlight.

Driver
Low-power models often lack a power supply. In such cases, an LED driver is used instead of a block. Since the diode is not able to receive power directly from the network (an alternating current other than the mains is needed), the driver is used. The device operates based on operating temperature and time, changing the output current to the LED.
To replace the driver, you should disassemble the spotlight to set the technical parameters of the driver, and then contact the store. Just as in the case of a power supply, you can select a suitable driver from another device.
Matrix
The most common cause of spotlight malfunction is excessive heating of the matrix, which leads to blown fuses. The spotlight is disassembled, after which the damaged matrix is taken out. To do this, unscrew the four screws and solder off the conductive parts. Next, apply a layer of thermal paste to the LED and solder the conductive parts back. The operation is completed by screwing the matrix into place.

In some cases, the wiring in the matrix goes through the holes in the substrate. It acts as a matrix radiator. In the transition areas, the wires must be covered with an insulating layer (primarily we are talking about the positive wire). This will avoid a short circuit to the device body.
Advice! Before replacing the matrix, you should clean the substrate and the area where it will be installed. It is recommended to treat these areas with a heat-conducting compound.
The shape of the matrix must not be disturbed. It is recommended to use only “original” screws so as not to damage the design. Also, do not forget about the polarity: the red wire is positive, the black or blue wire is negative, the green-yellow wire is directed to the body.
If at least 2-3 burnt-out diodes are detected, you should not wait for the matrix to burn out completely. In any case, the device is no longer able to function normally, as a result of which the drivers and voltage converter will soon fail.

Note! If the matrix does not work with a filled compound element, it cannot be restored.
Voltage converter circuit board
If, when checking the board, obvious signs of burnt-out elements are found, the device will need to be repaired. The figure below shows a converter circuit for a spotlight.

Before replacing non-functioning parts, you should ring the LEDs. First, one of the board legs is unsoldered, since ringing the soldered elements will not give the correct result. If necessary, burnt out parts are replaced with new ones.
Low power floodlight repair
As an example, let's look at the repair of the SDO01-10 floodlight. Device power - 10 W. An external inspection shows peeling of the protective coating on one of the floodlights. There are also dark spots on the light-emitting surface of the matrix.
Repairing a matrix with a damaged LED emitter is possible, but such a part is not cheap. The cost reaches 40-50% of the price of the entire spotlight. In addition, purchasing a new matrix presents another difficulty - most often there are no markings on the LEDs. As a result, it is not easy to determine the type of emitter.
To simplify the task, we install the spotlight driver from the burnt-out matrix to a lamp with a working matrix. On the old driver, the protective resistor burned out (its value is 1 Ohm), which indicates a breakdown of the diode in the diode bridge at the transition from the key resistor to the control resistor. However, replacing the driver did not restore the functionality of the spotlight.

After further testing, a break in the optical feedback pair was detected. Replacing the pair gave results - the lamp started working.
Repair of a powerful spotlight
The subject of consideration is the model of a powerful spotlight SDO01-30. Devices of this type are used for lighting large rooms (for example, industrial purposes).
First, we remove the back panel from the spotlight and visually inspect the condition of the radio components on the printed circuit board. We pay attention to elements that look suspicious (carbon deposits, deformations, etc.).
Next, we inspect the printed circuit board (pulling it out of the spotlight) from the semiconductor side. An inspection revealed the presence of a pair of burnt-out resistors: R8 (2 ohms) and R22 (1 ohms). Resistors with low resistance most often burn out due to the high current passing through them in the event of a breakdown of semiconductors or capacitors.

Next to the resistors is a field-effect transistor SFV4N65F. The ringing determined its malfunction. Since the spotlight circuit was not available, we find out the values of the resistors that burned out by disassembling a working lamp of the same model.
We unsolder the failed resistors, as well as the transistor. We replace them with new parts.
Some useful tips for repairing LED floodlights:
- When replacing the matrix, be sure to pay attention to the polarity.
- Be sure to remove the hardened heat-conducting paste under the matrix.
- The surface should be degreased with alcohol.
- When soldering, you do not need to overheat the surface. Soldering time is up to 2 seconds. If the matrix is overheated, the crystals will be destroyed or their new characteristics will not allow the spotlight to function normally.
- To repair a high-power spotlight, the knowledge used in repairing low-power lamps is sufficient. There are no special differences between devices of different power.
- If a matrix with a large number of diodes is not filled with a compound solution, the non-working diode will need to be replaced. To perform this operation, a micro-soldering iron is required. You need to work carefully so as not to overheat the crystals.
- If it is impossible to see the values on the burnt-out resistances, you cannot do without the instructions for the spotlight. It must contain the relevant data.
Anyone can fix a spotlight. However, to perform repair work, at least basic knowledge of electrical engineering is required, as well as skills in using a soldering iron and a multimeter. You also need the ability to read diagrams to understand the design of the spotlight.
After your purchased LED spotlight has served faithfully for many years, sooner or later there will come a time when it breaks. You can, of course, go to a workshop where they will fix everything. But is it worth spending money if you can do everything yourself? Especially in the case when the breakdown is “trivial”. To determine whether you can repair the spotlight yourself, you need to carry out diagnostics. On the basis of which we can conclude that independent “preparation” is possible.
One of my articles was dedicated. In a nutshell they consist of:
Light-emitting diode
- driver
- frame
- diffuser
- lens
The most common failures can be considered - burning of LEDs or drivers. LEDs burn out or lose their brightness from excess heat, which is poorly removed from them, due to the manufacturer’s “greed” on radiators. Driver problems are the bane of Chinese floodlights. For my part, I will say that I still prefer Chinese manufacturers. Especially for a low price. They can be easily “tidyed up” and without spending money on the brand. Their Chinese imperfections produce quite passable specimens (after modifications), which have served faithfully for more than one year.
Let's look at some aspects of floodlight repair. We will try to reject the LEDs and identify faults.
The LED spotlight flashes. How to repair it yourself
A typical malfunction is blinking (flickering) of the spotlight. If you notice that your future patient has begun to “blink” with enviable consistency, then there are two problems - either failure of the LEDs, or malfunctions with electronic components.
I will show how to repair a spotlight with this malfunction using the example of a 10 W device. I already mentioned somewhere that 10 W floodlights are the most popular. The LED is a matrix, in the housing of which 9 one-watt crystals are integrated, filled with phosphor. The crystals in the matrix are connected in series. A 10 W diode has three lines of three crystals. The lines, in turn, are connected in parallel and connected to the driver.
 Arrangement of crystals in the matrix
 When the matrix (one of the diodes) burns out, characteristic blinking will occur. Blinking may be chaotic, at regular intervals. The entire matrix or some lines may stop lighting. Let's dive into the diode device and see why this happens.
The design of all matrices is identical and consists of a chip made of an aluminum substrate, a dielectric layer, and crystals filled with phosphor.

In the picture we see that the crystals are connected by leads (good ones are made of gold, bad ones are made of copper); with intense heating, the threads peel off from the diodes and the matrix begins to turn off for a while. After the metal has cooled, contact appears again until it reaches critical heating and all or part of the matrix is turned off again. This can go on indefinitely. Until one of the threads finally falls off the crystal.
Using handy means, we try to identify a matrix failure - take a non-sharp object and do not press too hard in the places where the crystal is connected by threads. The spotlight must be turned on. As soon as the problematic diode is found, the matrix will begin to light up.
 Identifying the Problem Matrix
 If we determine that the matrix is faulty, then in this case the repair consists of replacing the chip. How to do this - read below, using the example of a 12 V 10 W spotlight.
I'll warn you right away. If at least one line of crystals in your matrix stops burning, then such a chip must be changed as quickly as possible. Otherwise, in the very near future you will be left without a light source. Let's see why this happens.
 The reason for the increase in current on the matrix
 The connection of crystals in the chip is parallel-serial. For example, I’ll again take a 10 W LED. Let it be powered by a driver with a constant current of 300 mA. That. for each working line there is 100 mA. If one of the crystals in the line burns out, it stops working. The other two will STILL burn, but not for long. The driver is an iron creature and does not understand that one of the lines is “broken”))) and continues to output 300 mA. But in this case, the declared current applies only to two operating lines. This is neither more nor less than 150 mA. This current allows the diodes to heat up more. The technical operating conditions are violated, which leads to the rapid “death” of the LED.
We repair LED spotlight 12 V 10 W
I mentioned earlier that I really love Chinese spotlight crafts. Mostly because they bring them to me in batches. Someone wants to repair it, but when they find out how much the repair will cost, they leave it to me. Others simply give. And that's all I need)))
Or rather, we only need housings, which, after some modifications and modifications, turn into high-quality spotlights.
Not all Chinese spotlights are bad. There are many manufacturers that produce very worthy products. Moreover, in terms of price and quality, it is much cheaper and better than many famous brands. A lot of interesting material comes across on Ali. But you need to understand it well in order to purchase not outright rubbish, but the right copy.
Using these examples, I will analyze the possibility of repairing LED floodlights. First, you need to figure out what voltage your lamp is designed for. It is not uncommon for the Chinese to have no idea what they are sending. And you may have a 12 V 10 W spotlight in your hands, instead of 220 V. Don’t be lazy and disassemble the lamp. If you're too lazy, at least look at the power cable. If it is two-wire, then this spotlight is designed for constant voltage, if it is 3-wire, then it is alternating. 12 V wires are colored black and red. With alternating voltage, the color can be any.
How to distinguish Chinese floodlights for different voltages
1 of 2


Chinese floodlight 220 V
Initially, let’s take it as an axiom that our chip has failed. In this case, repairing the LED spotlight will not be any problem. You just need to replace the burned out one with a new one. Naturally, you must first buy it.)
1. Unscrew the glass mounting bolts from the spotlight
2. Remove the glass
3. Remove the diffuser
4 Unsolder the LED
5. Solder the LED
For a more complete understanding of everything that is happening, look at the photographs.
Replacing the LED matrix in the floodlight
1 of 4


Spotlight repair - view after glass removed